Inspired by a youtube video I recently saw on dragon encounters I made one for our current campaign and I am pretty happy with how it turned out. Here’s how to run it.
Note, this encounter is designed to be tough! When I ran, it one of the heroes almost died.
Threat, treat and timer
We start with the 3 Ts from Index Card RPG:
- Threat: Dragon.
- Treat: The dragon’s offspring: a wyrmling.
- Timer: Kolbolds!
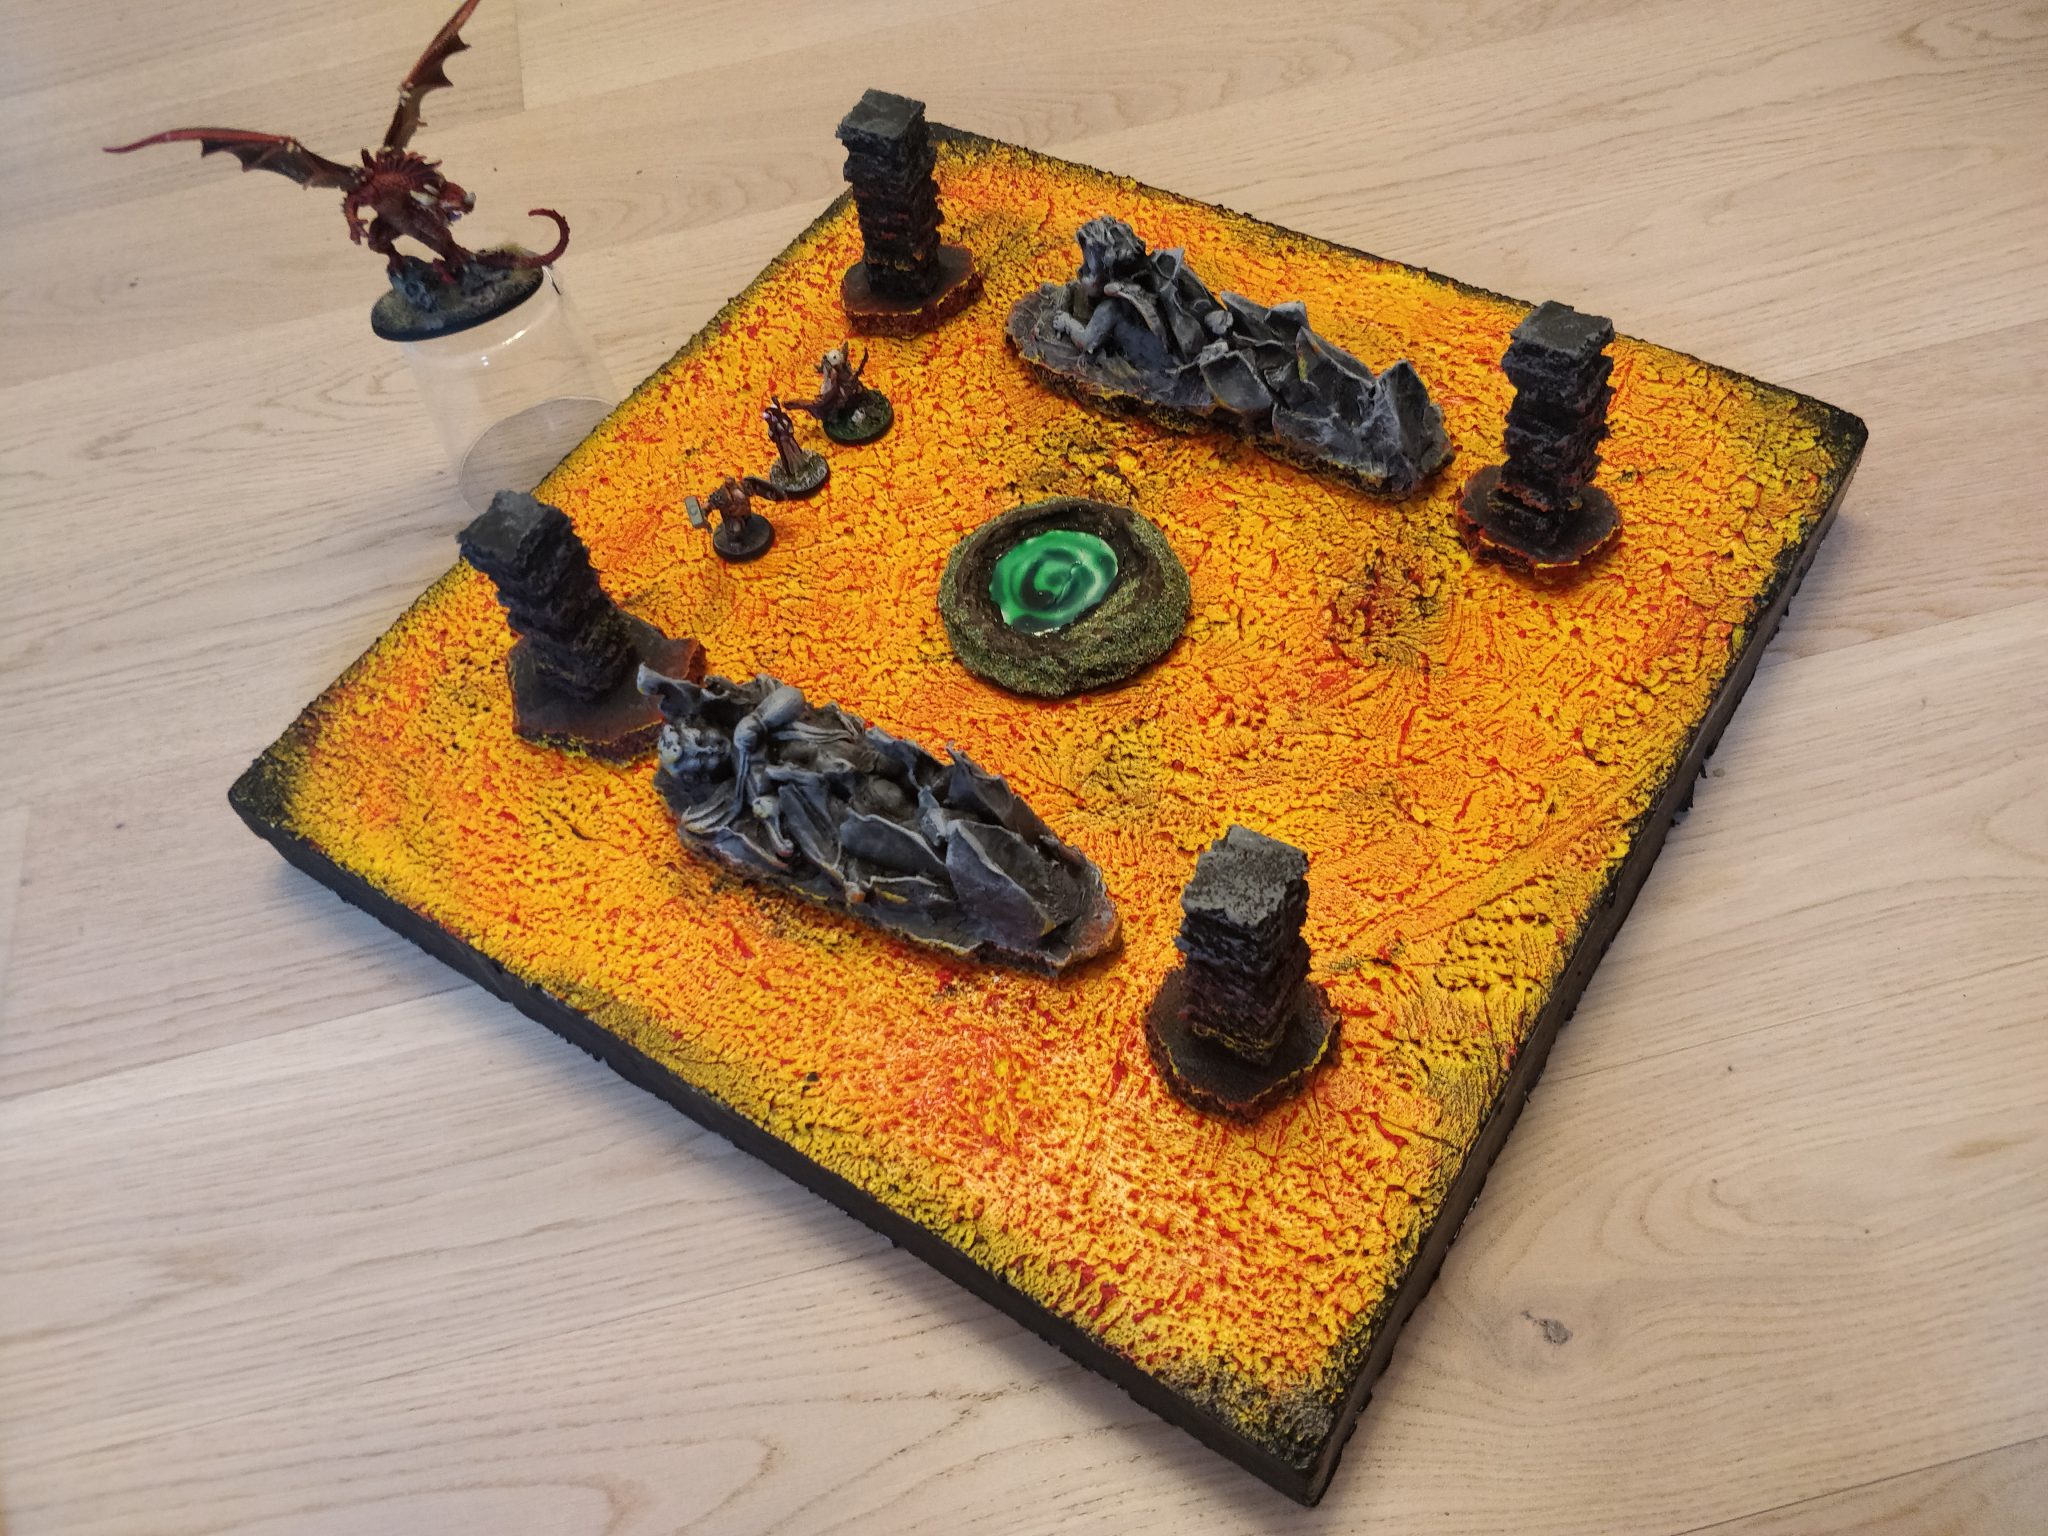
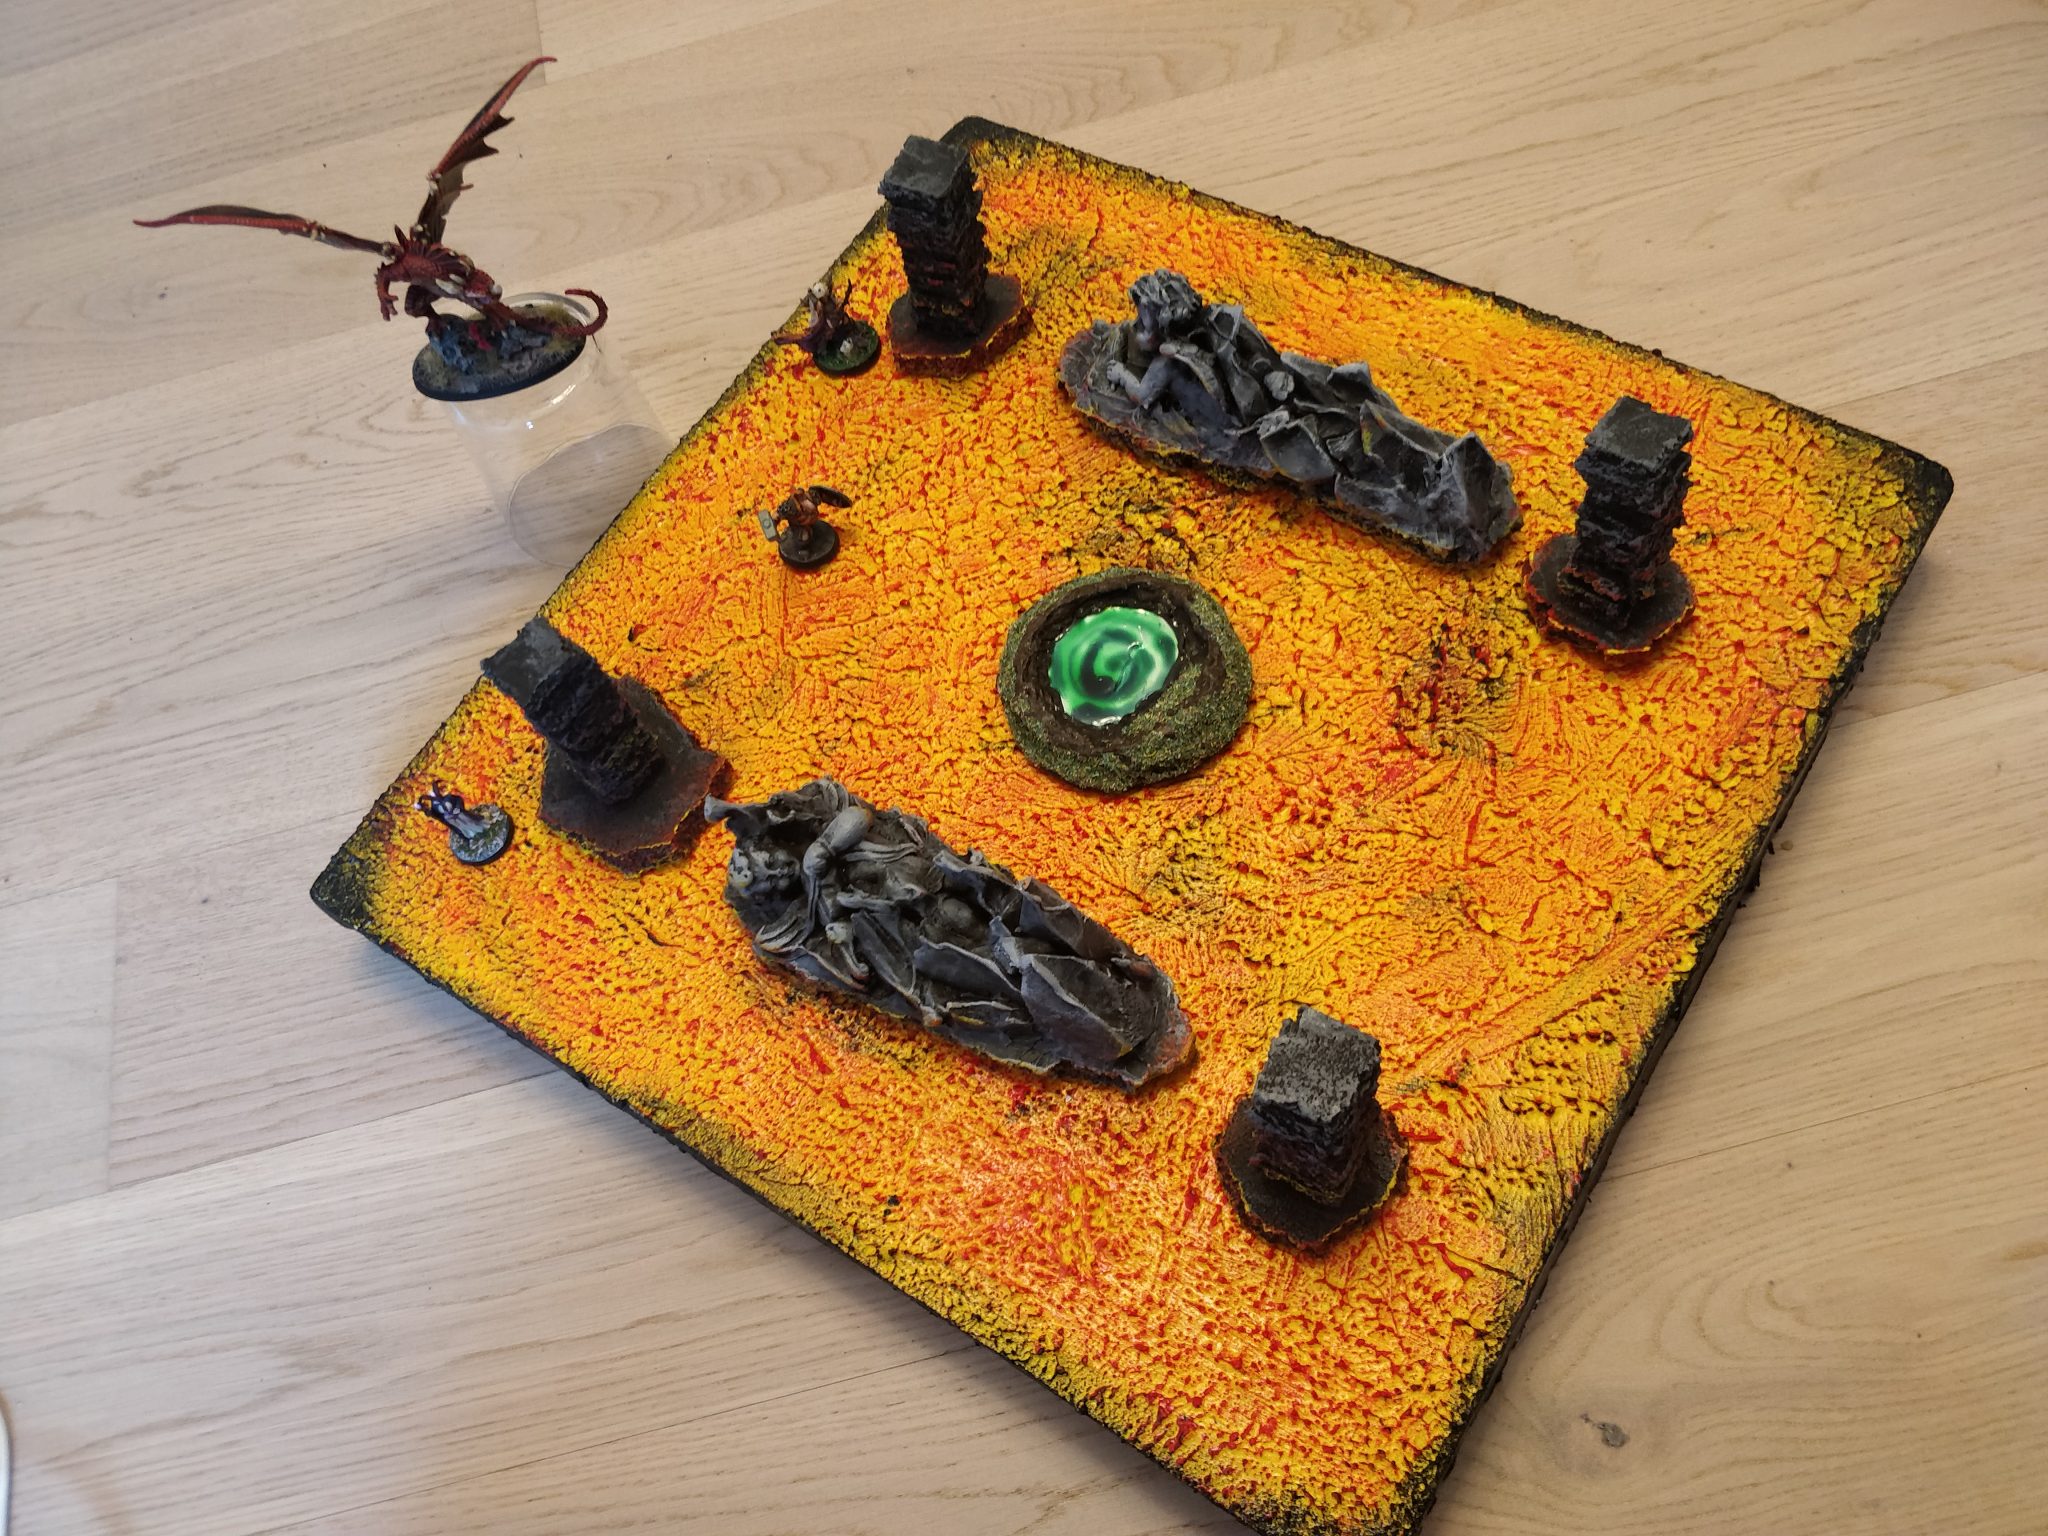
The setup
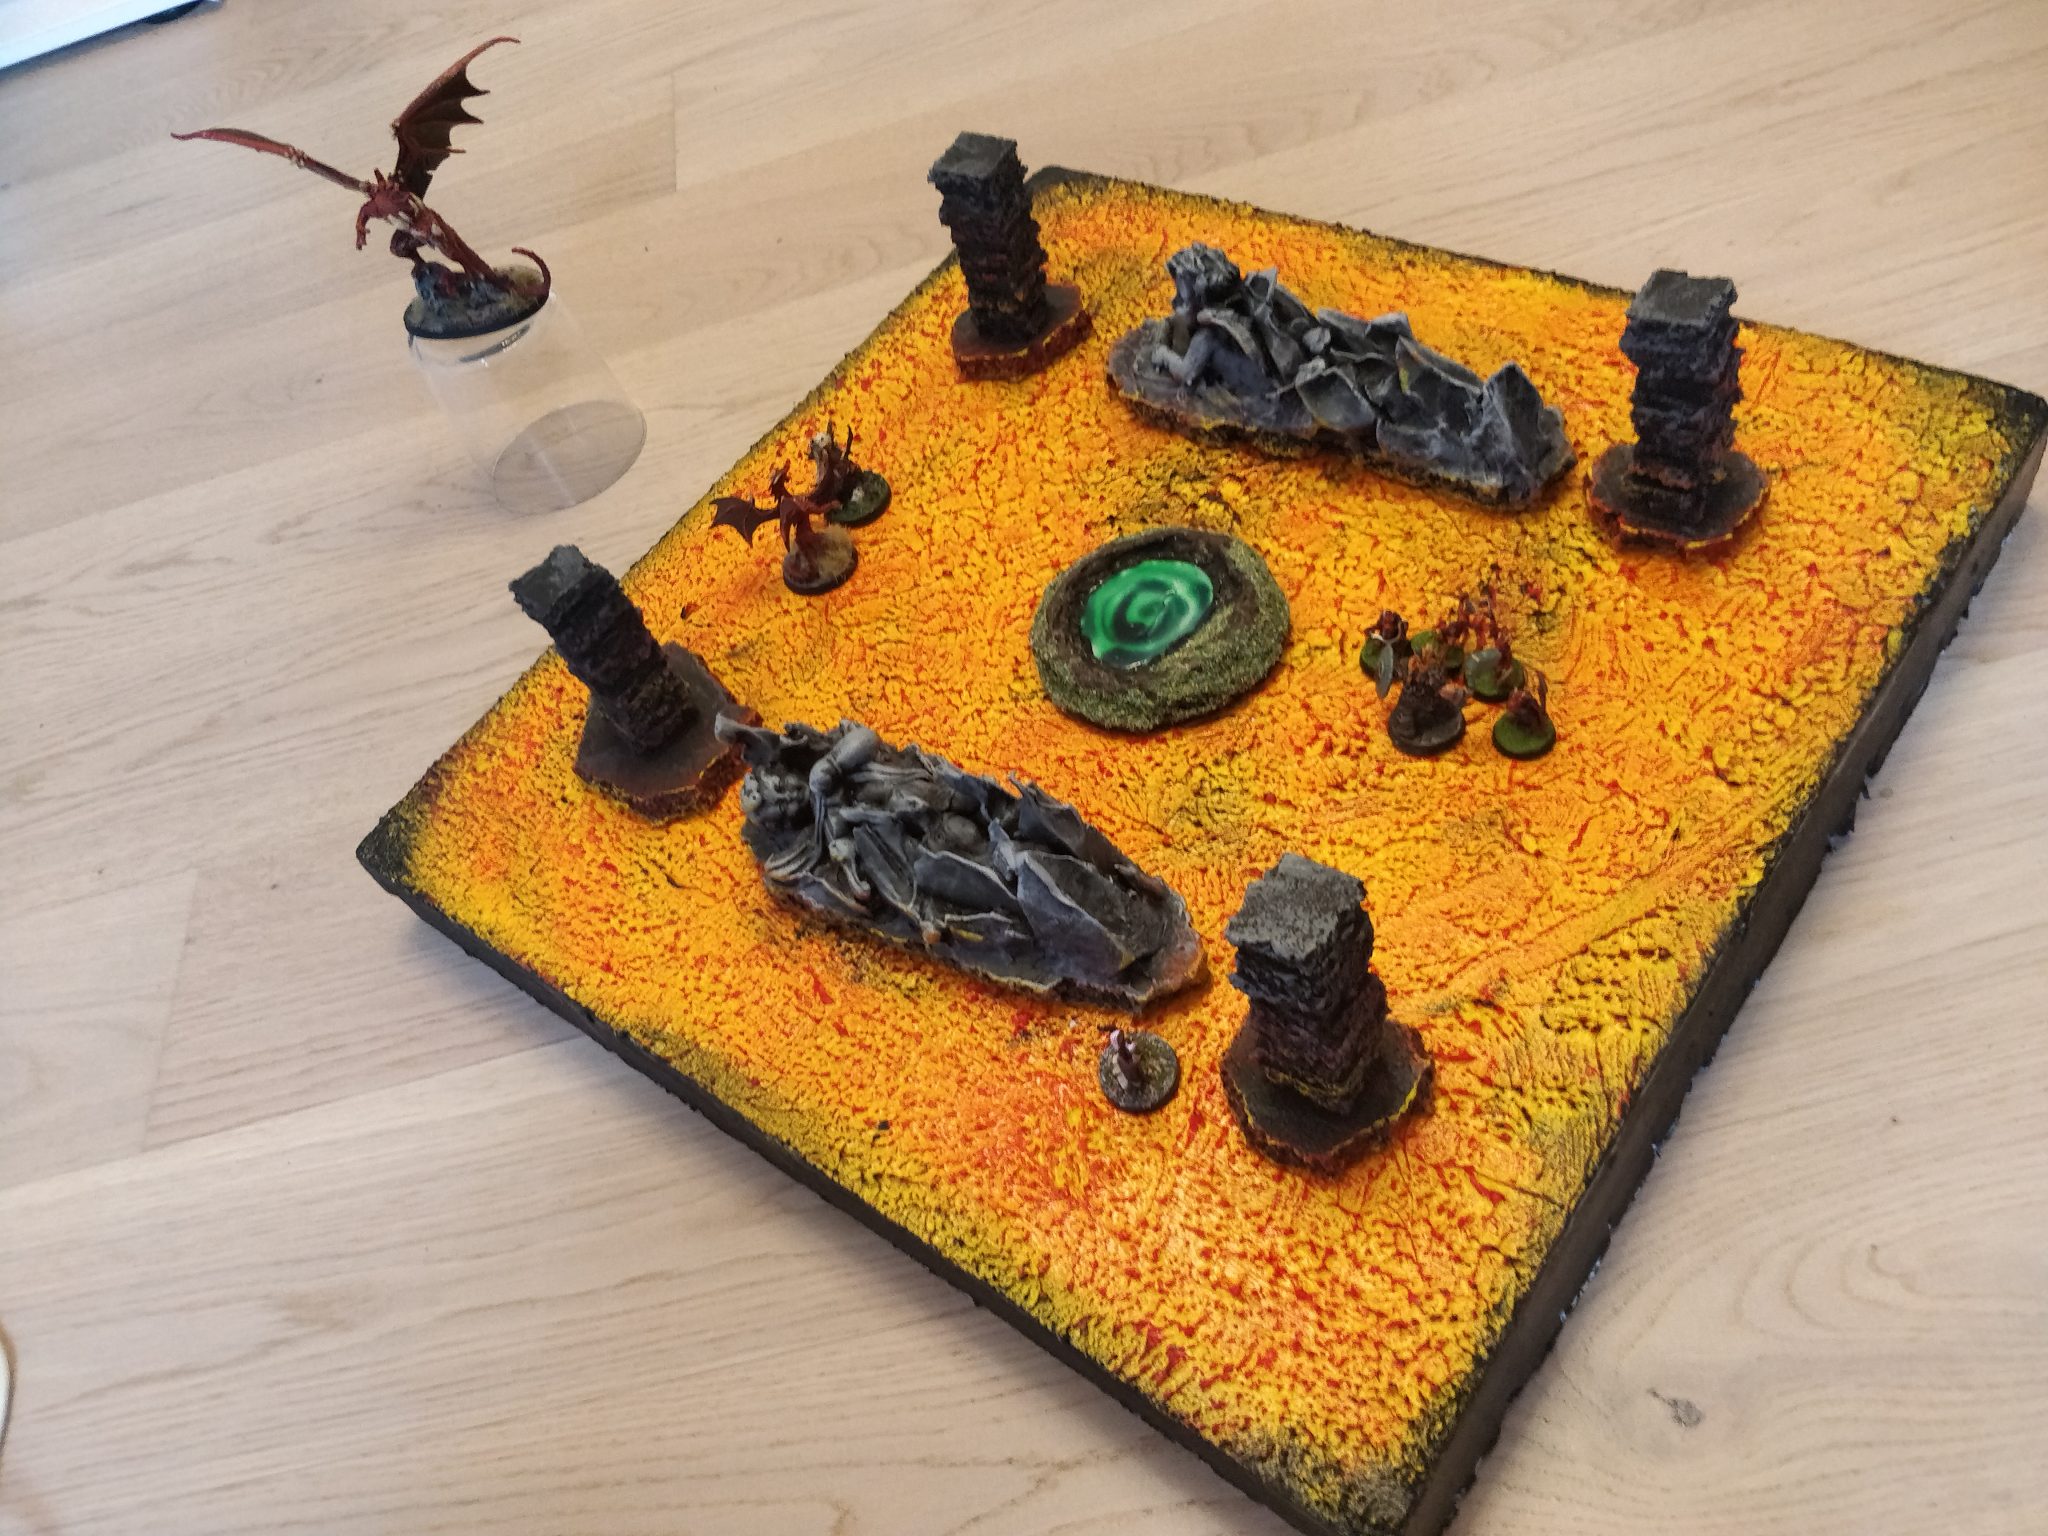
The goal: The green pool is a portal the heroes need to re-tune to use it to enter a certain location.
It could be anything else; a prisoner to be freed, a particular item to be collected etc.
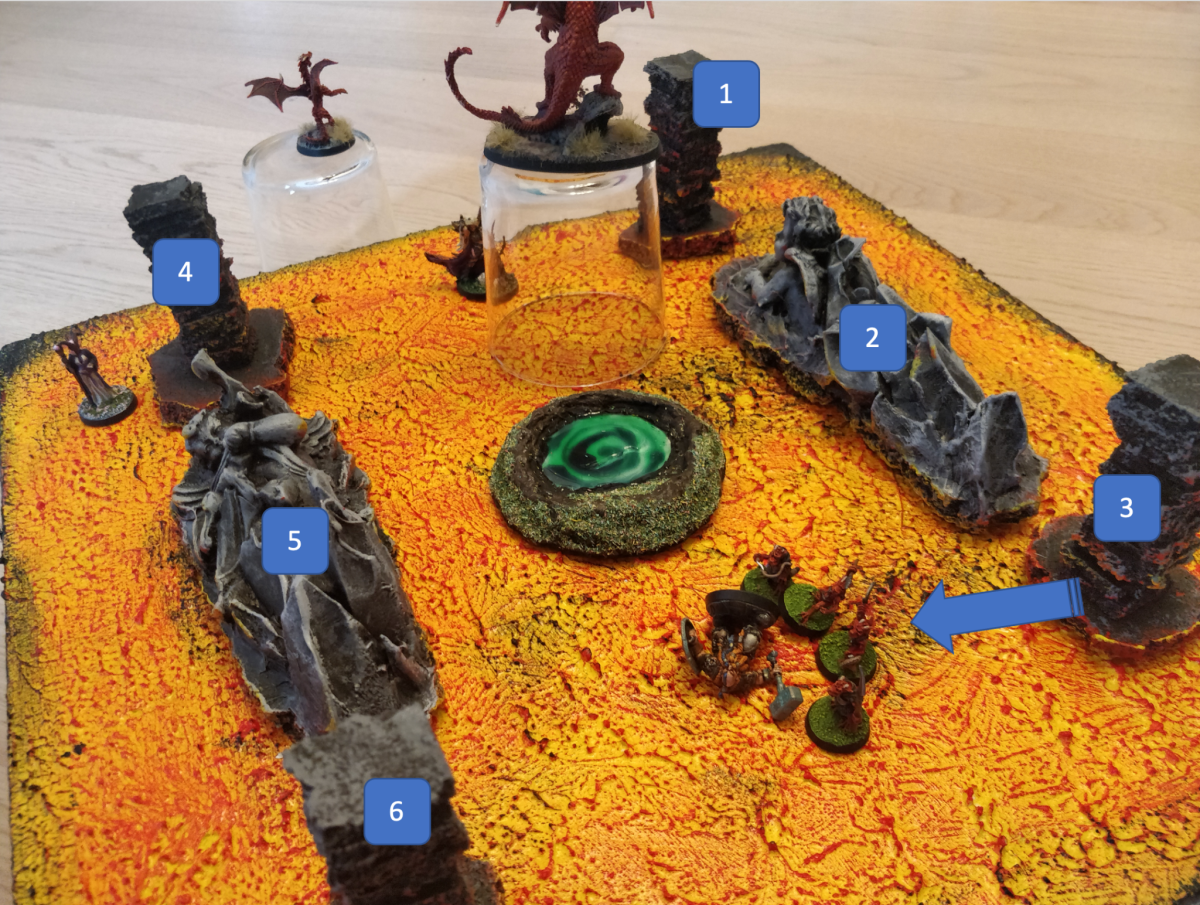
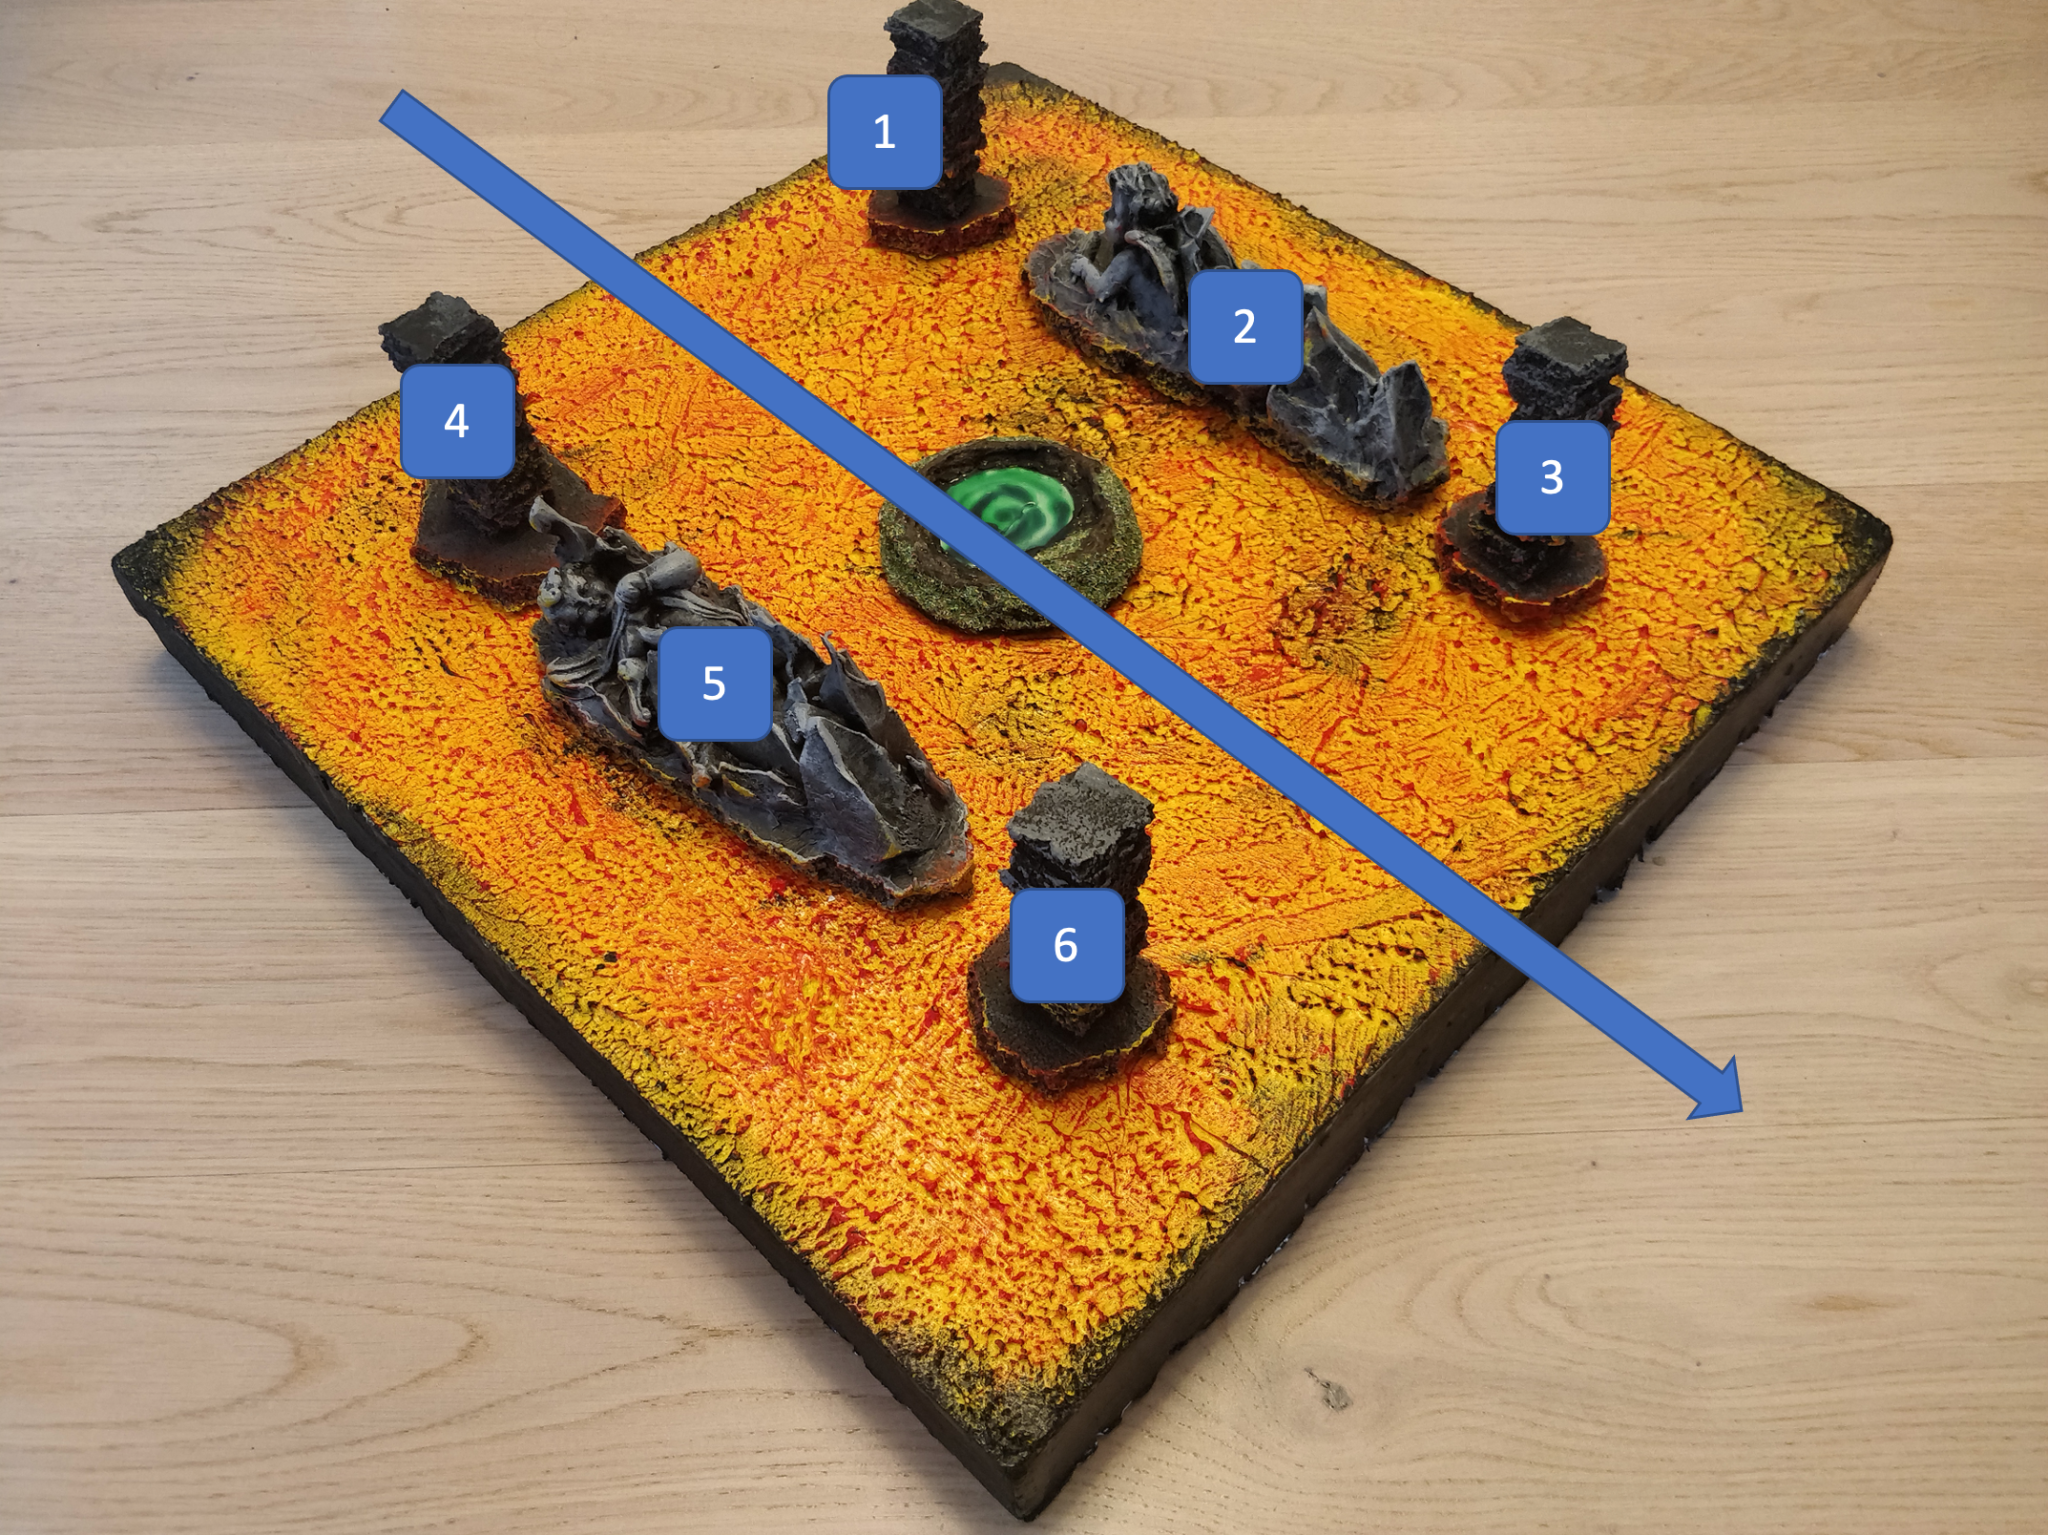
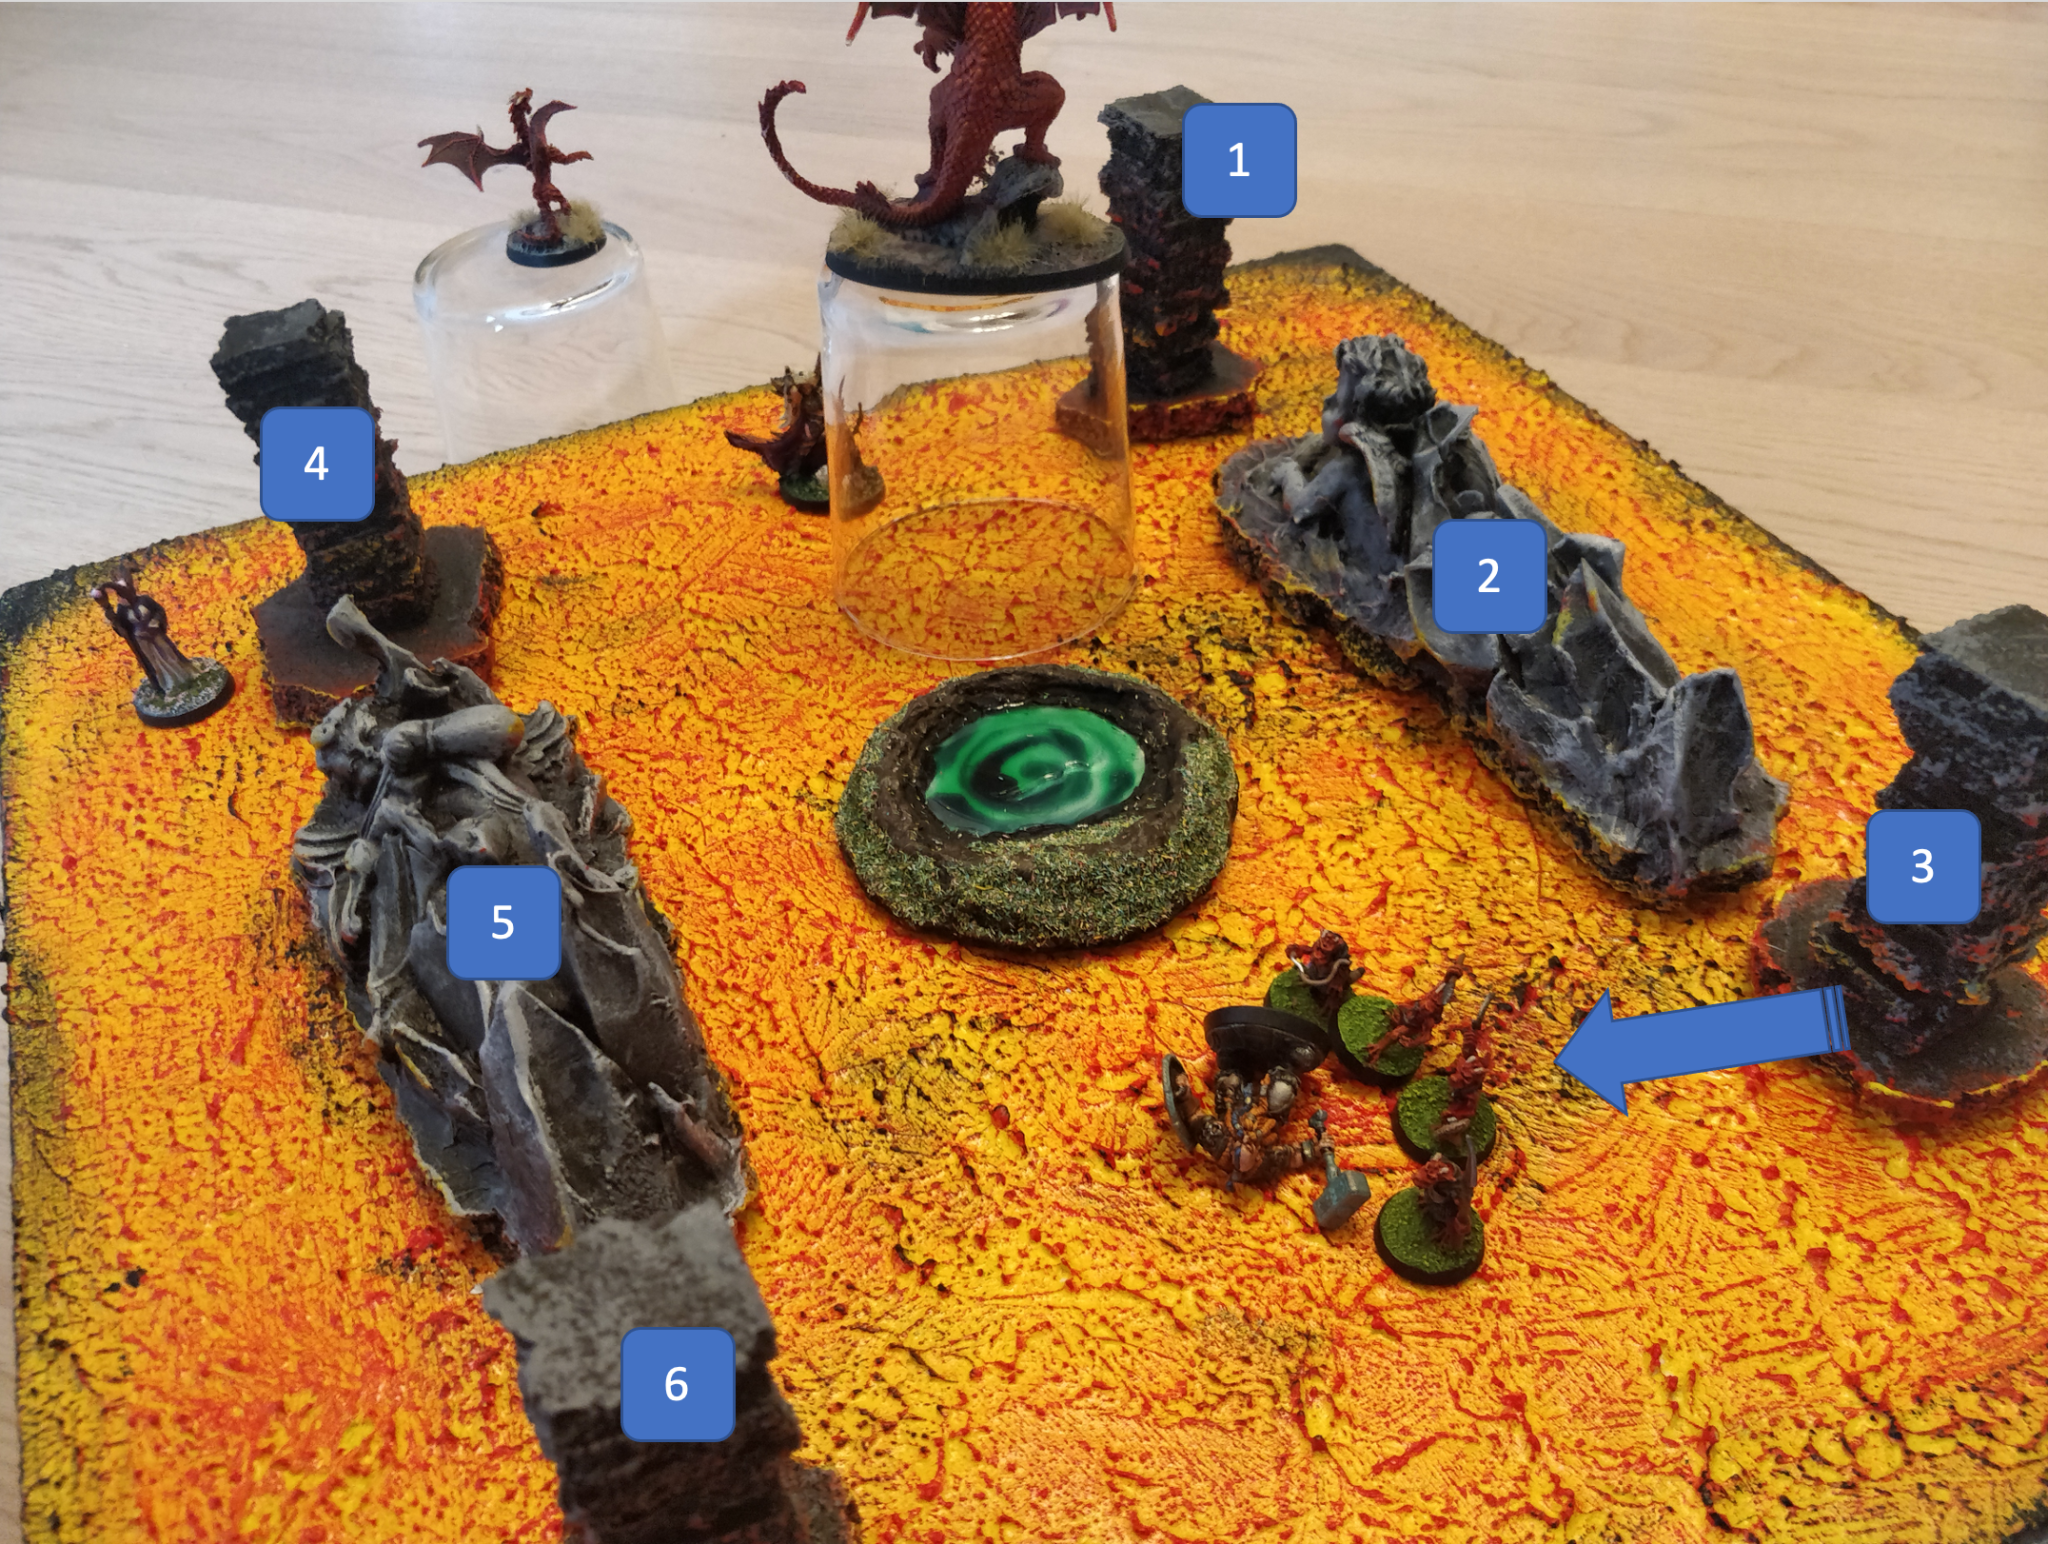
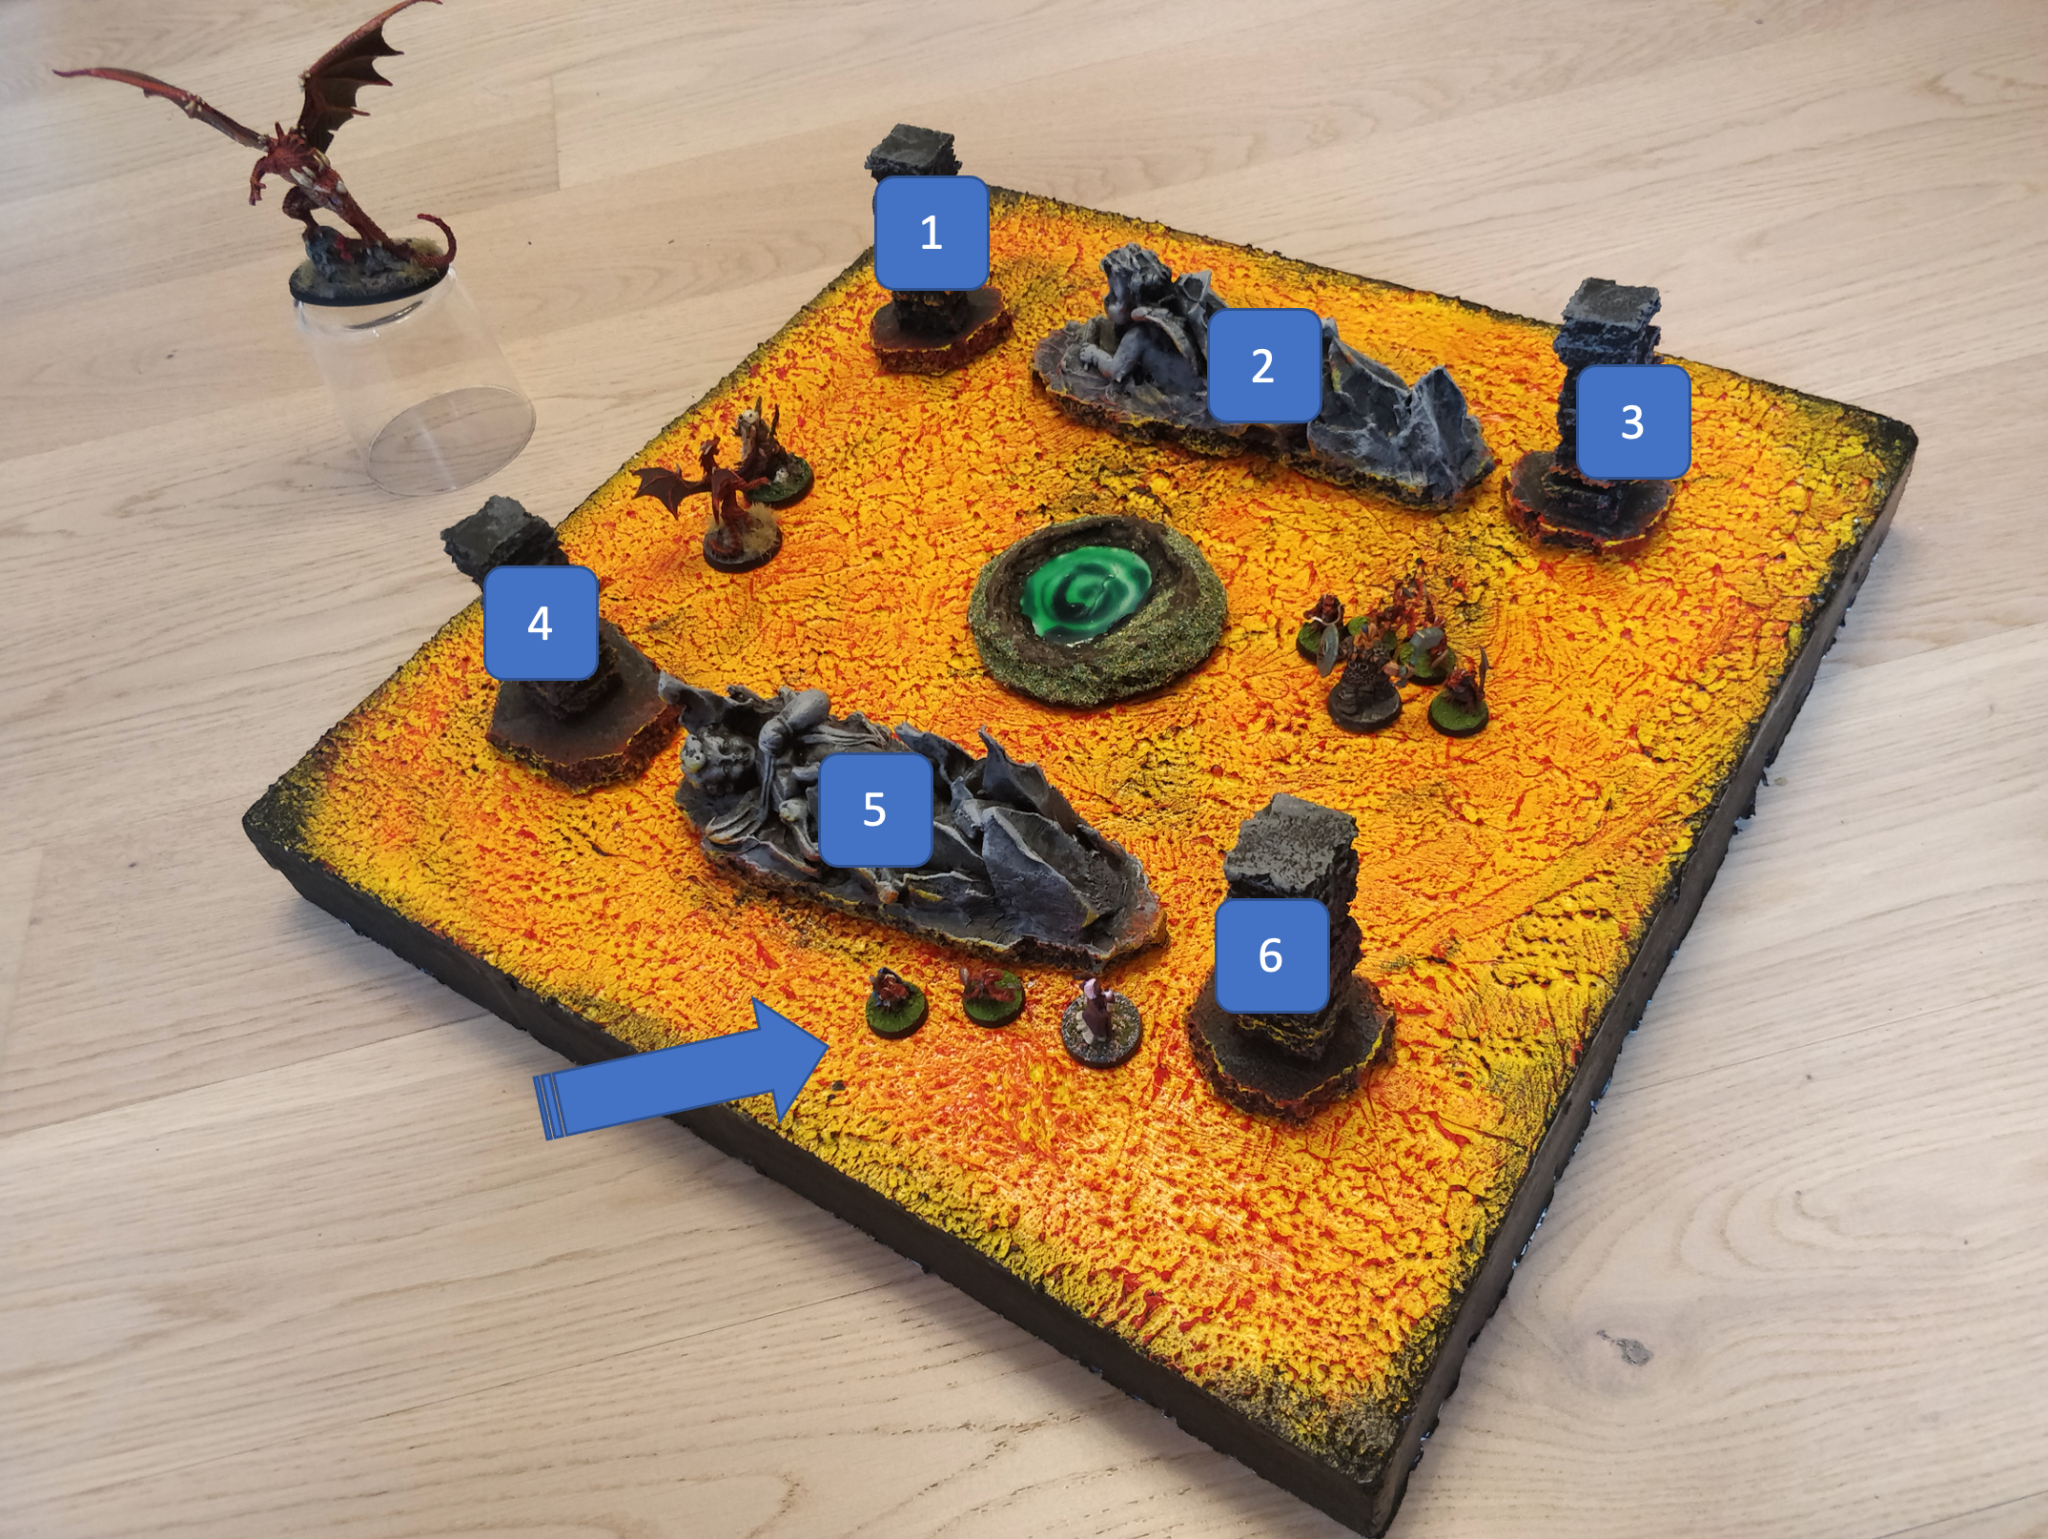
The terrain set up is 6 pieces of scatter roughly organised as a corridor creating a natural flight path for the dragon and providing cover for the heroes.
The 6 pieces of terrain each has a number corresponding to a D6. This is the timer and we will come back to that later.
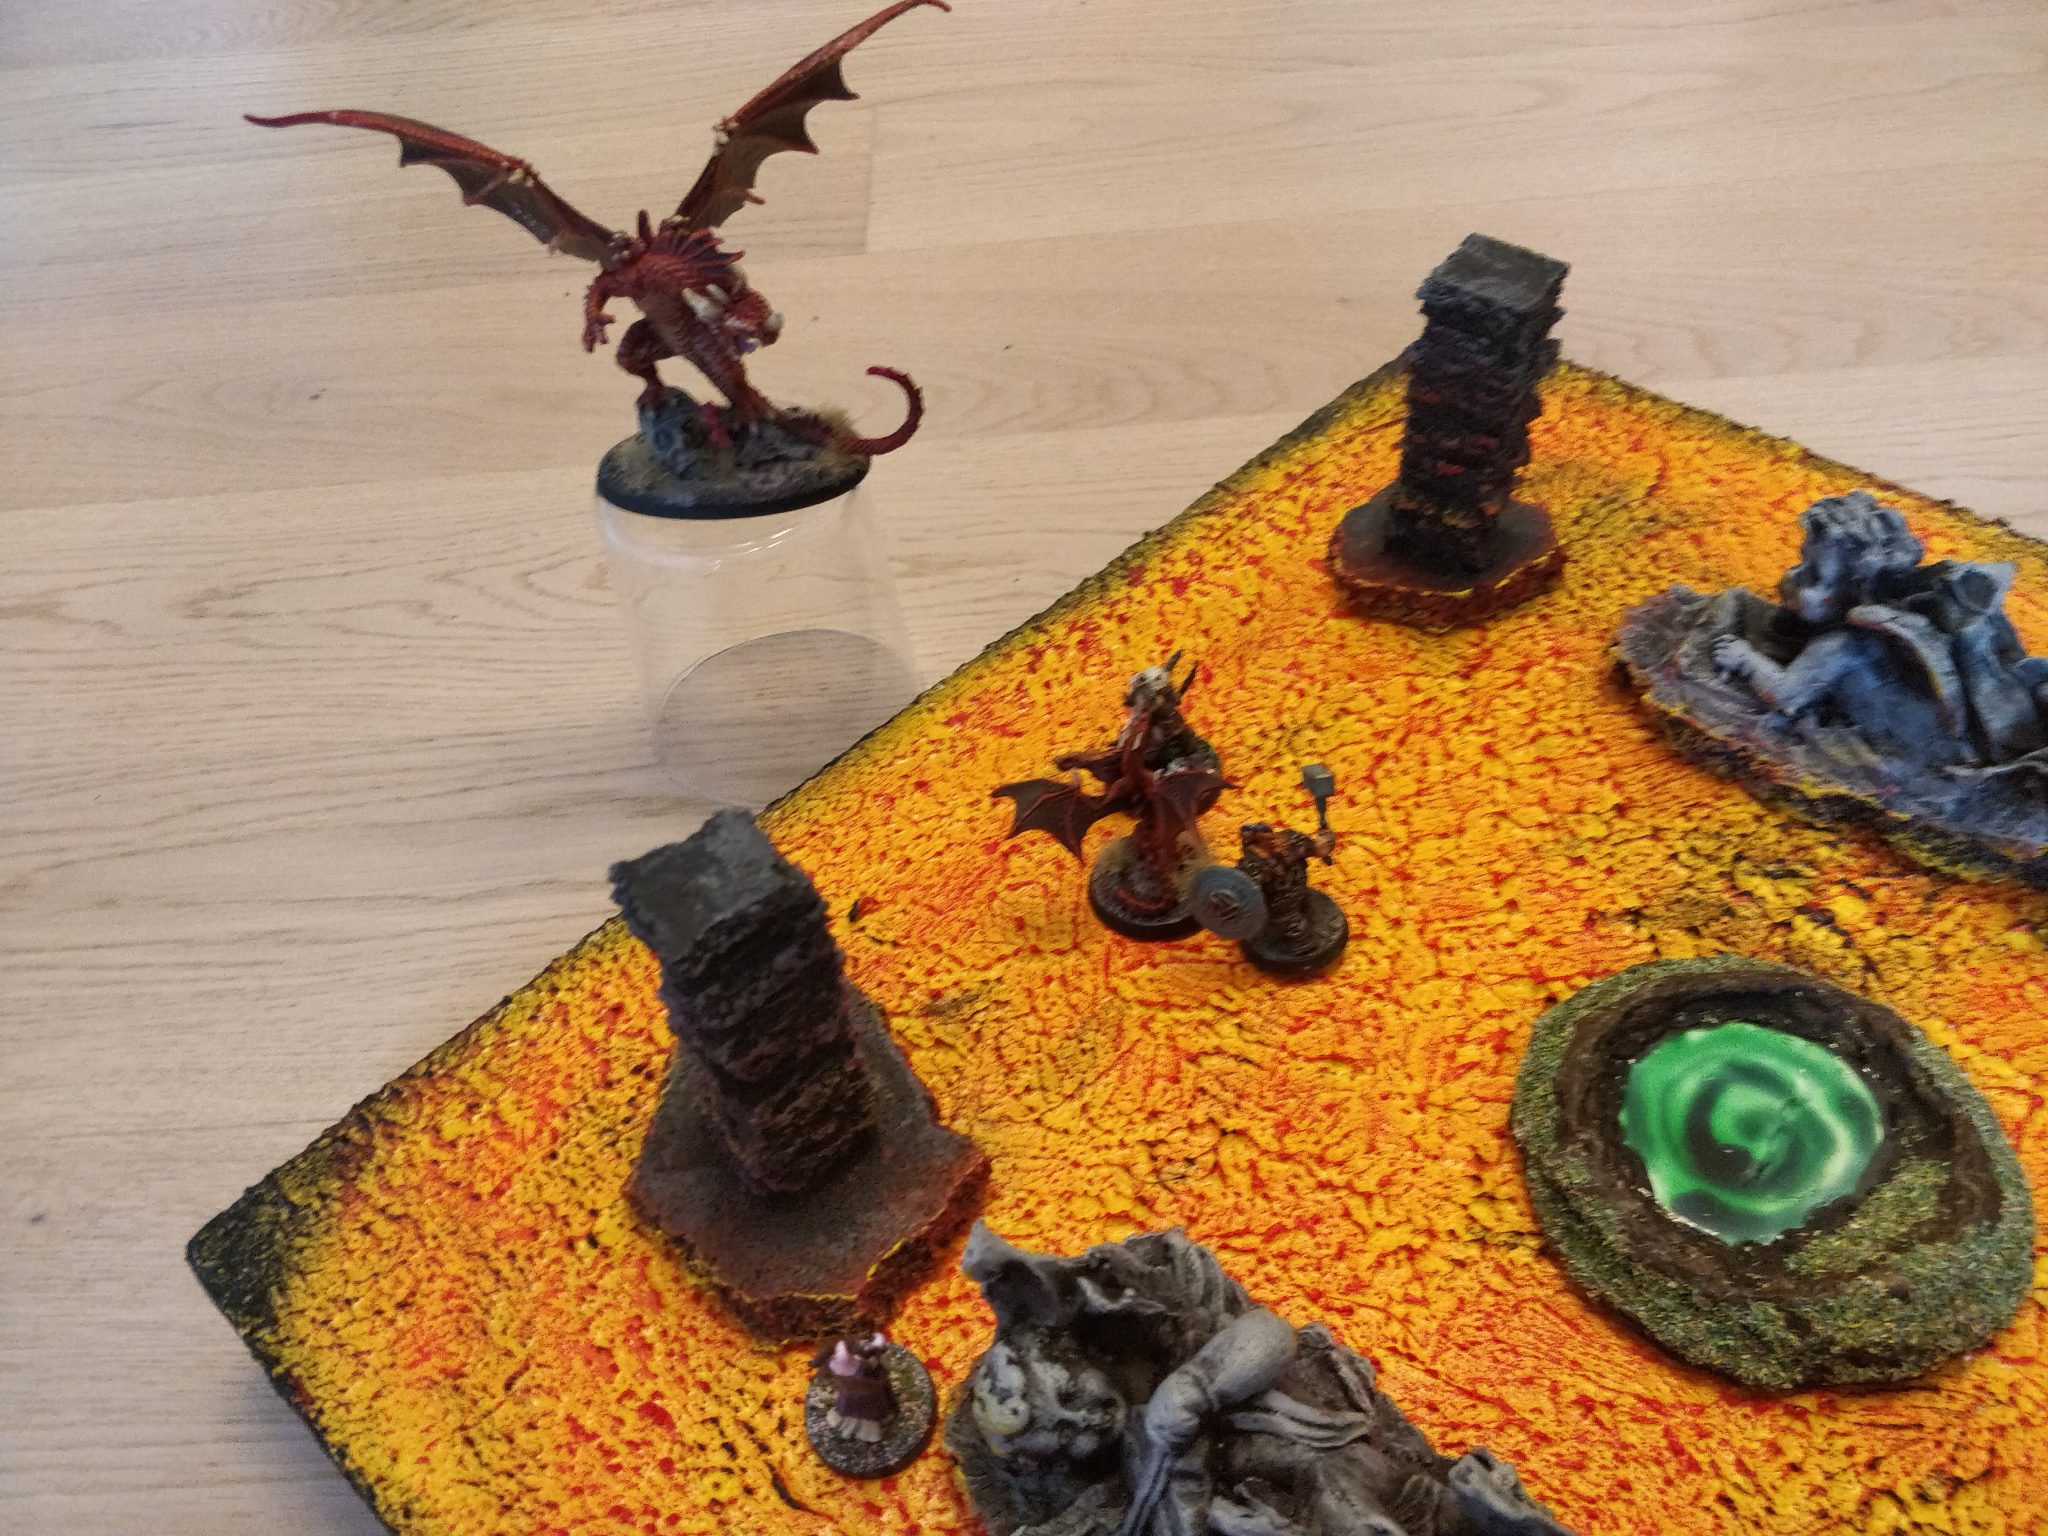
First strike
Threat: The dragon will initiate combat from behind the party. Most likely they will not have noticed it coming in at high speed from a high altitude, but even if they do, the attack still works.
Depending on the party set up, the dragon has two different ways of initiating the combat:
1. The party is grouped together so the dragon uses its breath weapon for maximum impact.
Then it flies onwards as far as it can and does a swooping u-turn getting ready for next strafing run.
2. The party is spread out, so the dragon grabs one of the party members, flies away and up only to drop the unfortunate member in the next round of combat.
After dropping its prey, the dragon continues its flight away only to do a swopping u-turn preparing for the next flyby attack.

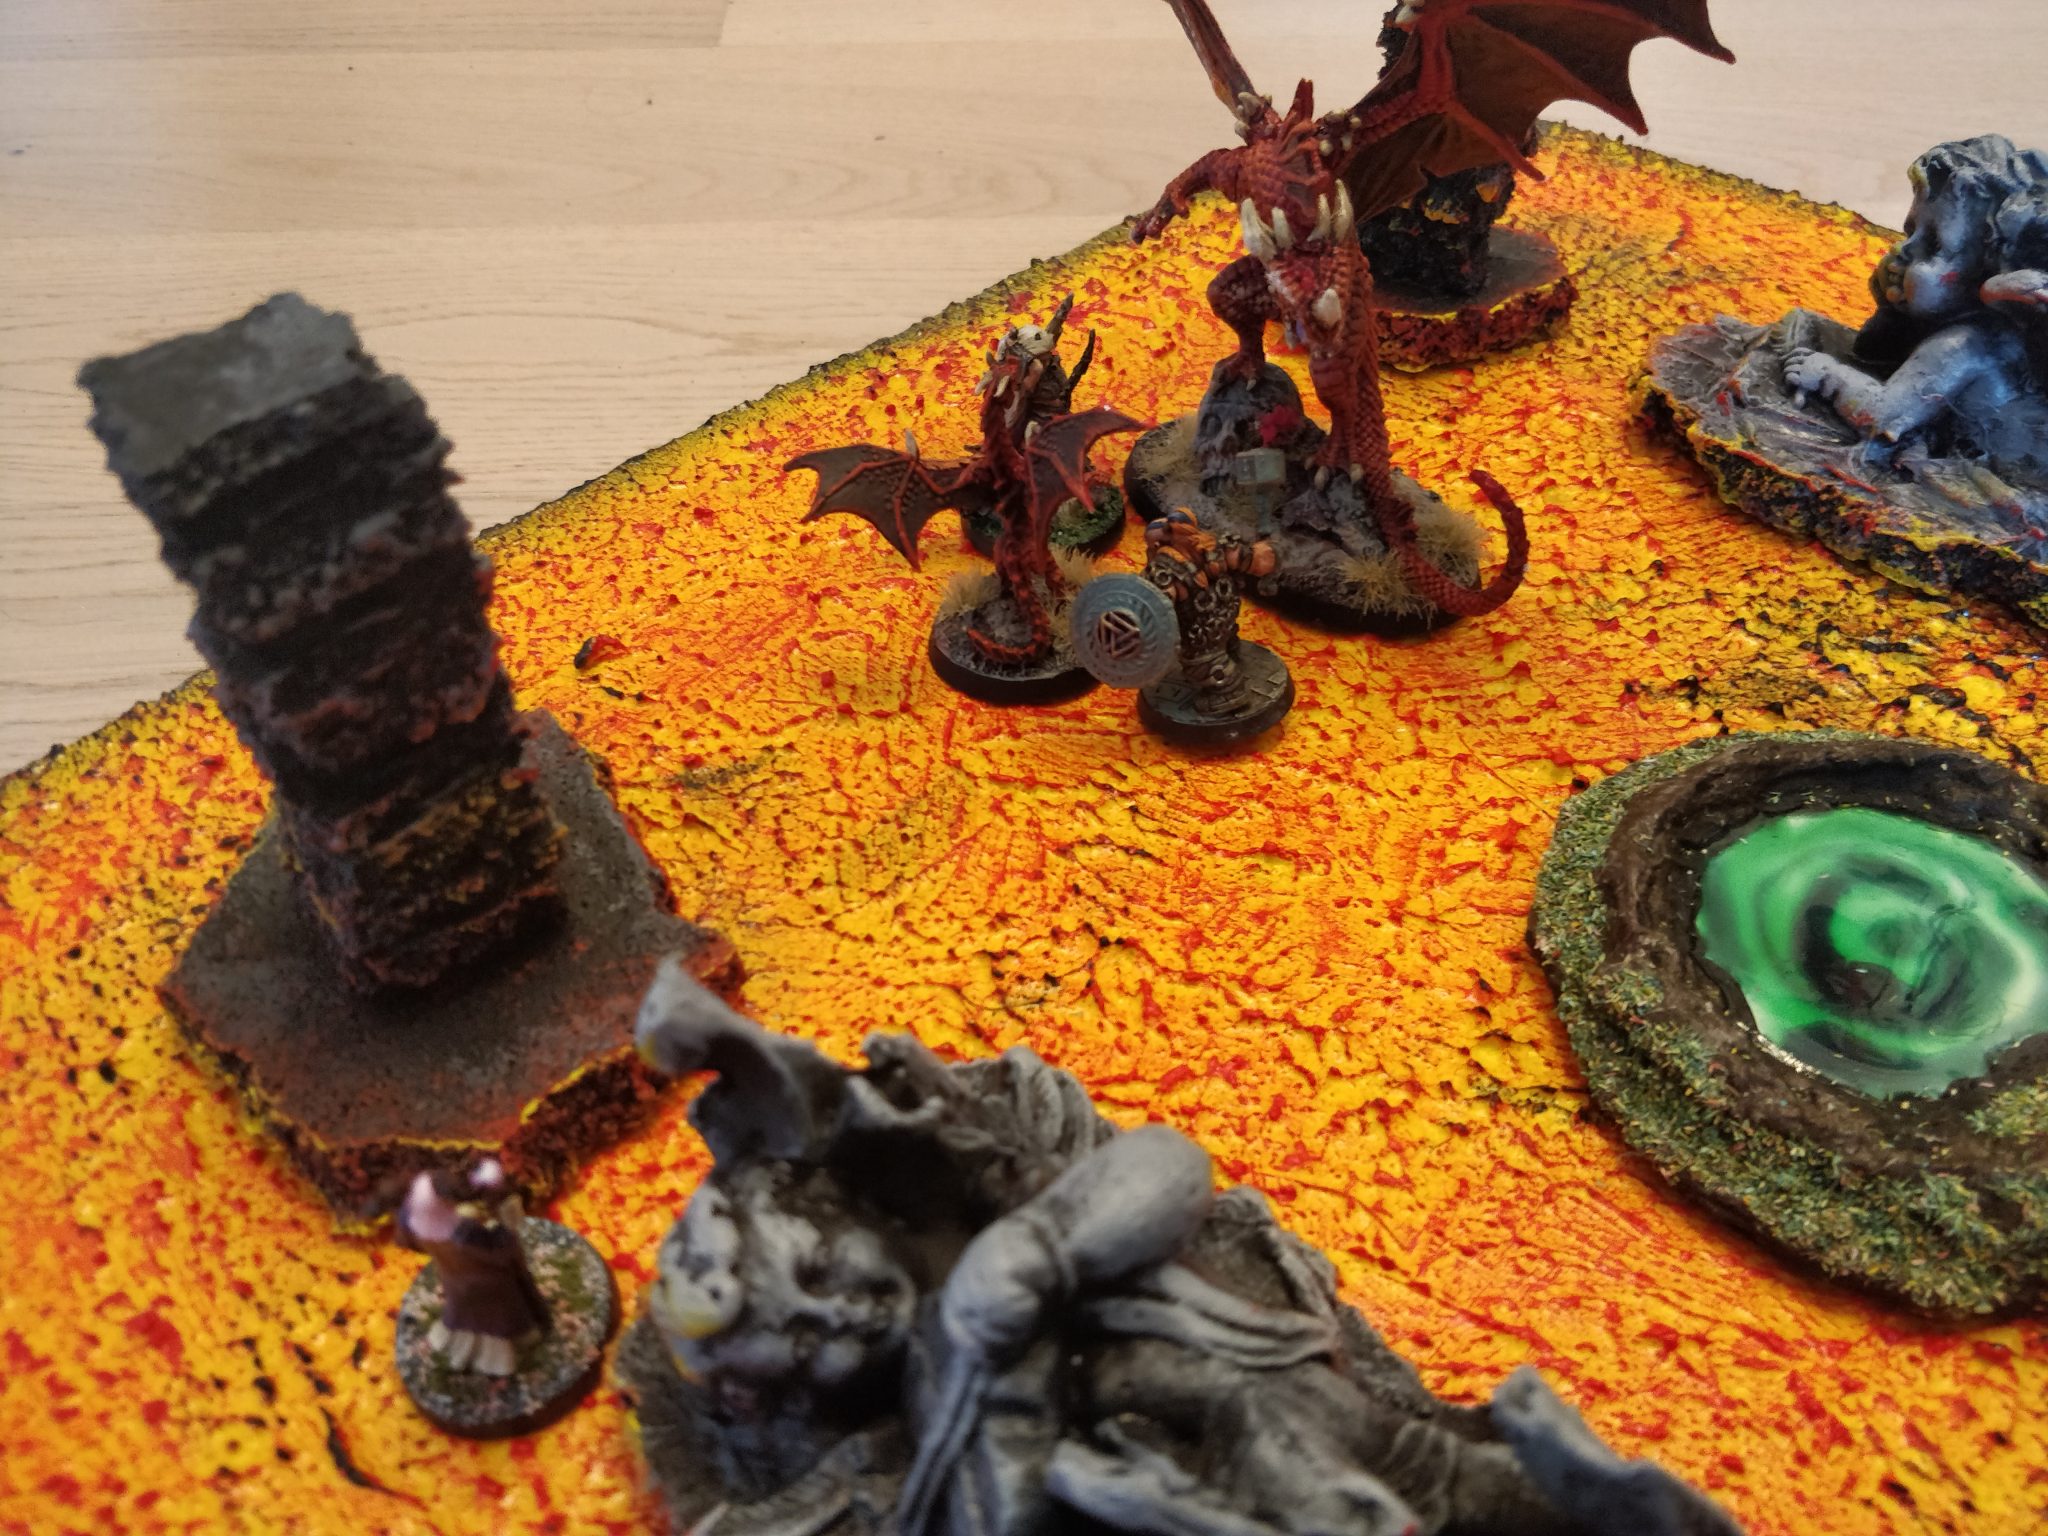
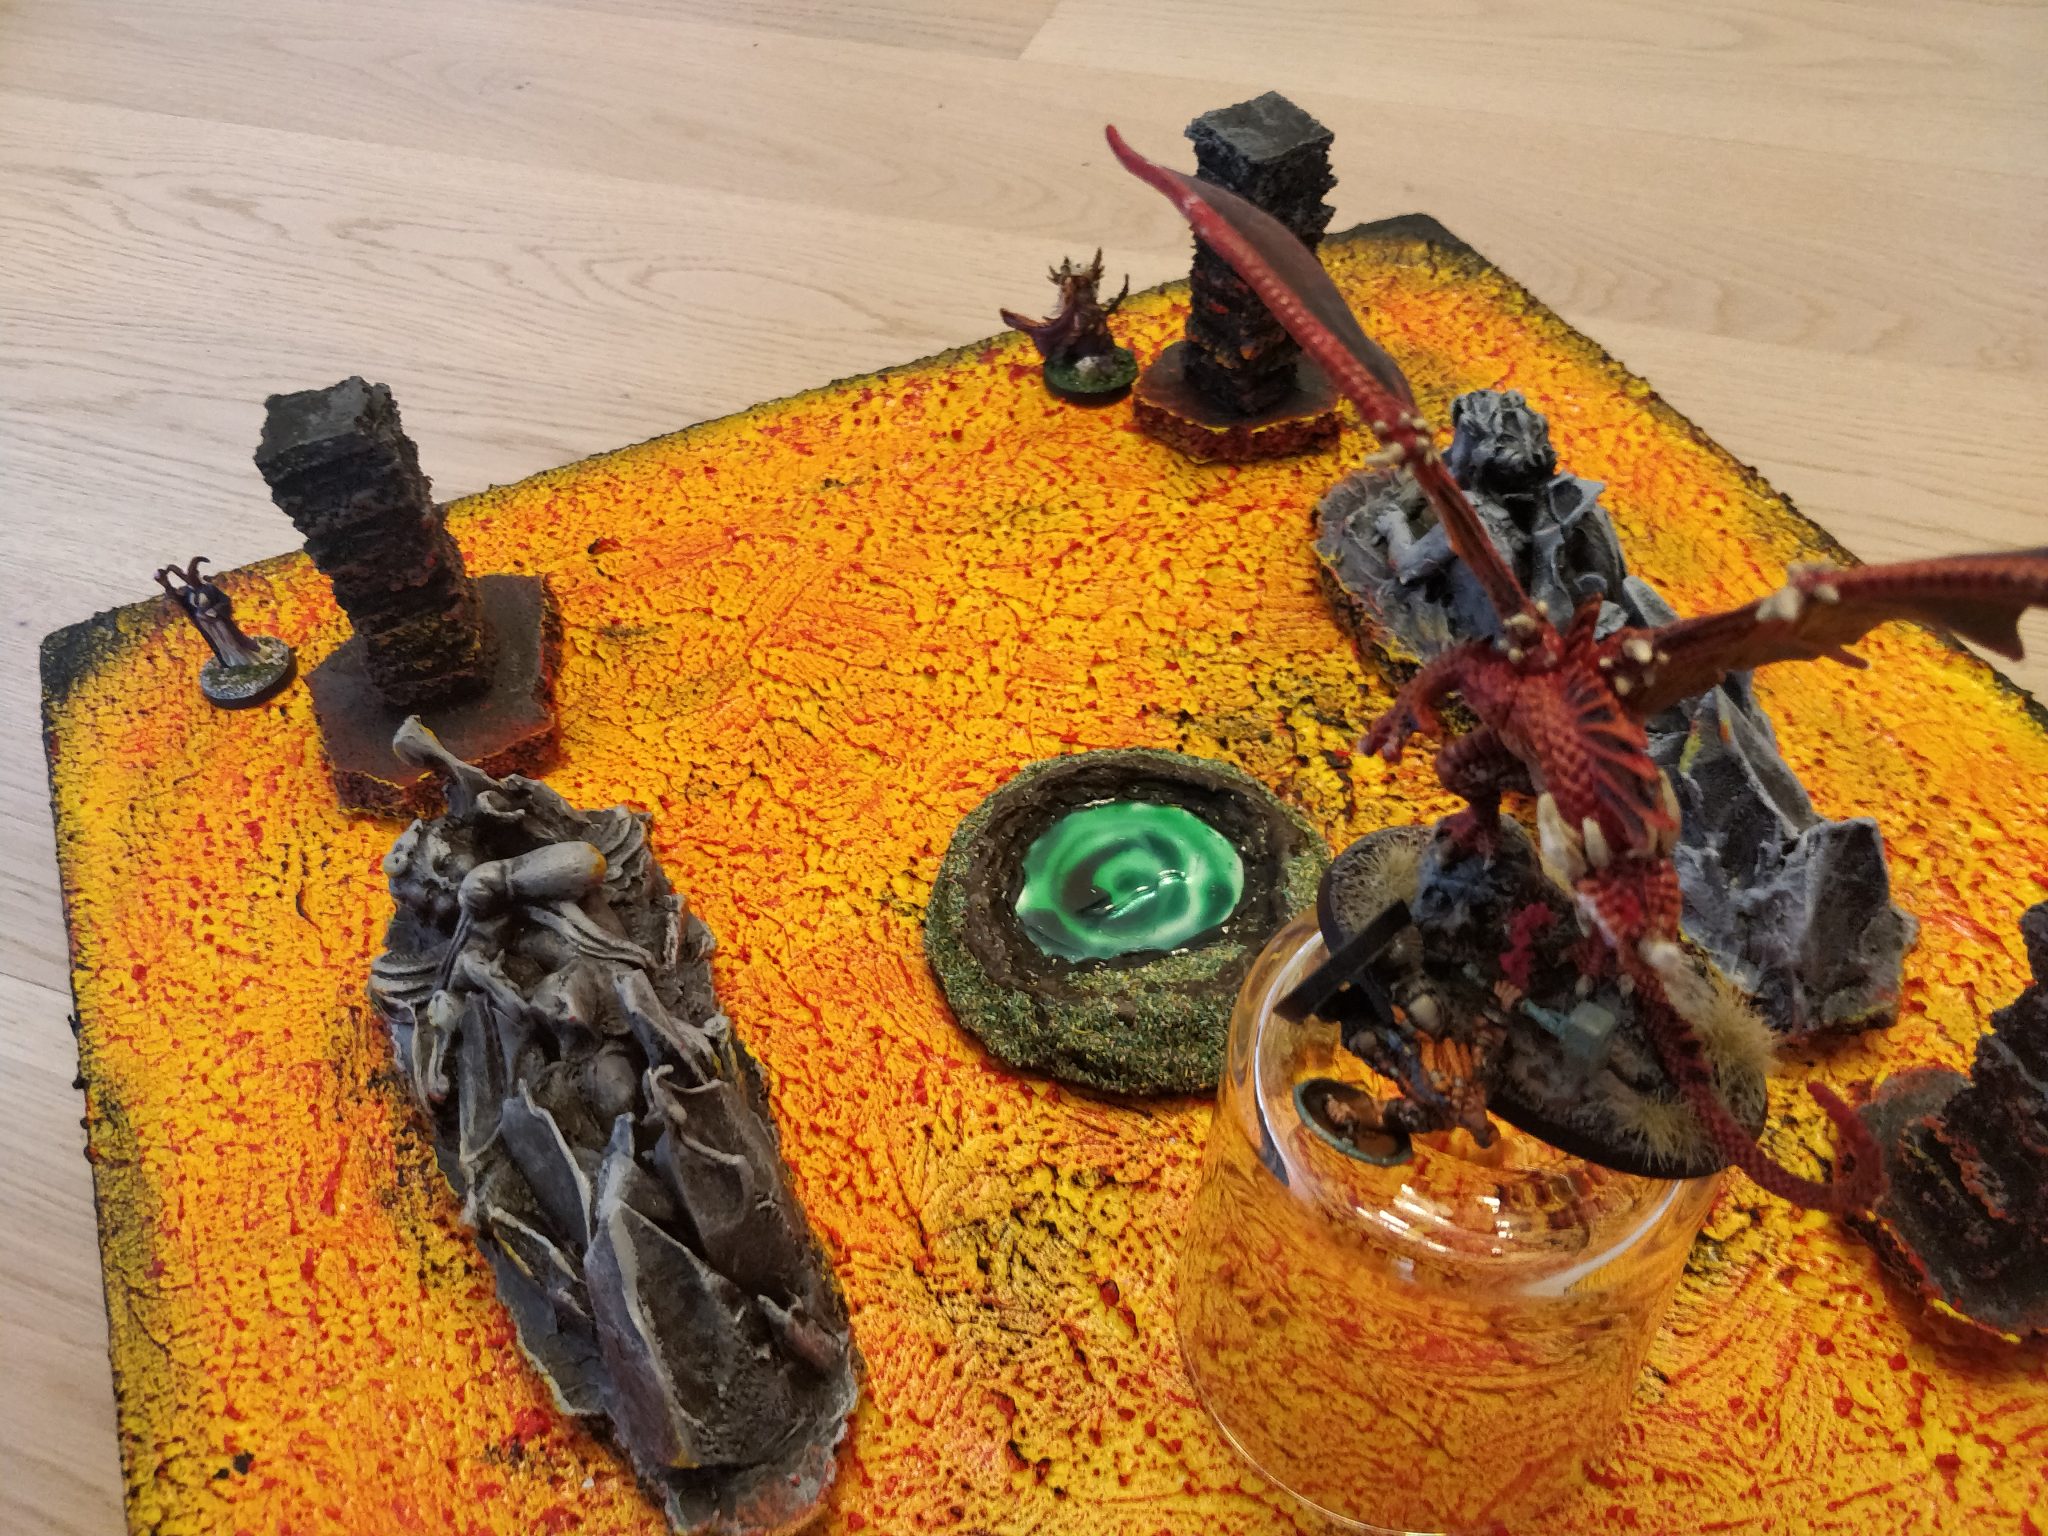
Roll initiative! The fight begins
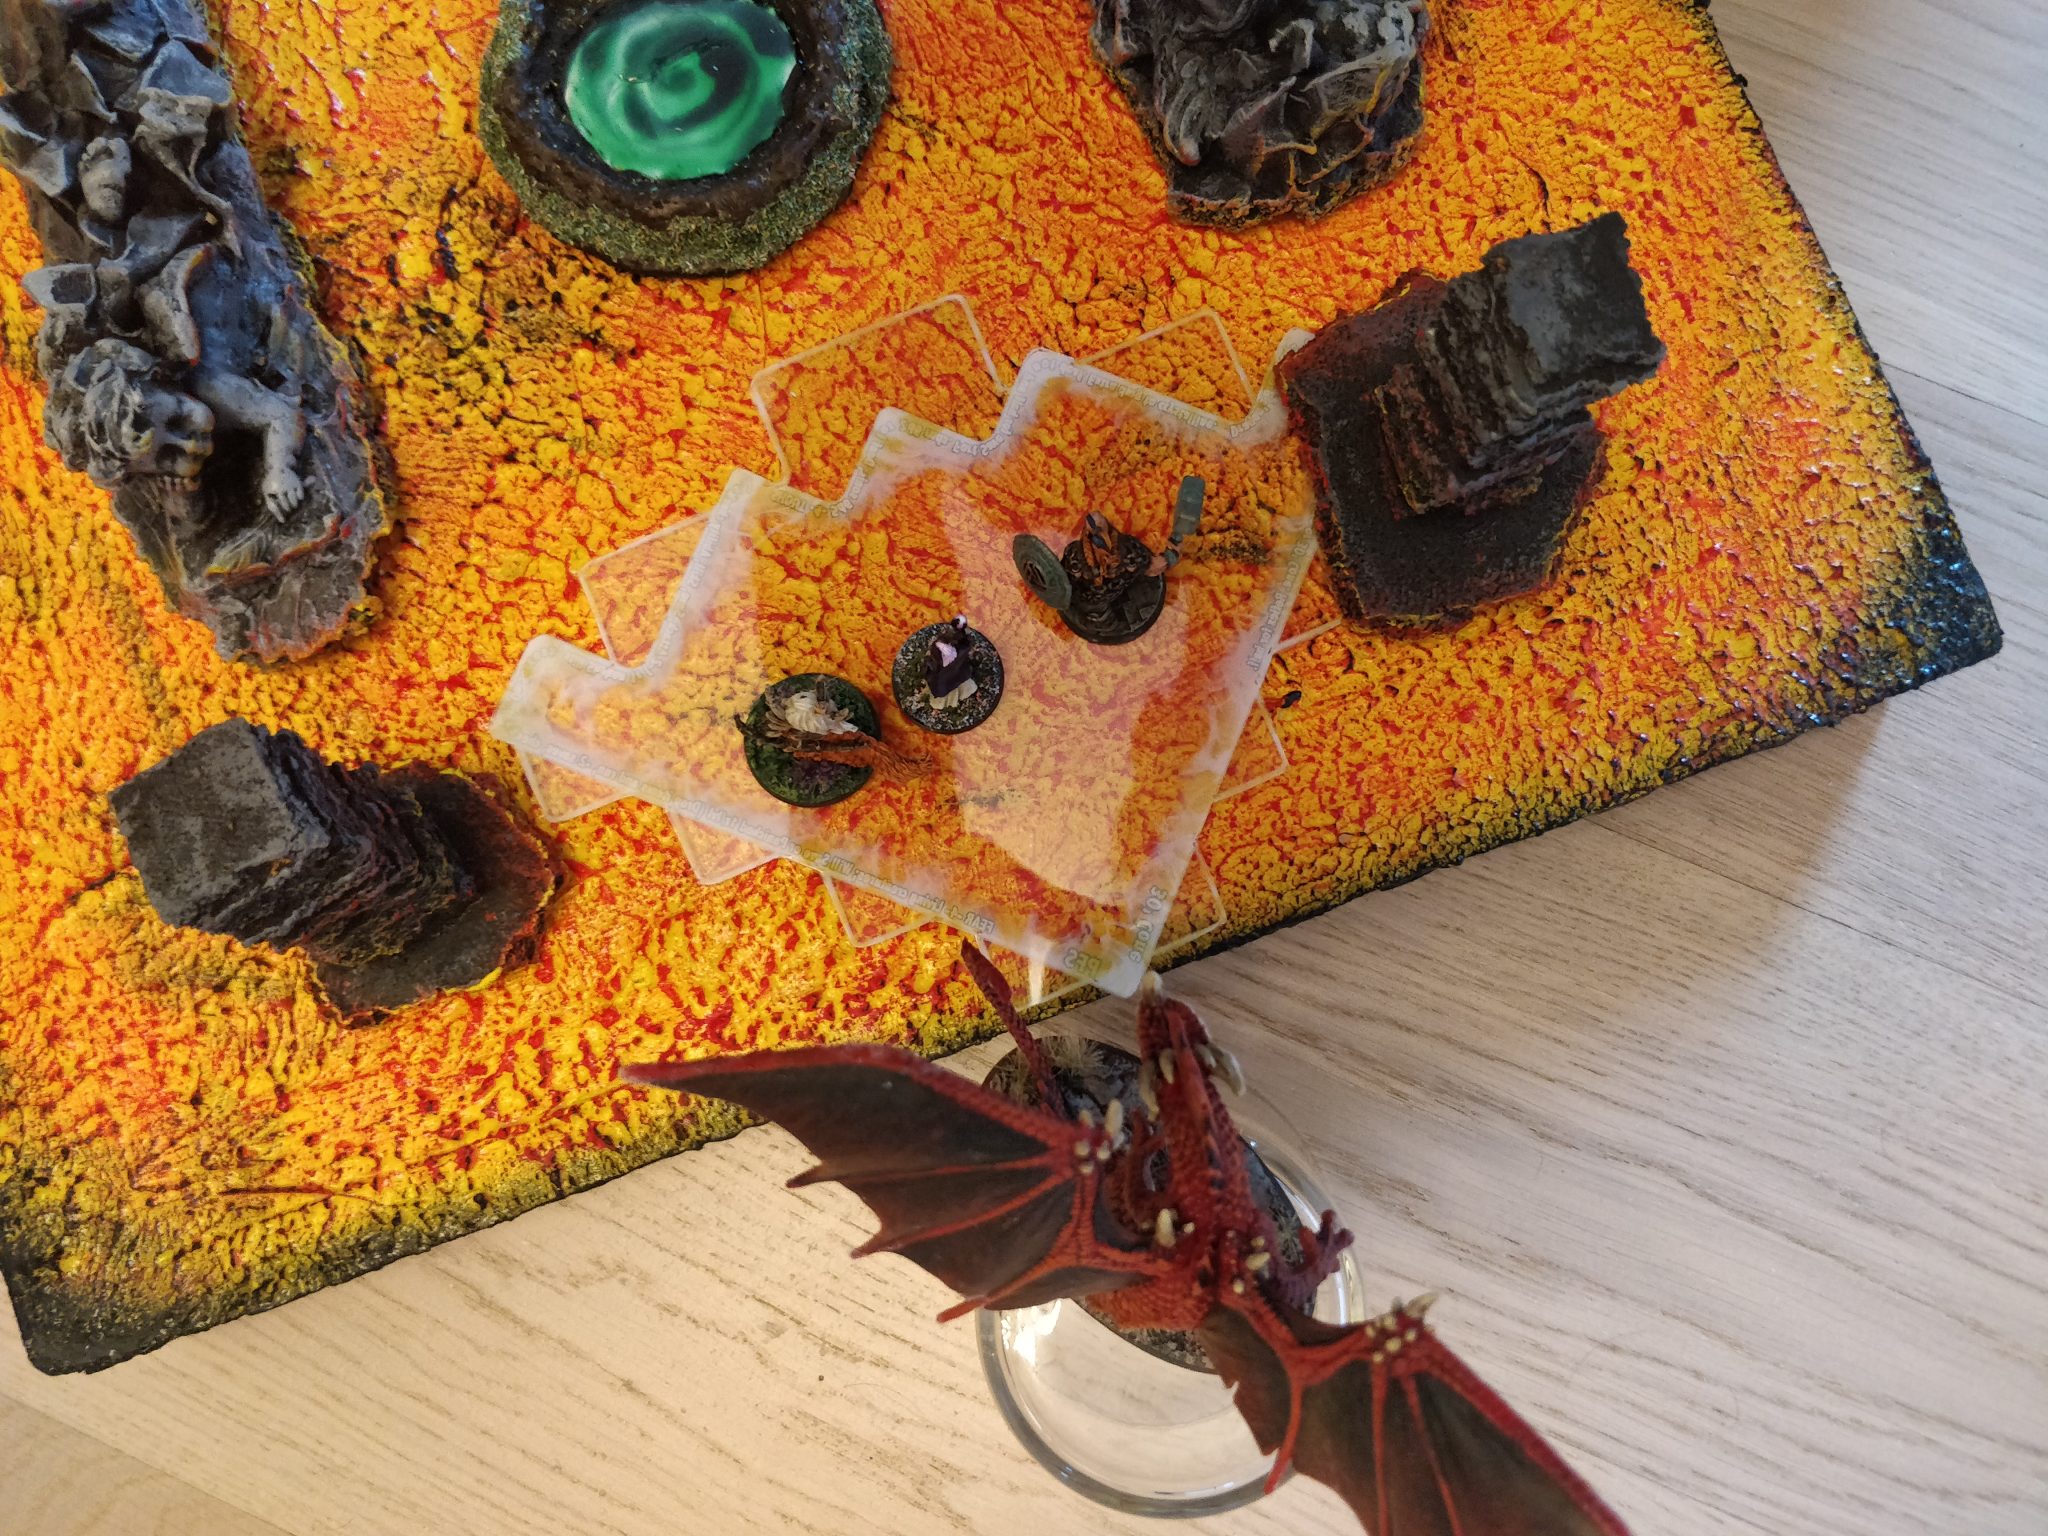
At this point in time the heroes are recovering from the initial surprise attack and the dragon is swooping around for another attack.
The dragon should be strafing back and forth always keeping out of distance. That makes it predictable, but also very hard to deal with. The example below, the dragon swoops in to try and grab another hero.
Treat: But as it does so, its offspring suddenly appears unplanned to “help”. The dragon might be annoyed by the wyrmling appearing, but doesn’t pay more attention than that.
Timer: At the same time, roll a D6 (I rolled a 3 in the example below) and roll another D6 for number of kobolds appearing (I rolled a 4).
In the example, the 4 kobolds appeared close to the dwarf the dragon just dropped so they ran over to beat on the dwarf while he was getting back on his feet!
This not only adds time pressure, it also adds another layer of danger especially with the kobolds’ “Pack Tactics” ability, which is why I chose them over e.g. goblins.
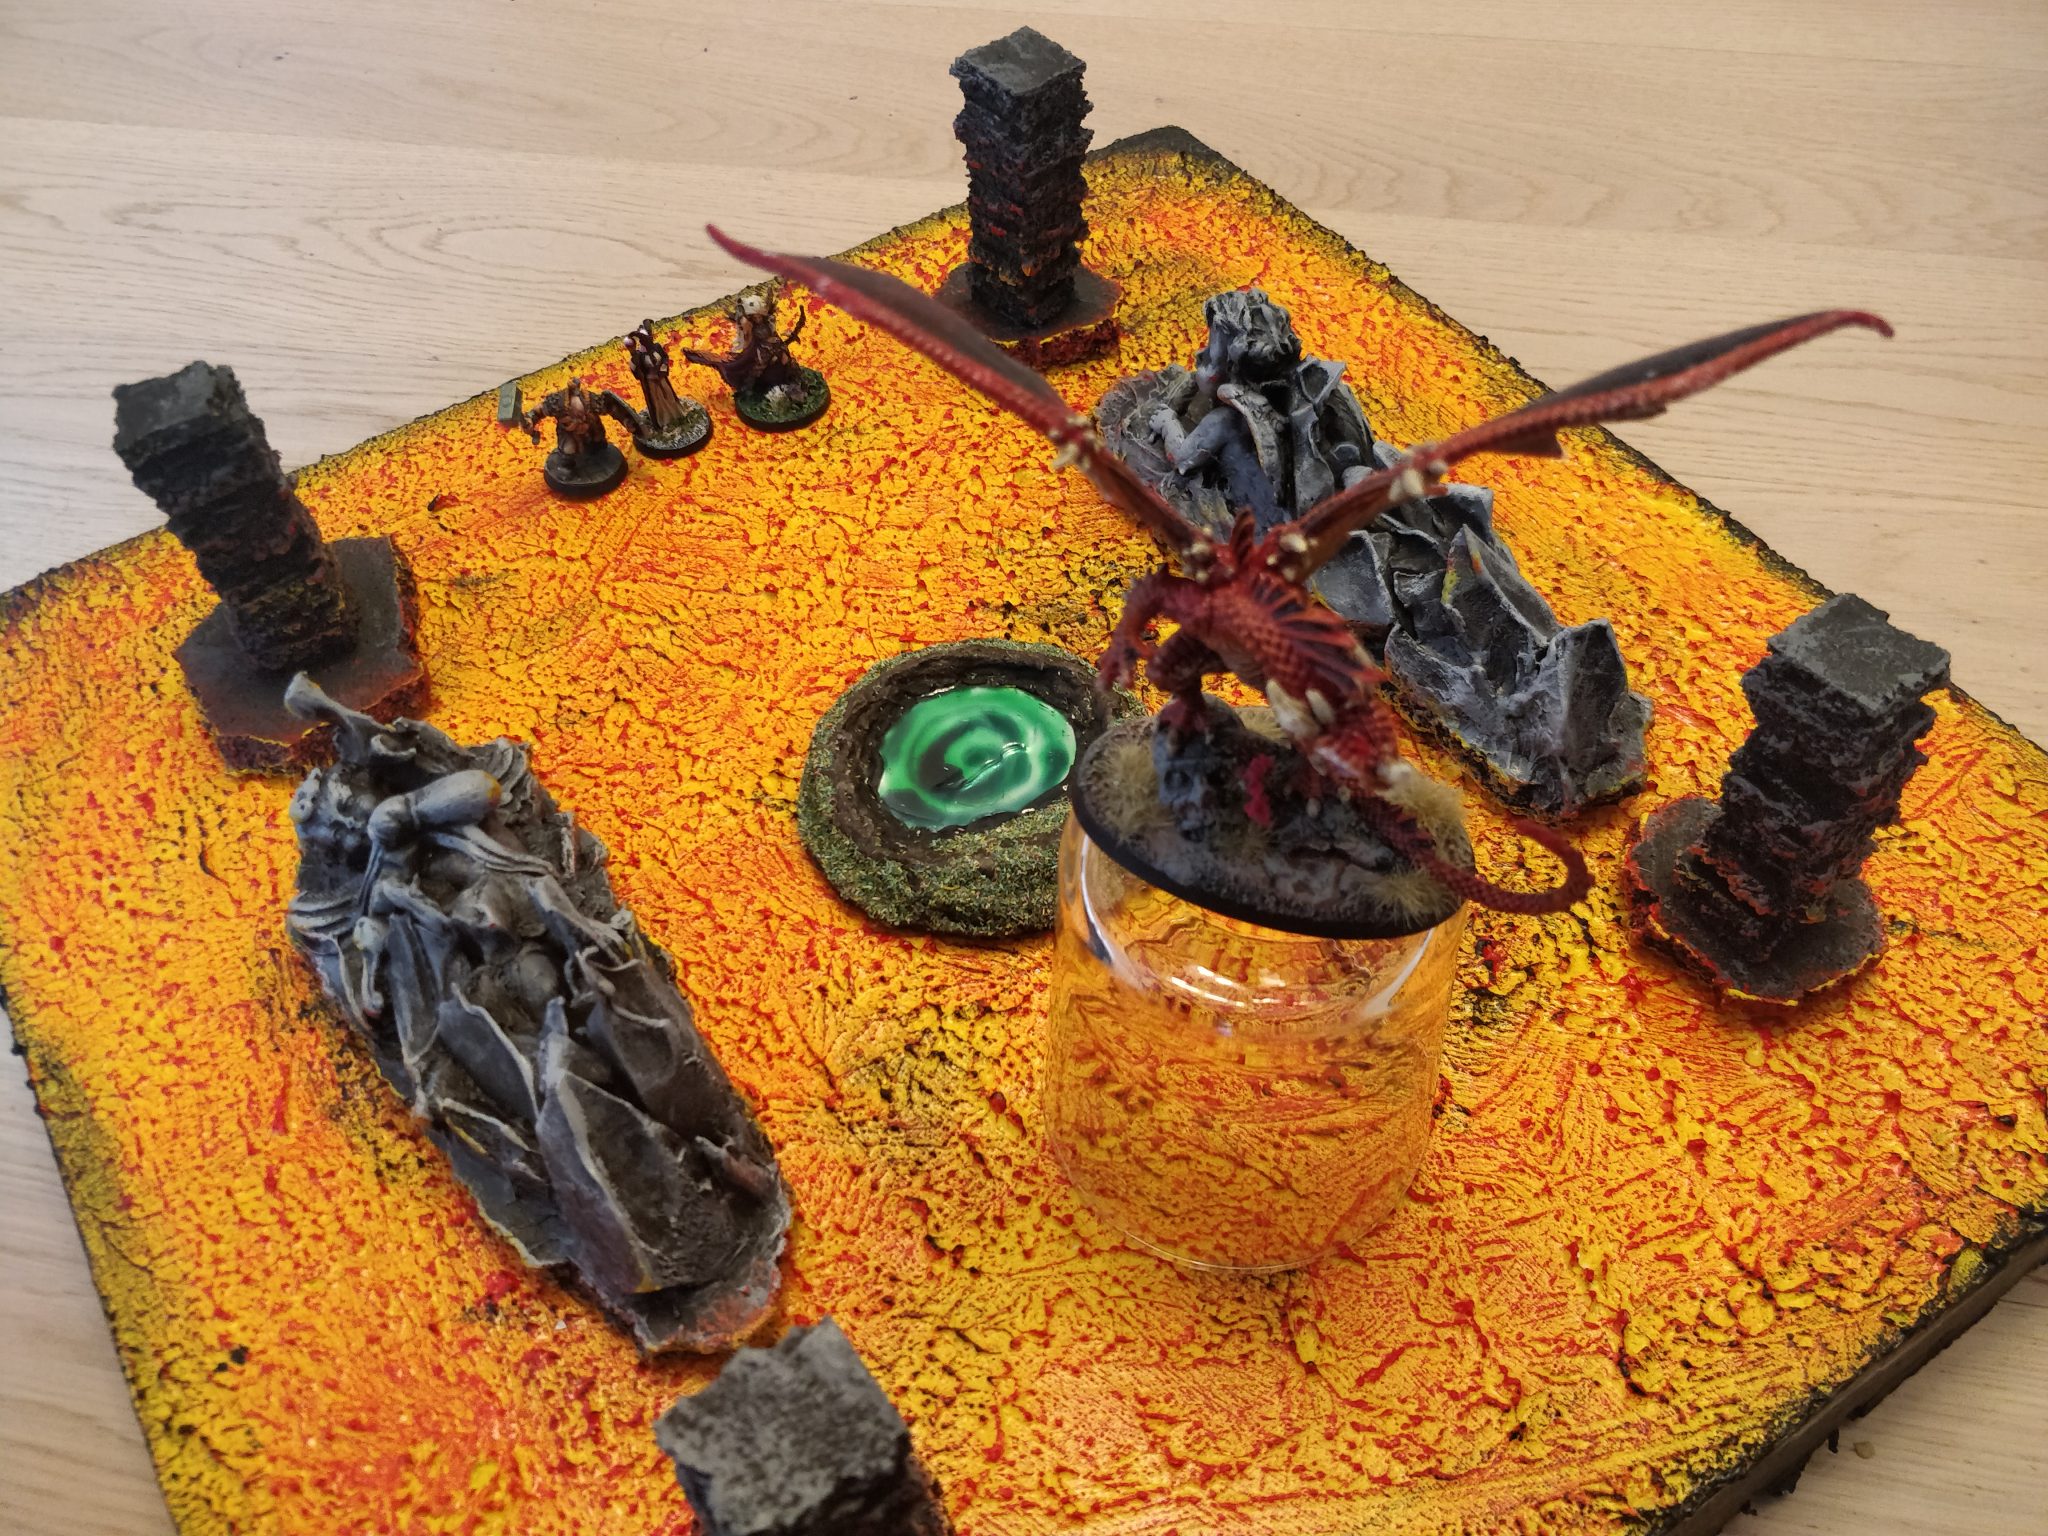
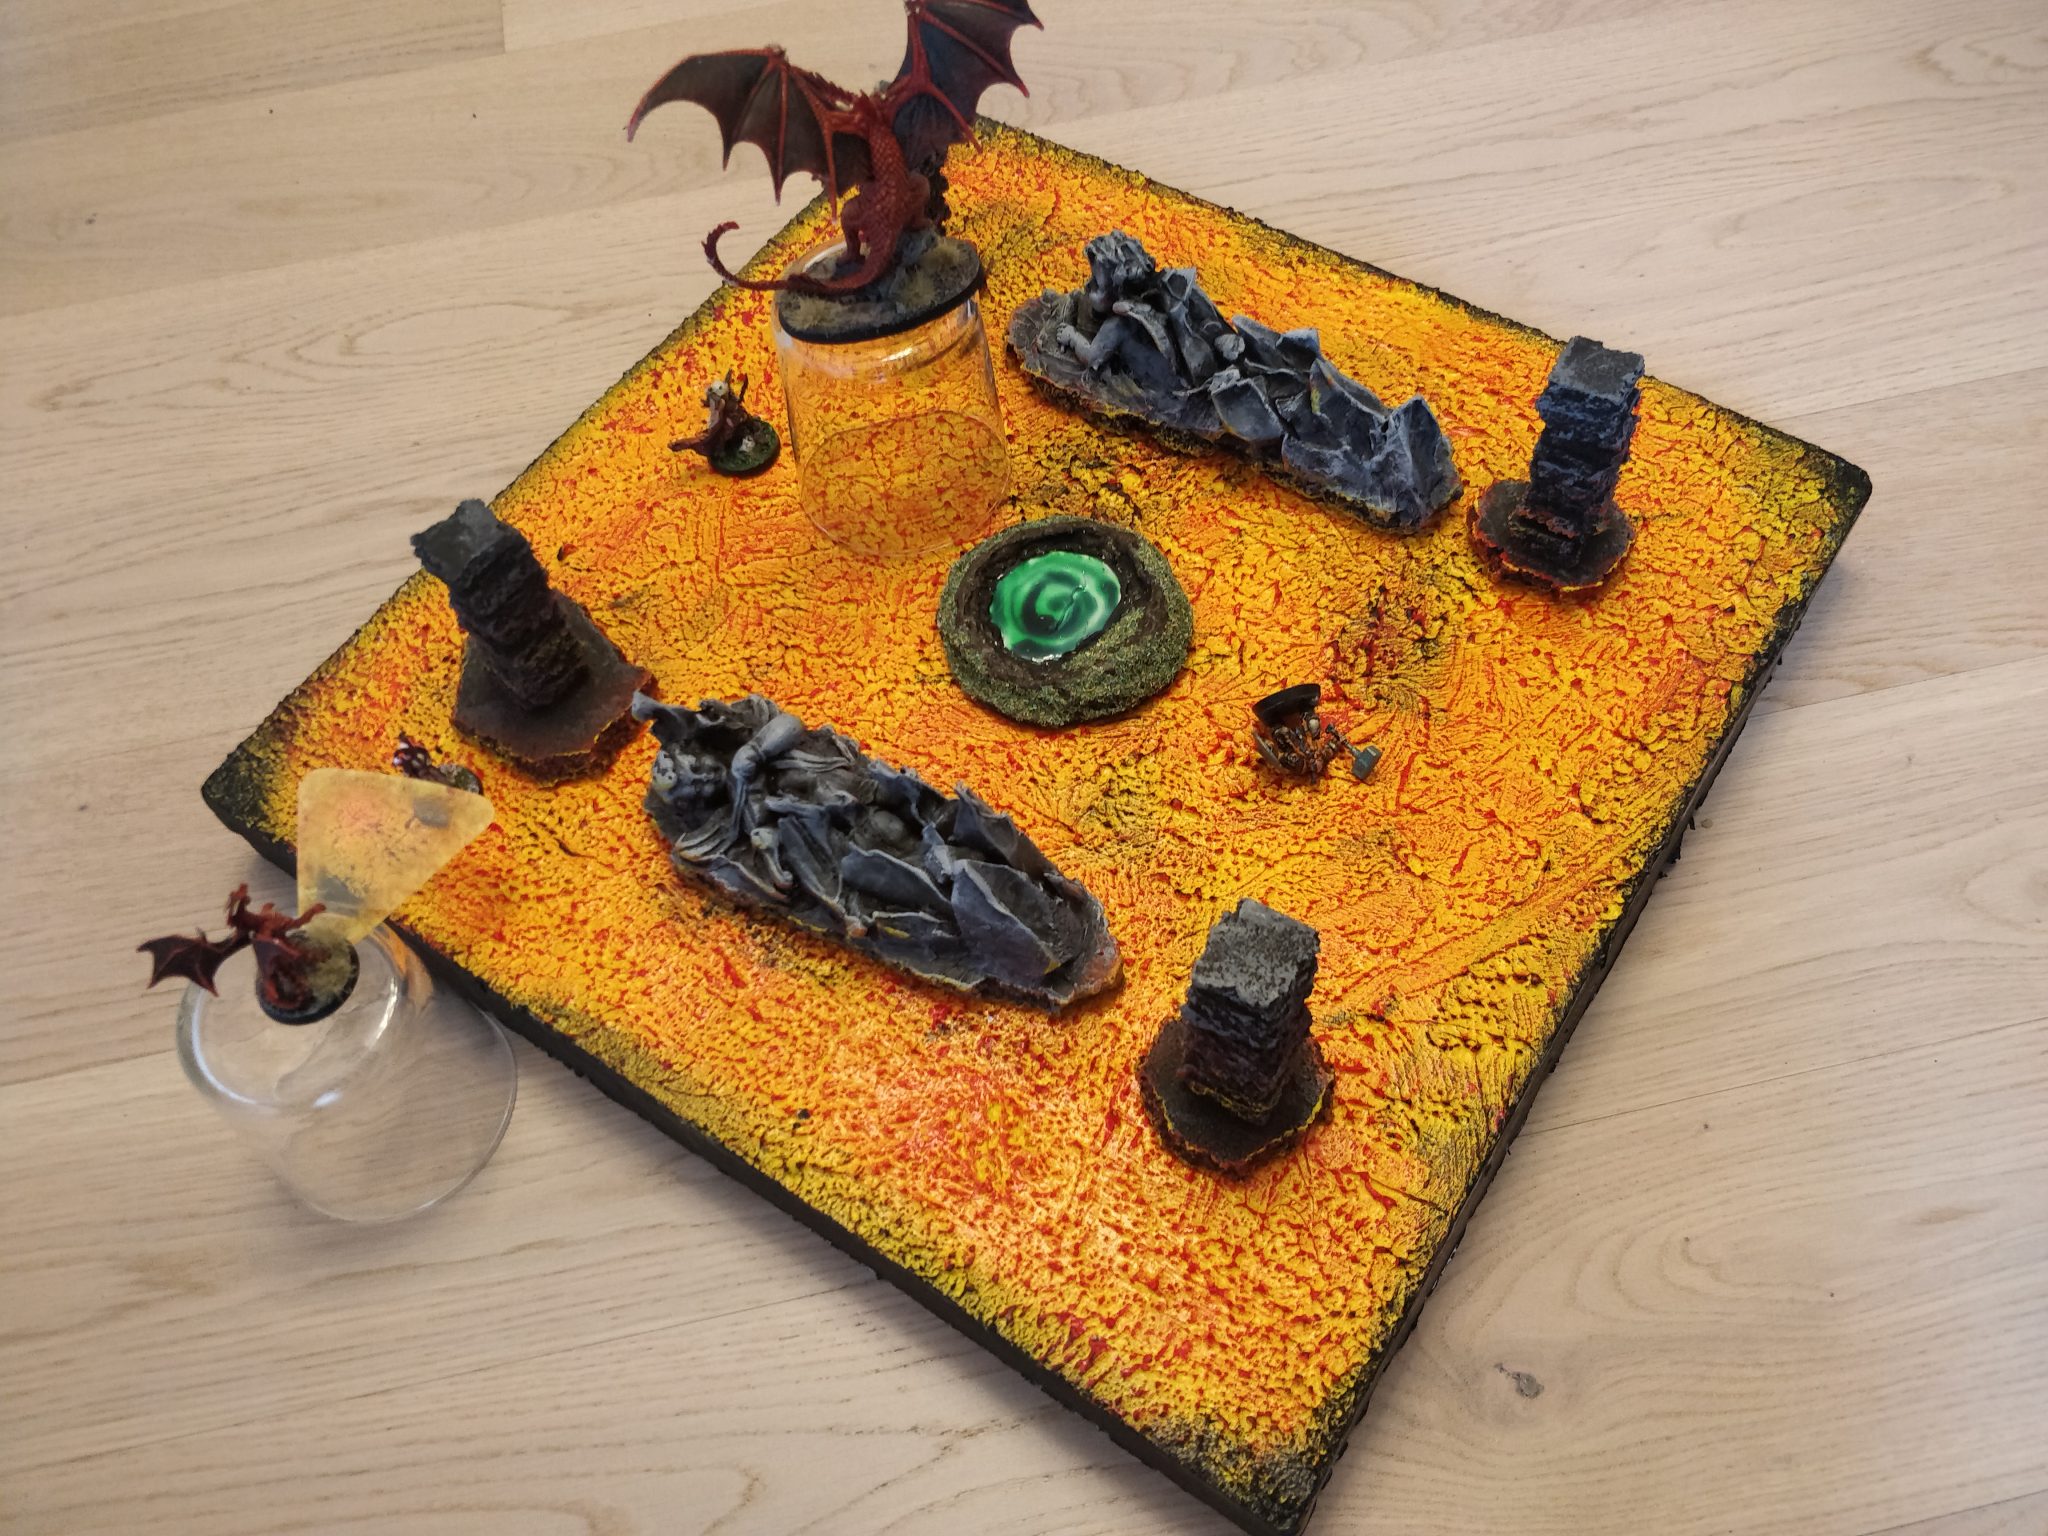
Disruption to the dragon’s plans
Treat: The wyrmling, euphoric of being in battle, gets overconfident and lands to continue the fight on the ground, much to the horror of its parent.
With the wyrmling on the ground, it will not take long before the heroes will cause it serious harm. This forces the dragon to disband logic (and its plan for another strafing run) and prepare to engage at ground level, hopefully before the wyrmling is killed.
Remember to rolle the timer again. In the example I rolled 2 kobolds from scatter no. 6 perfect for engaging the hiding sorcerer.
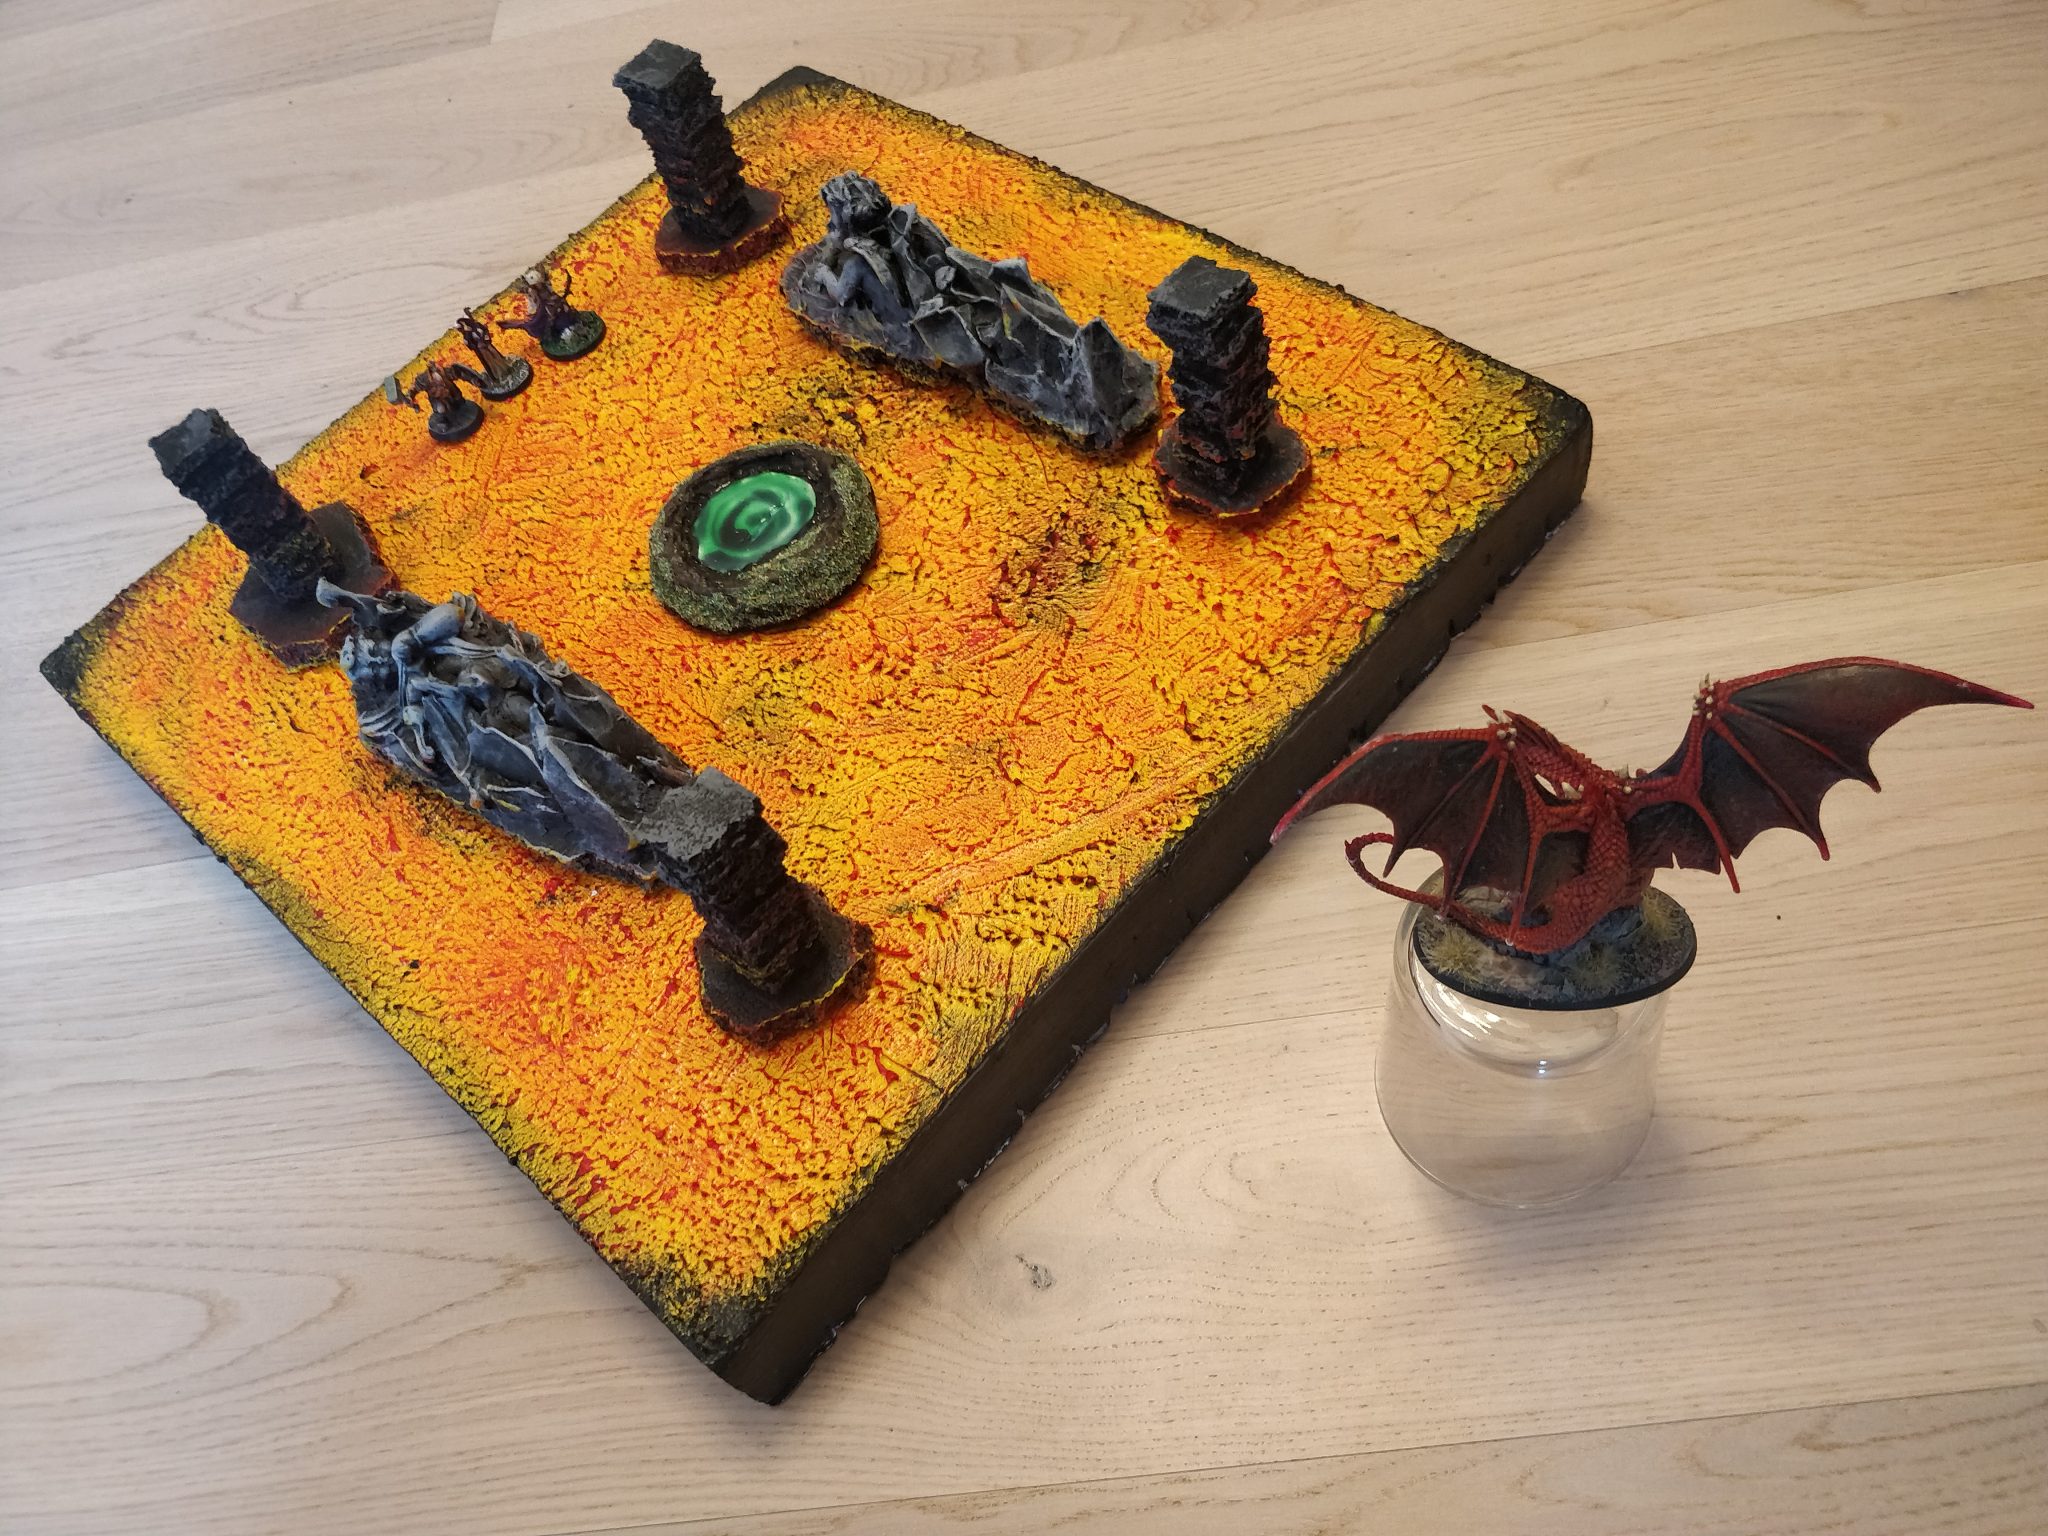
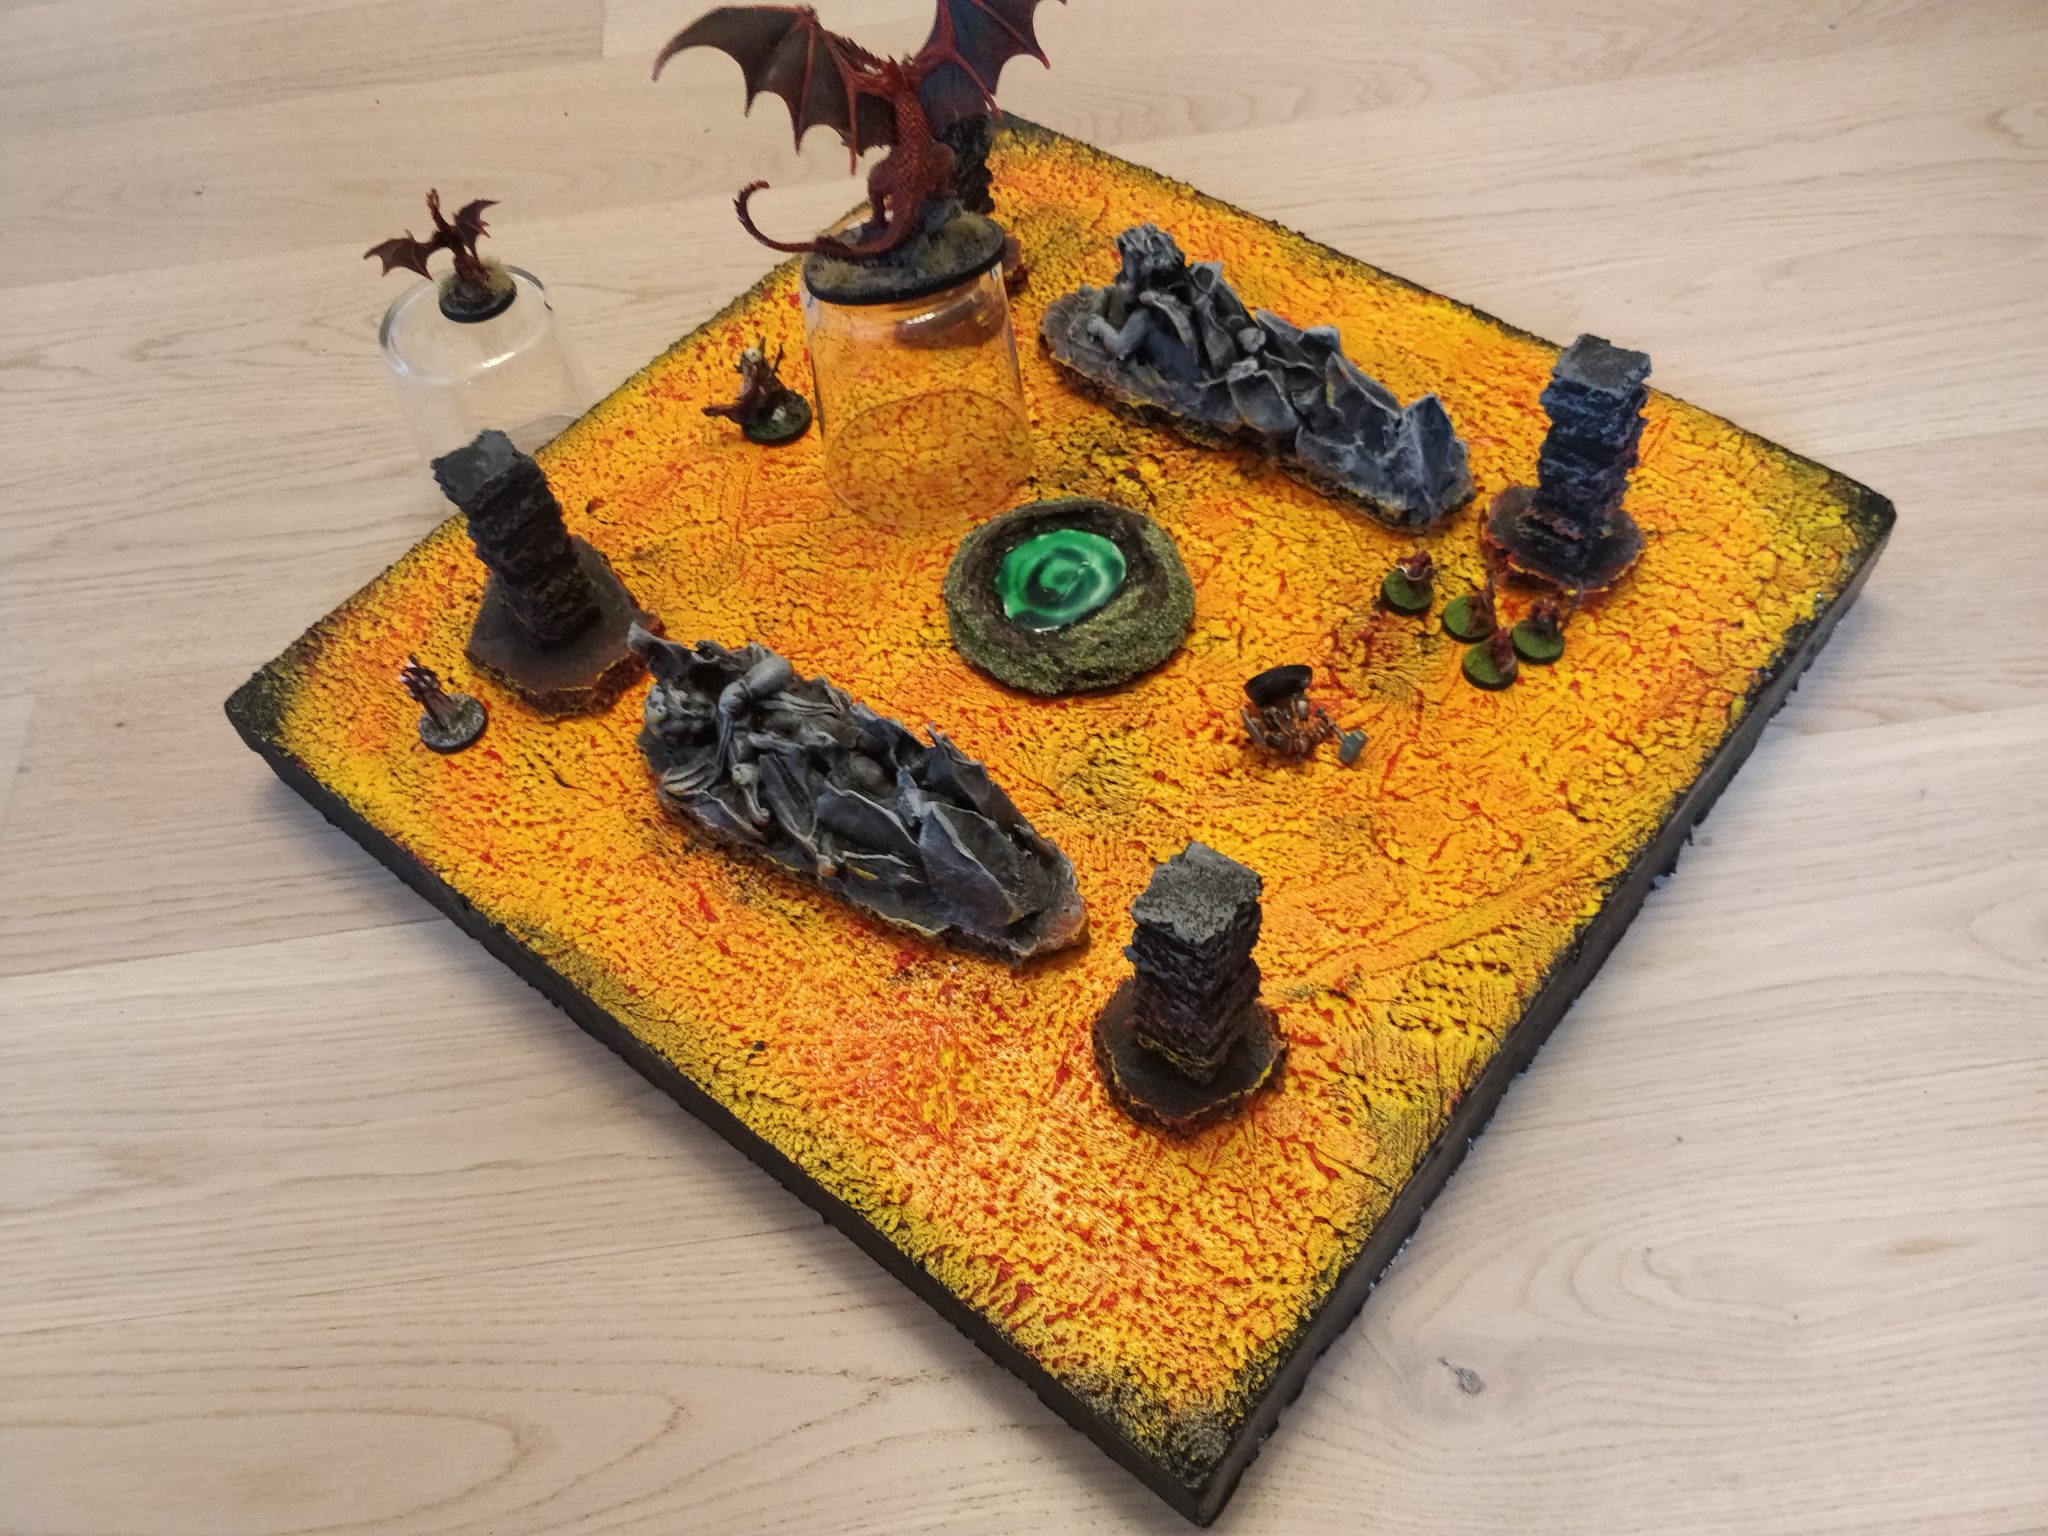
End game
If the heroes are smart, they will go all in on the wyrmling, if not for anything else, but the fact it is more dangerous than the kobolds
Driven by panic and rage, the dragon will now engage at ground level and at this point the heroes should feel more in control of the battle.
It is important that even at ground level, the dragon should be a deadly foe as this will force the heroes to remember the original objective: The re-tuning of the portal.
And that’s it.