The new and improved Typhoon
 I was not happy with the result of the previous Typhoon I made. First of all the mini didn’t really came out as I wanted it to be, Second, I think the Chaingun is too short range for a battle crawler. The only real option is the Mortar.
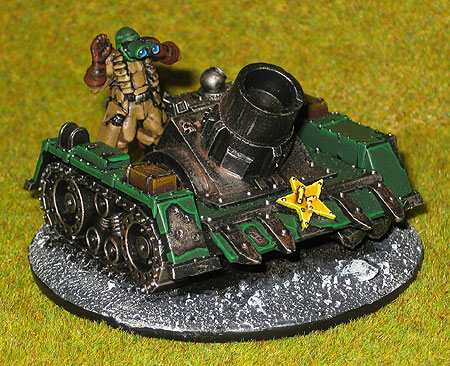
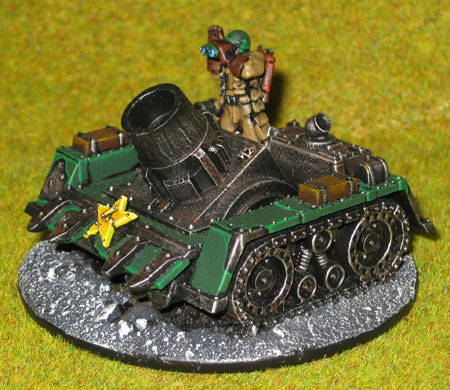
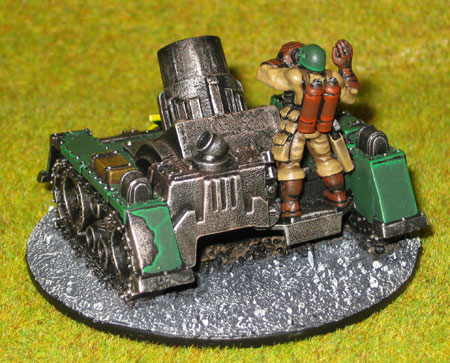
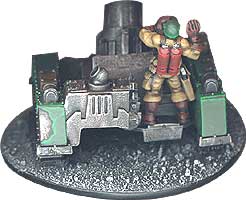
On the left you can see the finised Typhoon and below I have made a step by step guide on how I did it followed by some bigger photos, enjoy!
What I used:
This is what I used to built the Typhoon.
1 Space Marine Vindicator Front Plate: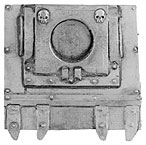 |
1 Space Marine Vindicator Demolisher Cannon: |
1 Ork War Trak: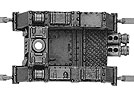 |
2 Ork War Trak Tracks: |
And I also used the following bits which are not essential and can easily be replaced to customise and personalise your own Typhoon:
- 1 Viridian HMG crew with hand up and binoculars.
- 1 Spare Rad Trooper backpack
- 1 Space Marine backpack
- 1 Star from a GorkaMorka rebel Goblin
- 1 Ork War Trak handle
- 1 bottom from a Pringle’s pack (used as base)
Building the thing |
|
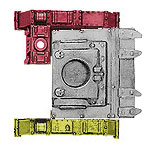
 Cut the War Trak into to parts 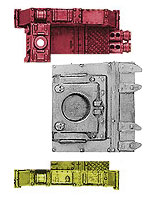
|
Building the Typhoon is pretty straight forward. The only mayor operation is making the War Trak broad enough to be able to fit the Vindicator Front plate inside.
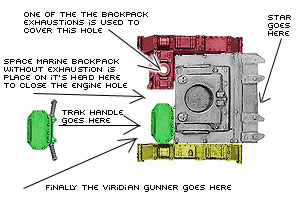
Shown left is how I cut the Trak. The red area includes the War Trakk Enigine and exhaustion pipes. Note: make sure when you cut the engine off the yellow area that the plastic is kept intact on the Yeloow bit and not on the engine. It is a lot easier to cover up a hole on a rough engine full of bits than on the smooth surface on the yellow track plate. Now Glue the parts together as shown on the left. You might need to trim the exhaustion pipes down in order to fit the Vindicator Front plate. After doing this glue the Demolisher cannon and Tracks in place (where they were meant to go on the original minis). As you can see this leaves a blank area in the lower left next to the engine, which also contains an open side. This we fix with all the extra bits. You can see what I have used on the finish mini, but use what ever you have at hand. |
|
Here is an image of were I placed my bits:
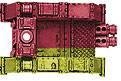
 And in colours: 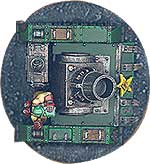 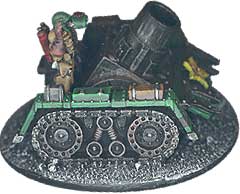 |
|