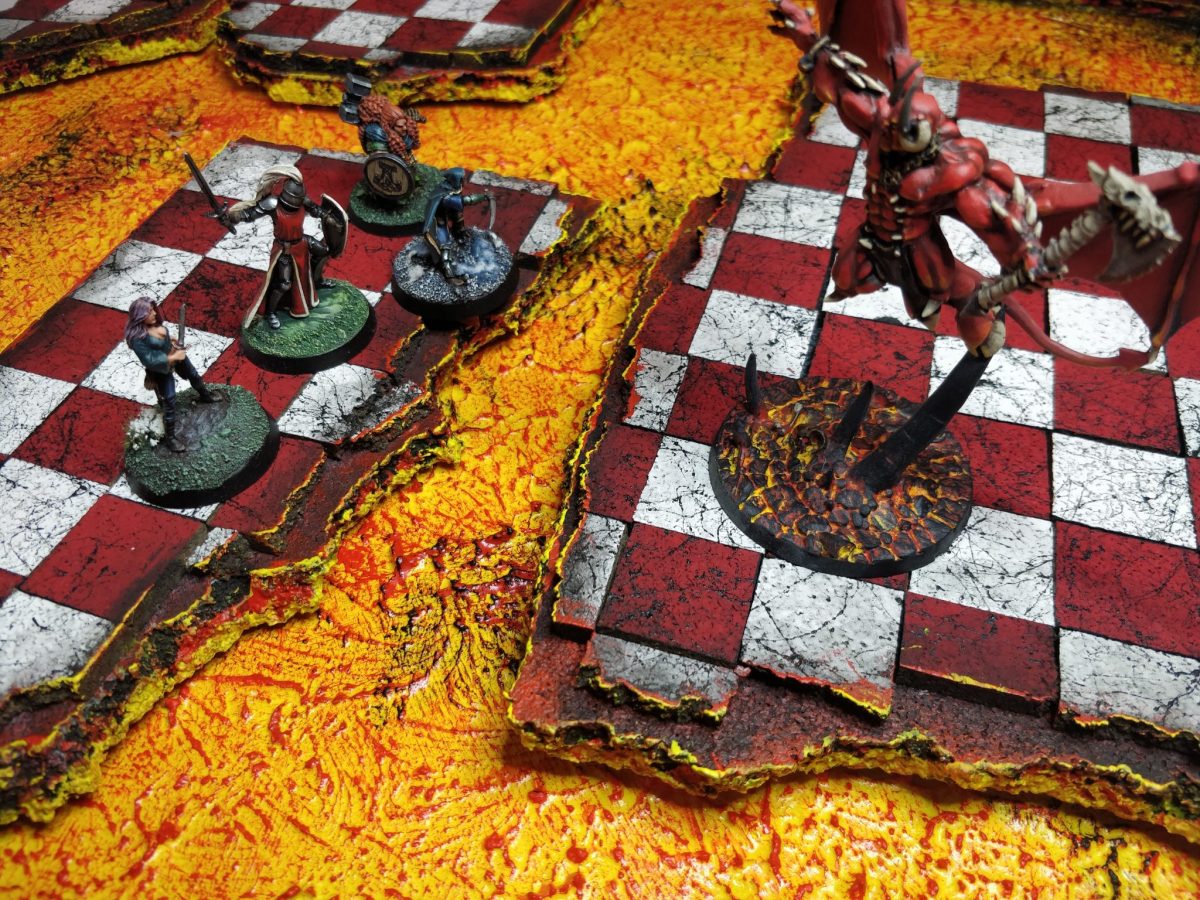
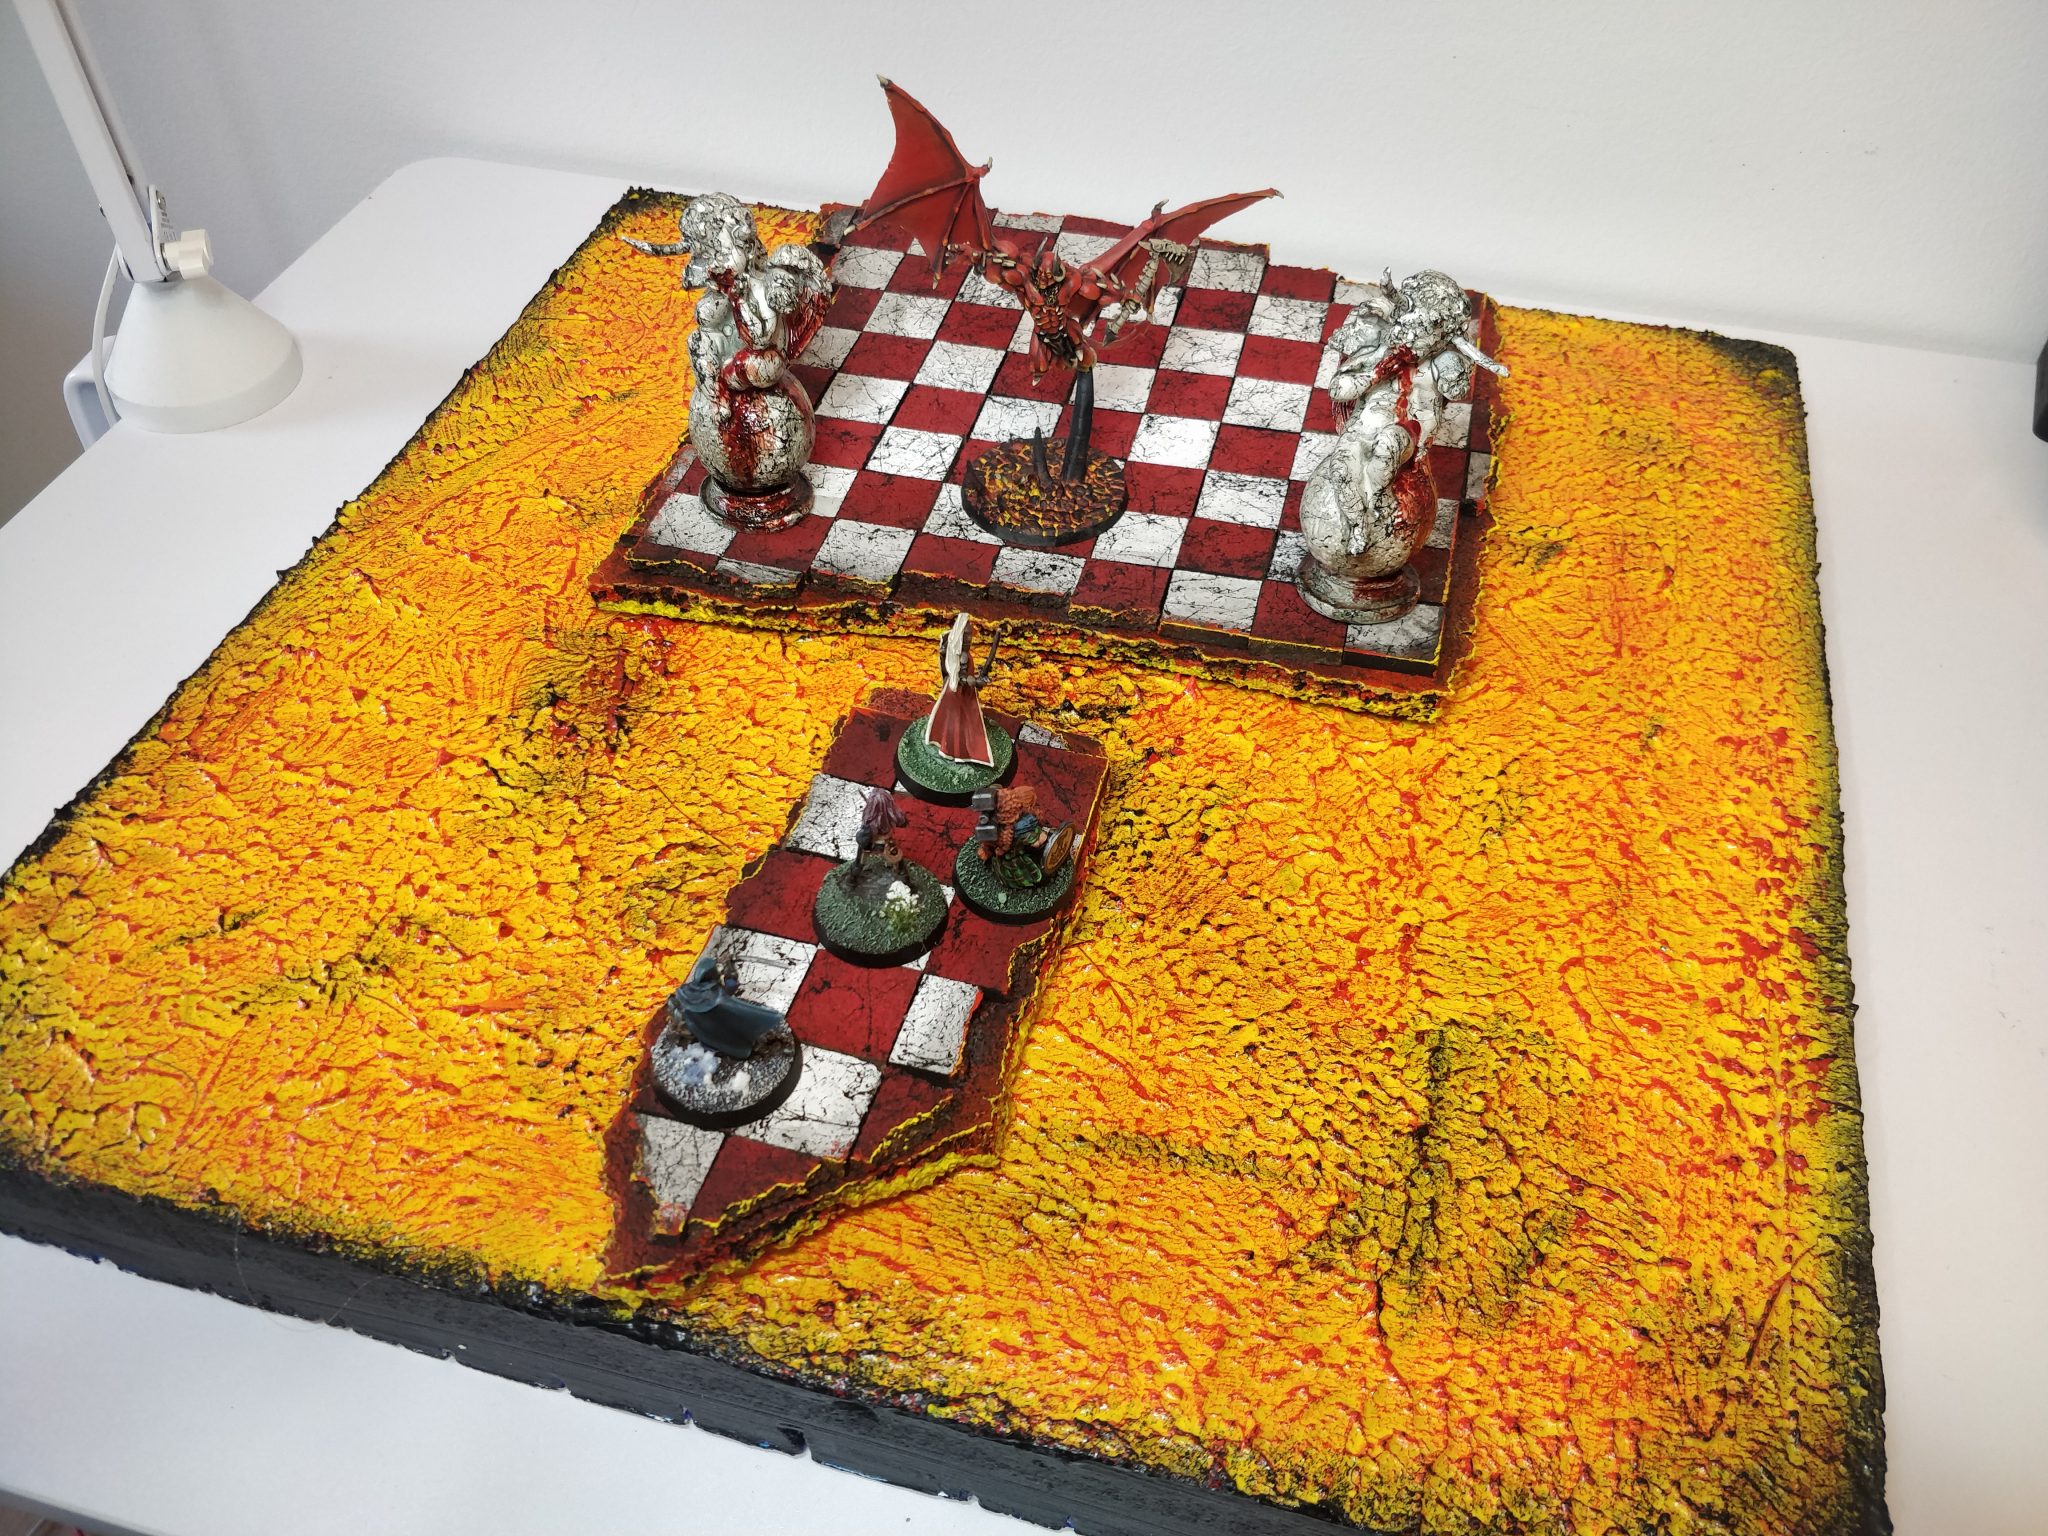
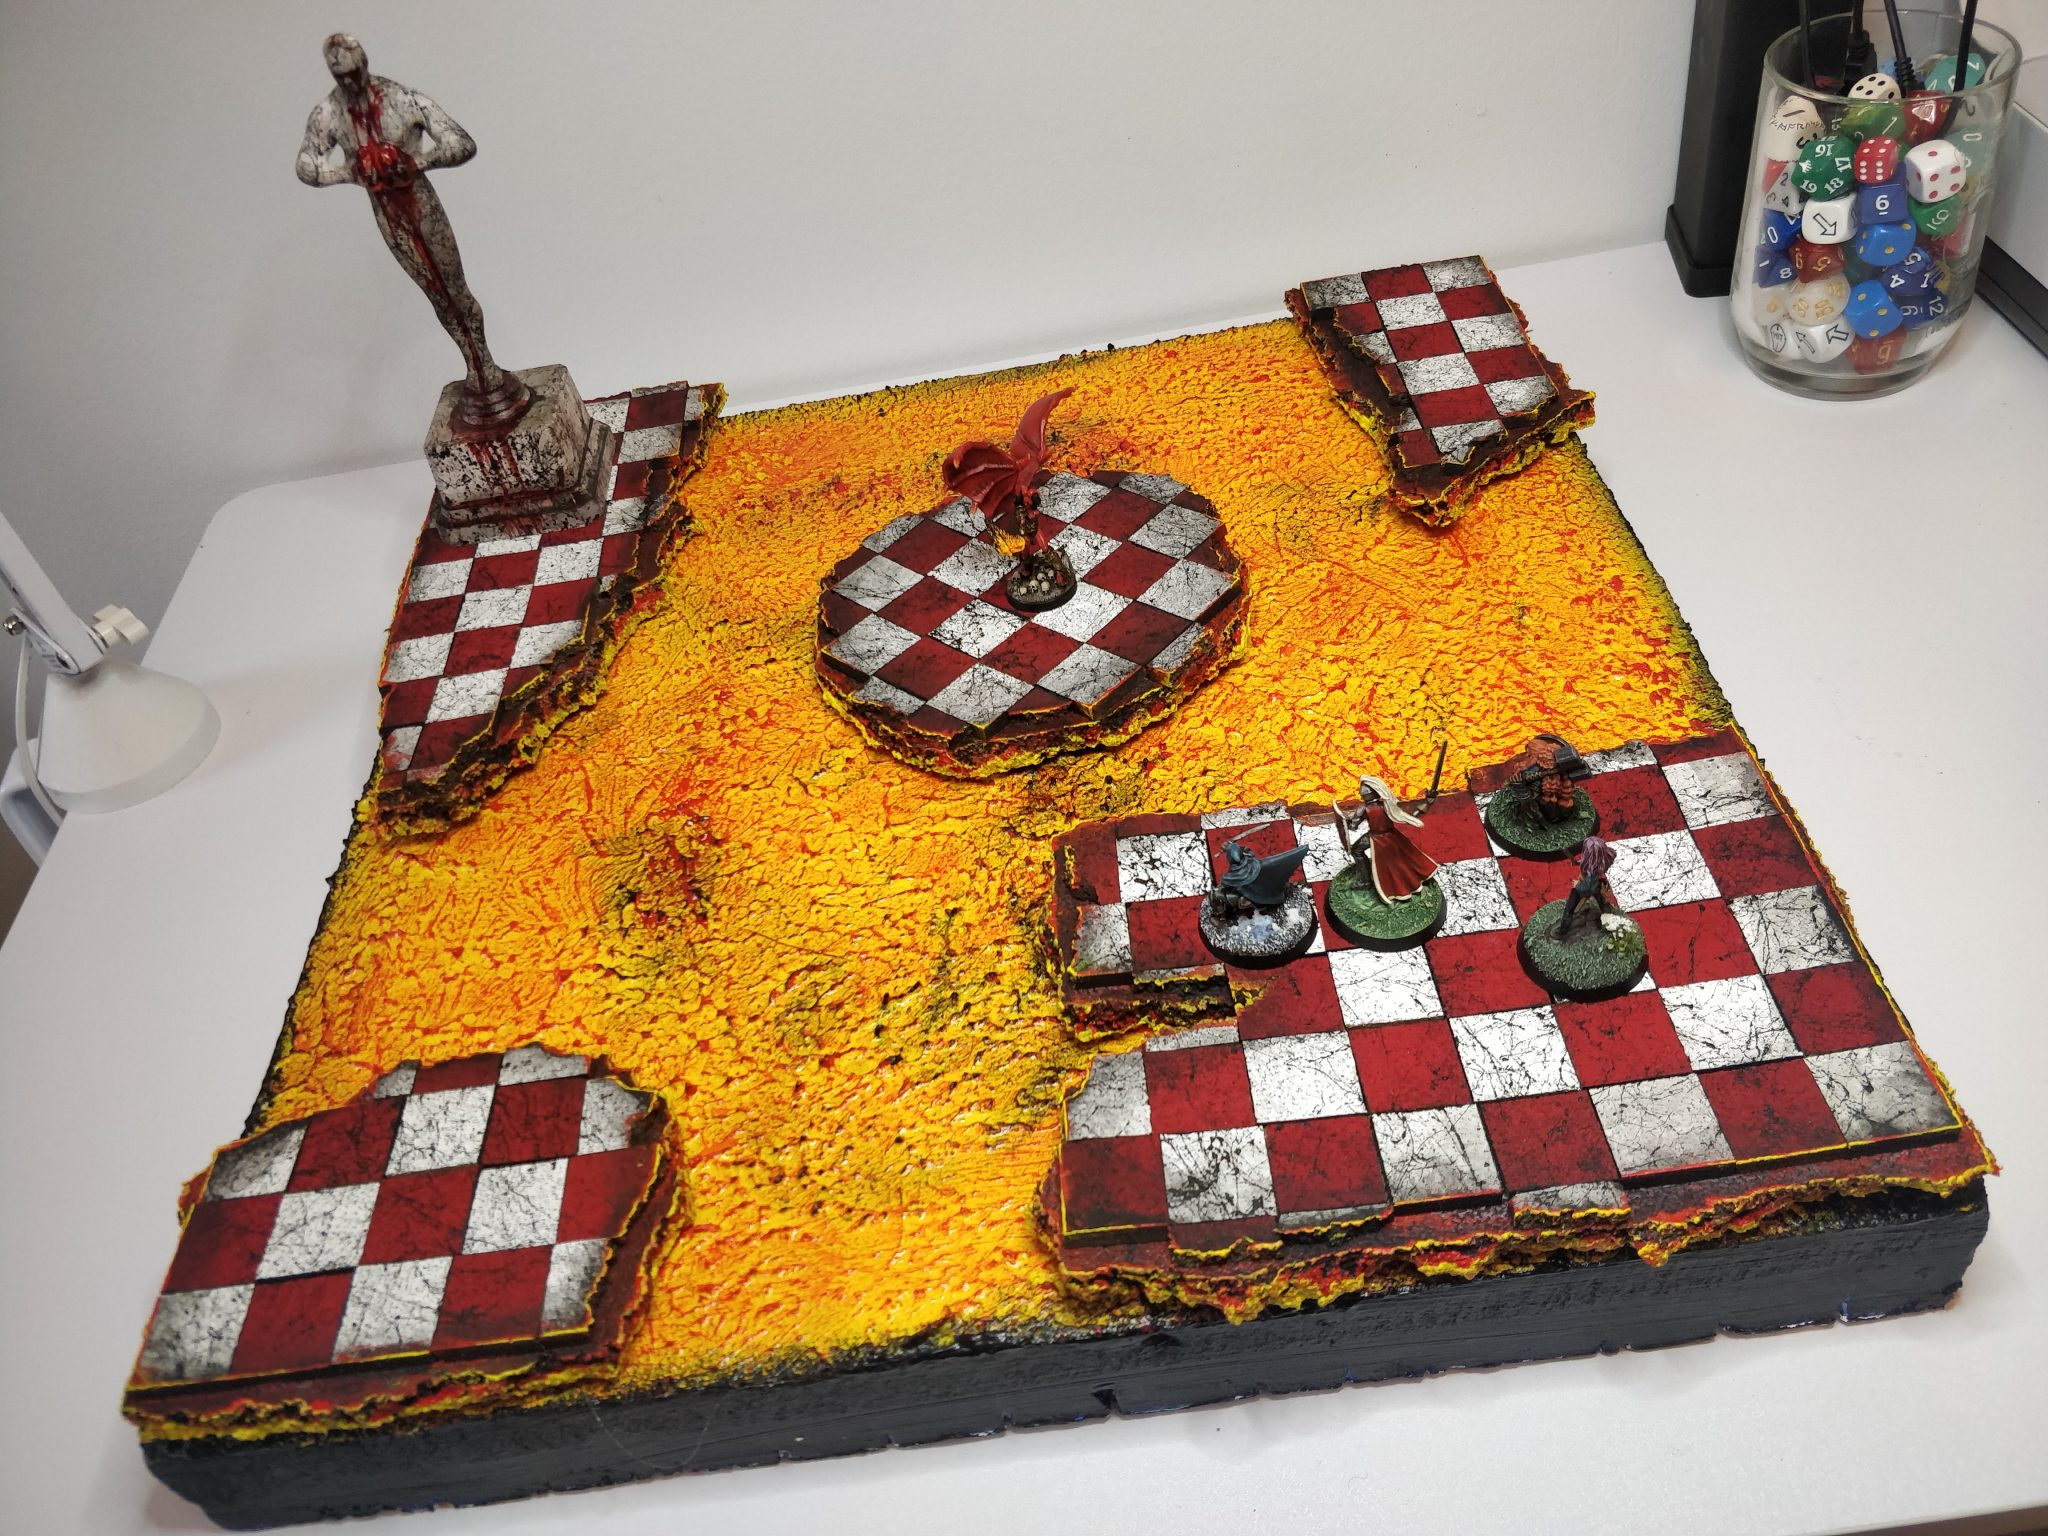
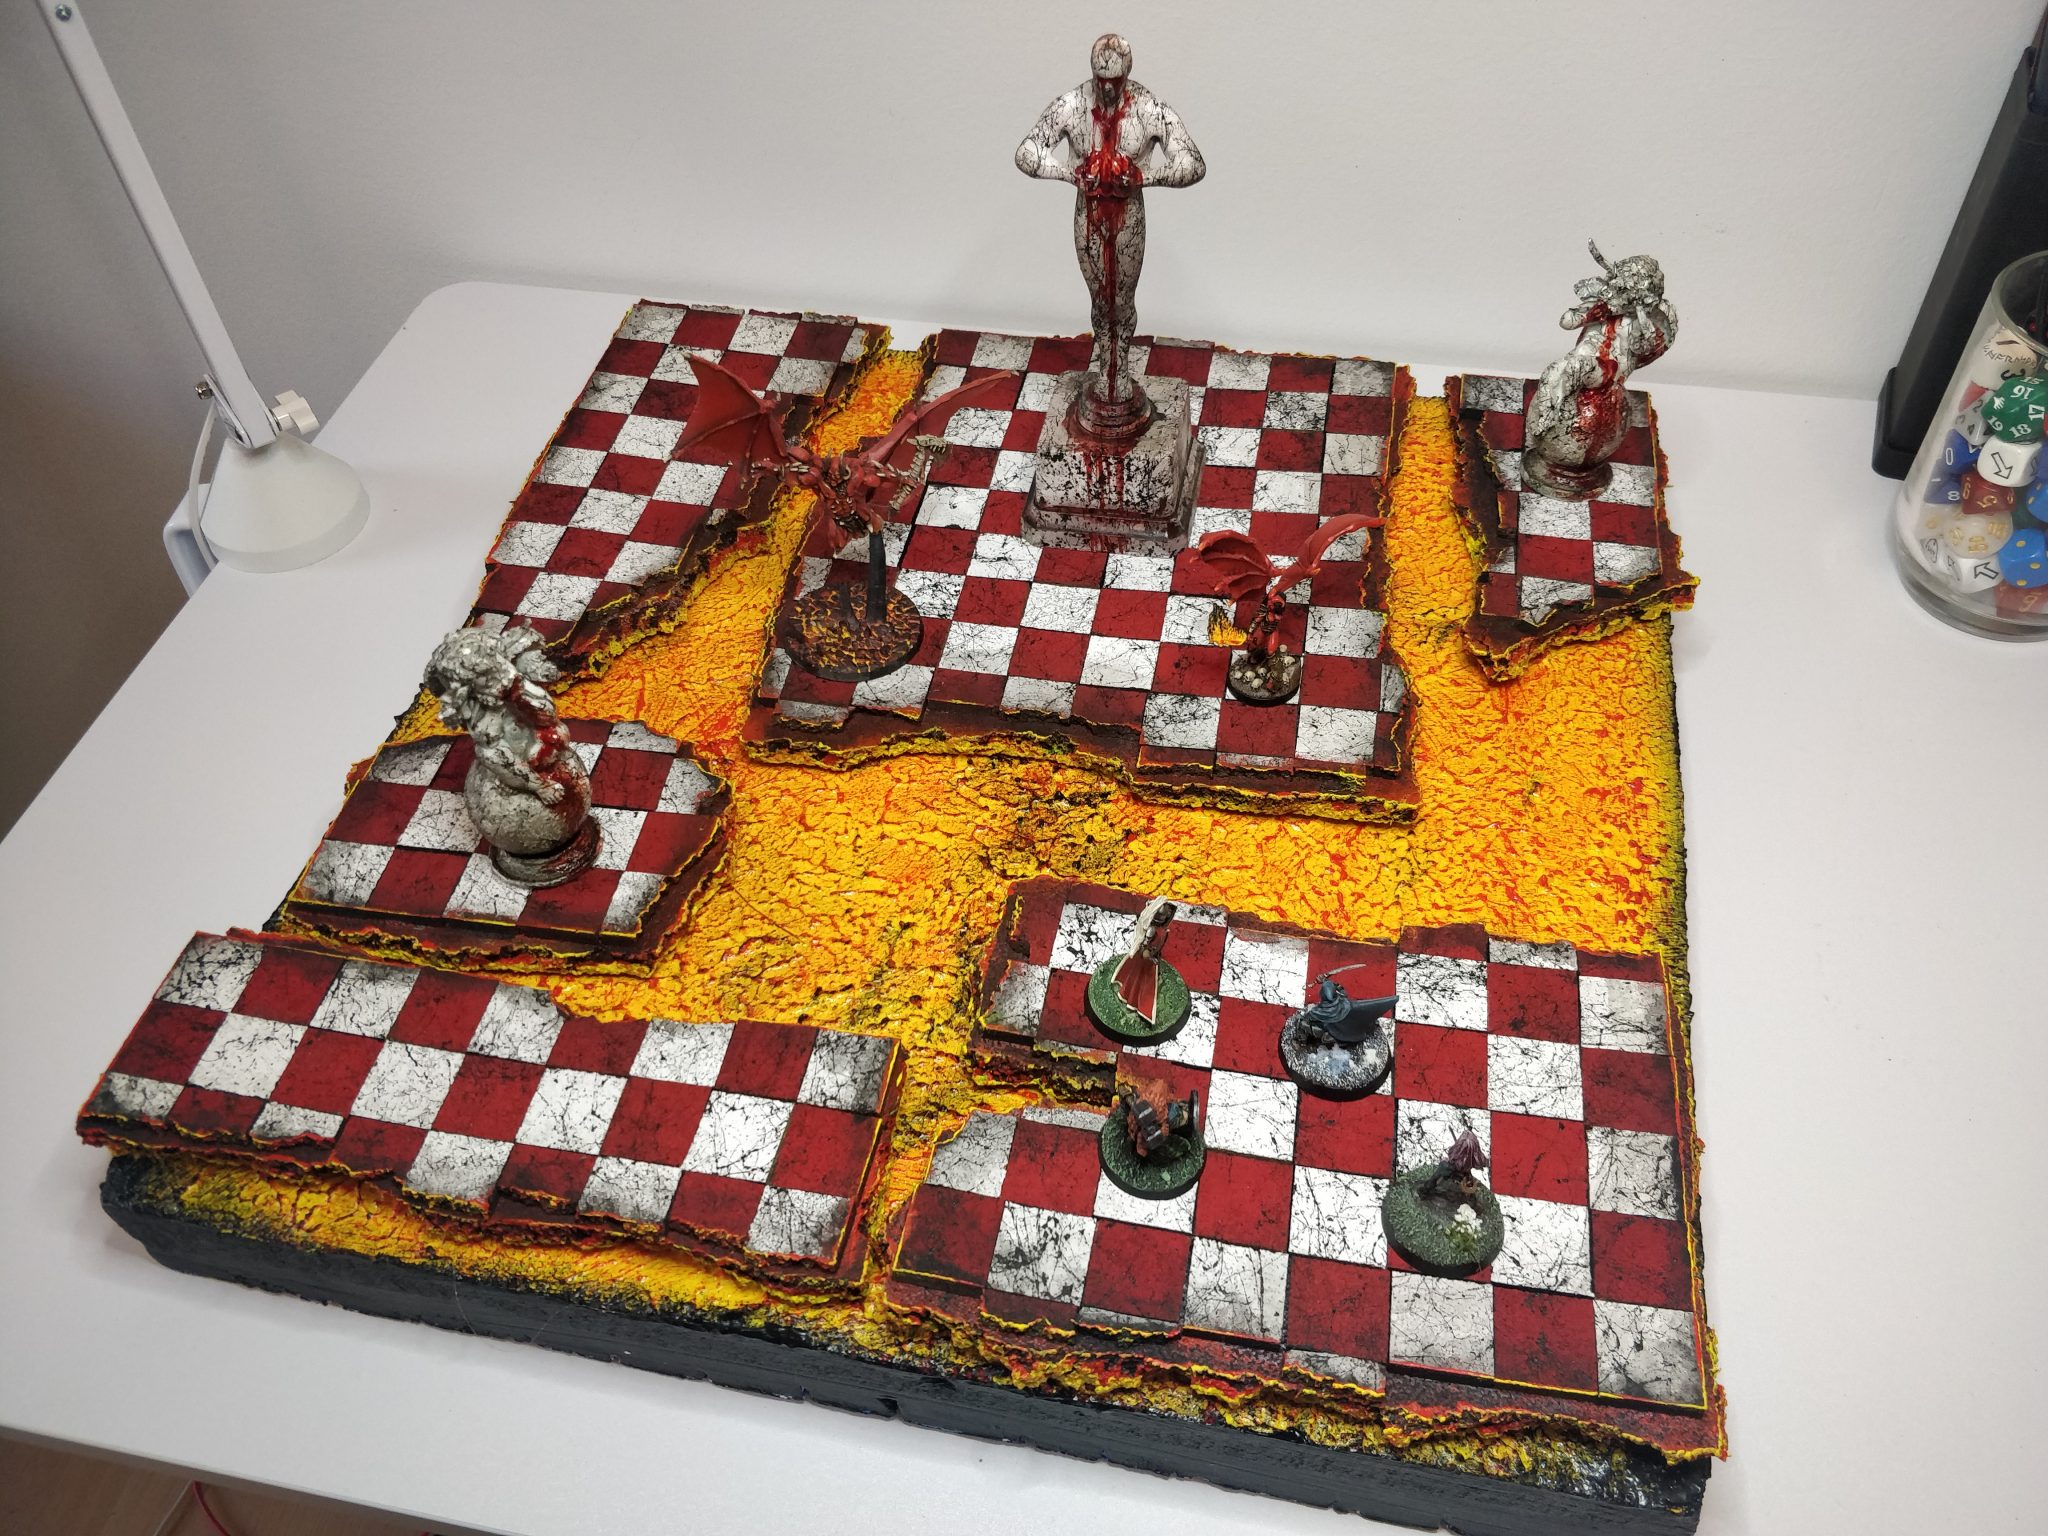
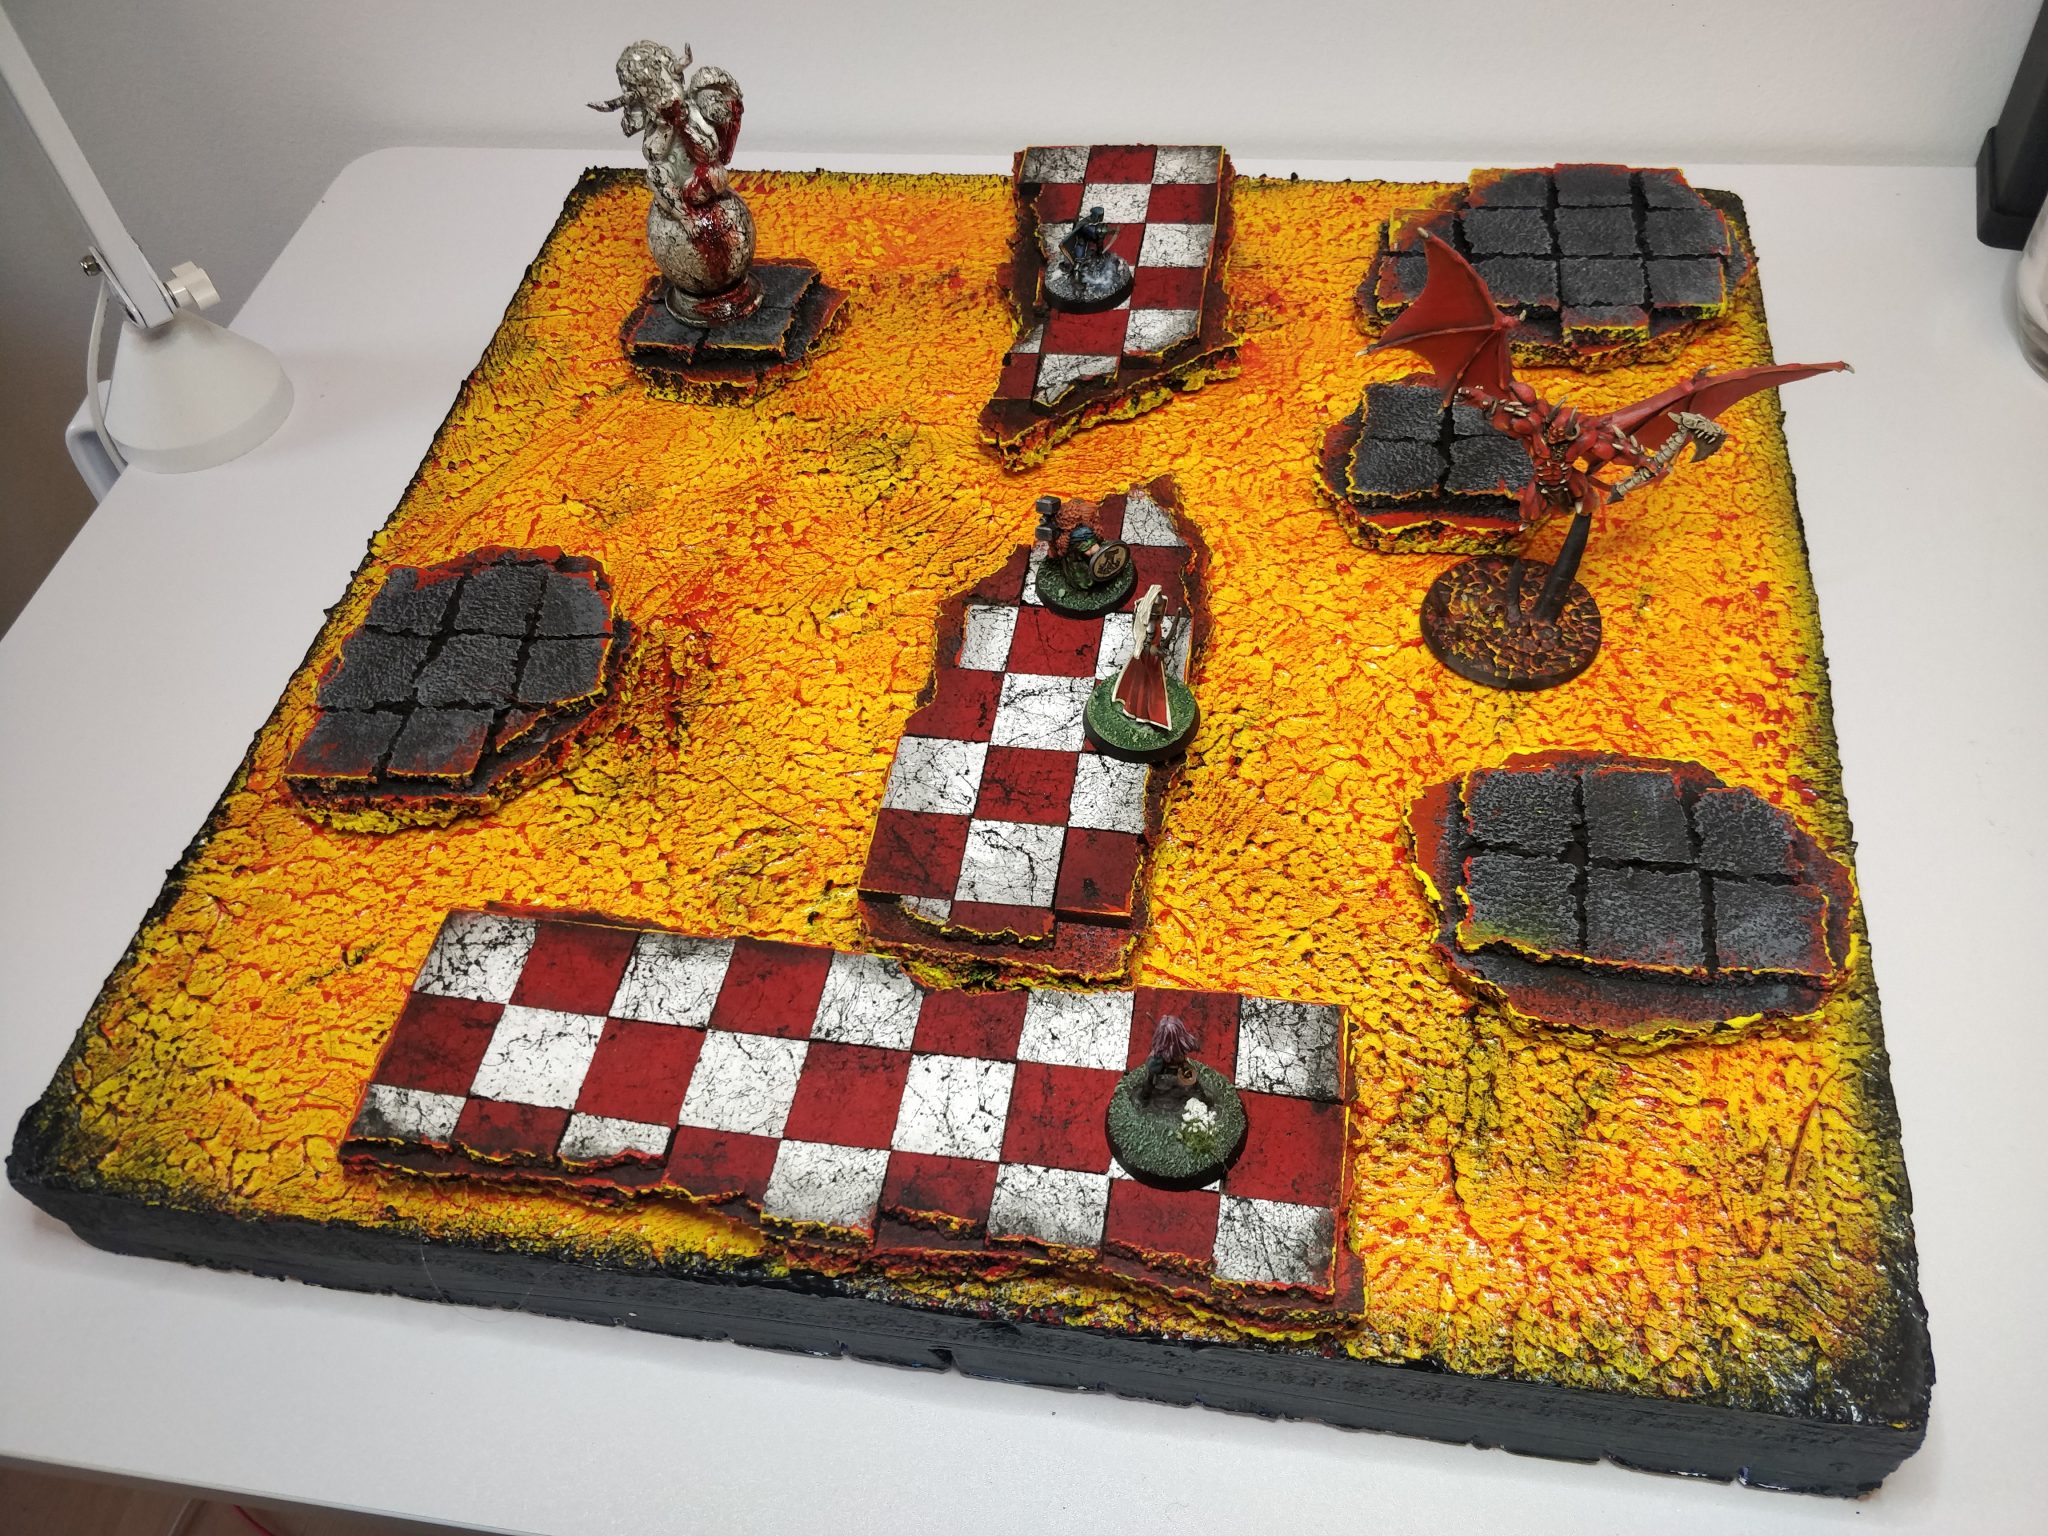
I finished my Phlegethos board recently. The idea was to have a lavaboard with floating elements on top. And I was quite happy with it.
In the process I decided to add tiles as it would give a hint of semi-civilised world plus both my players and I like tiles for tactical encounters.
All good.
but it got me thinking about Phlegetos. It isn’t just a fiery hell, it has cities with entertainment, pleasures and fine halls.
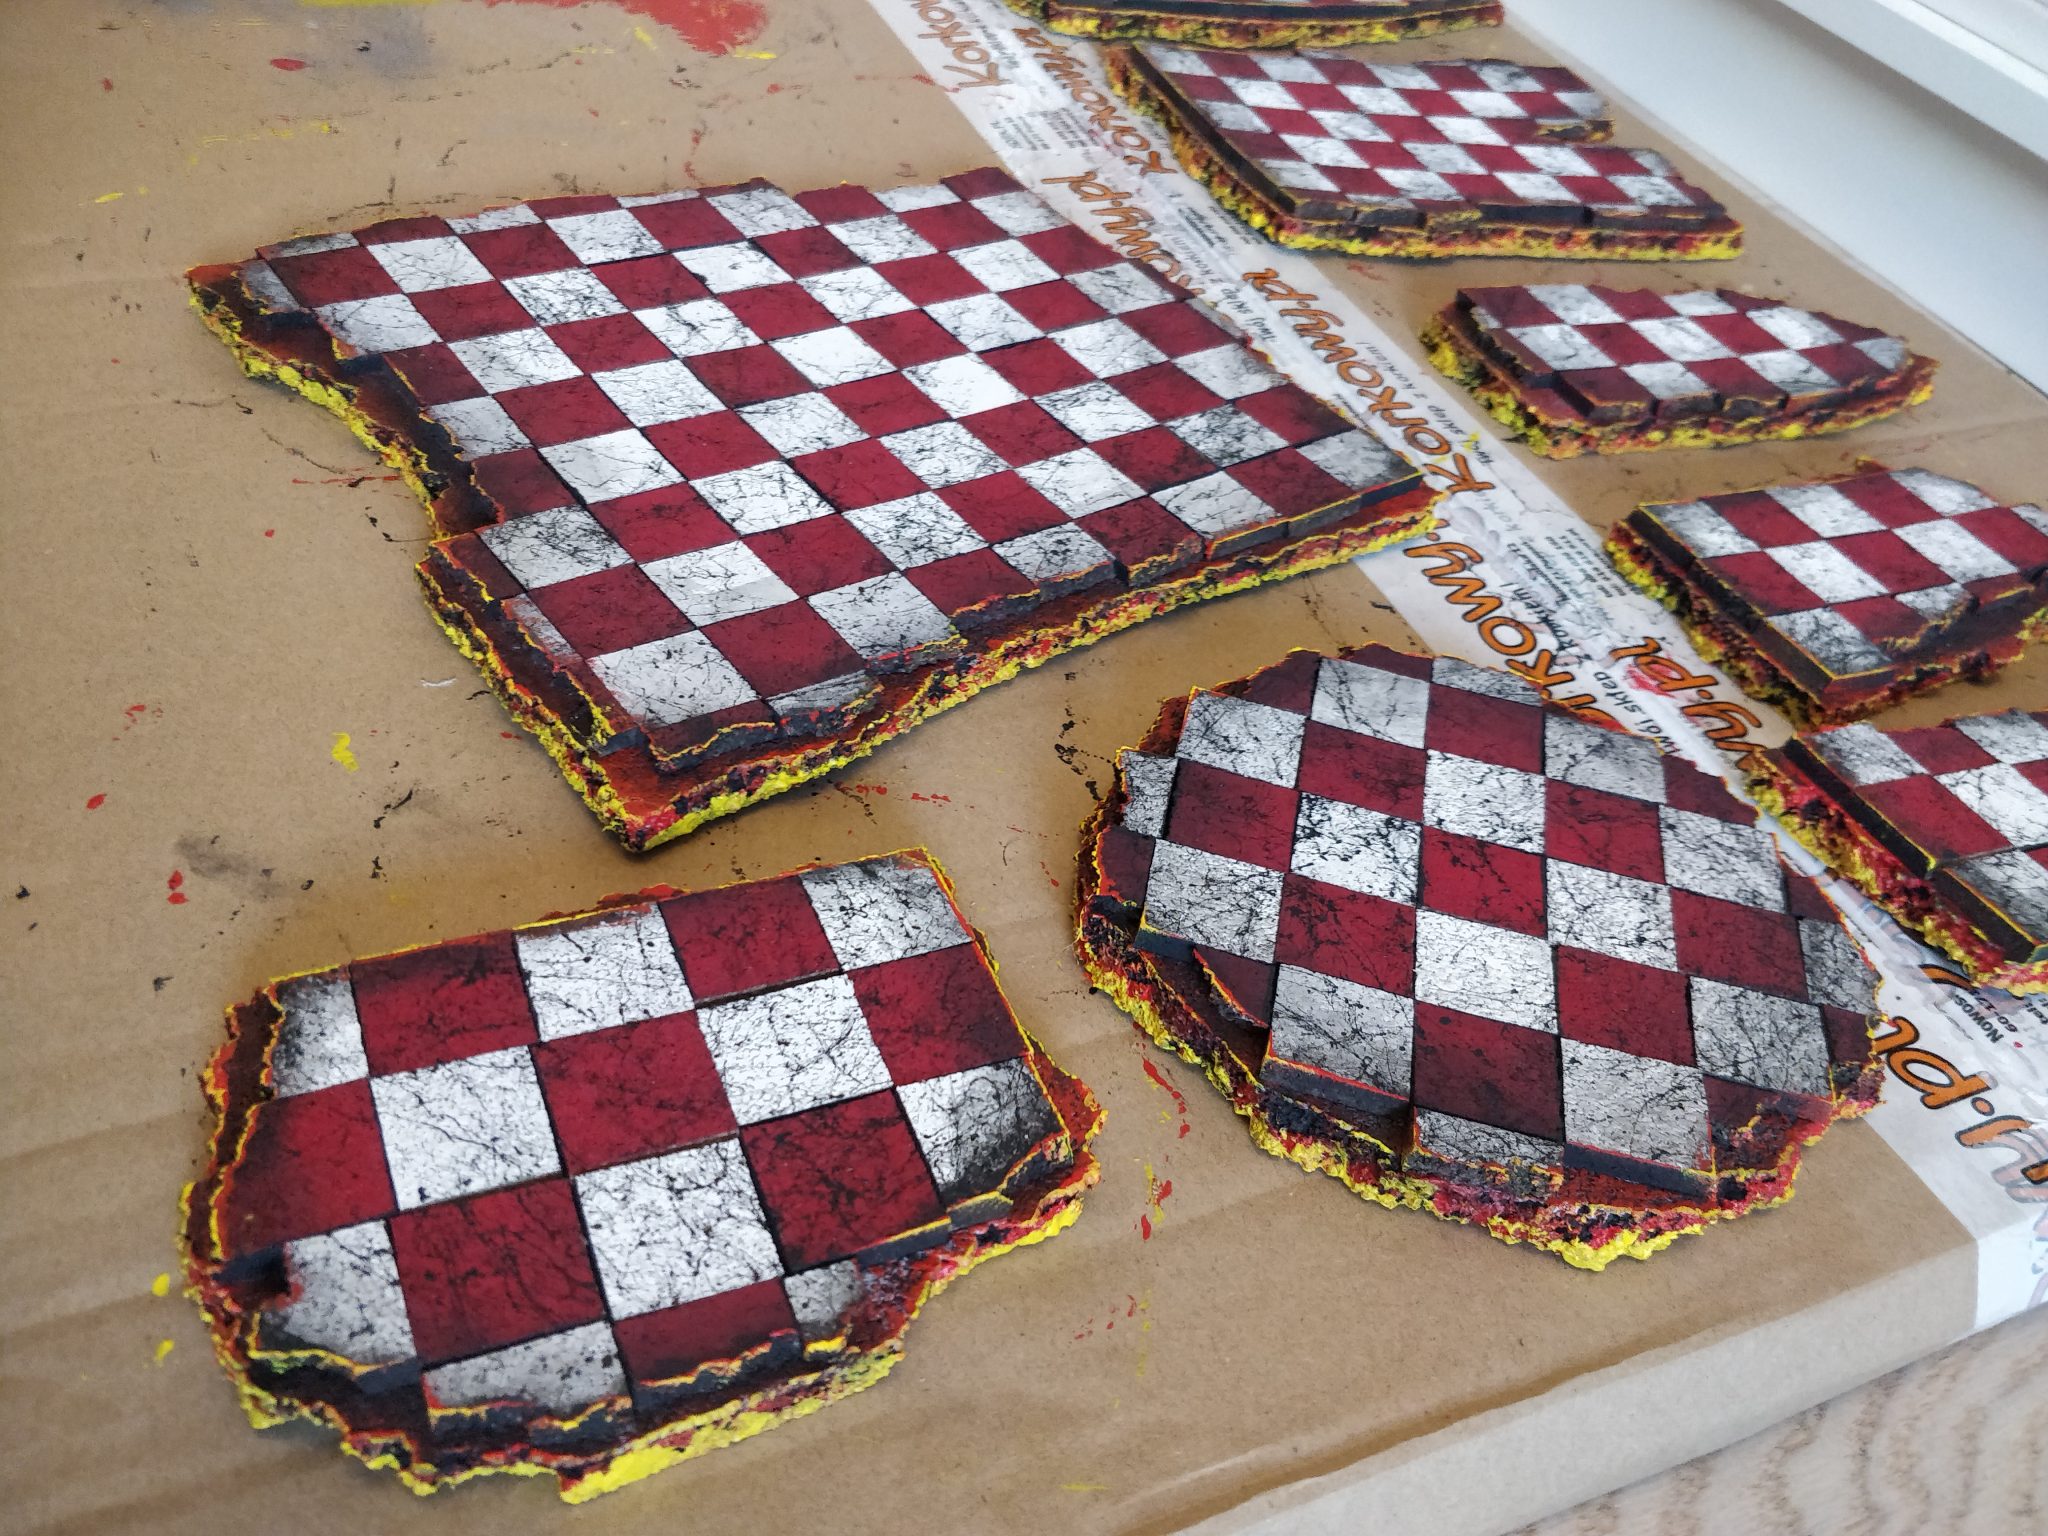
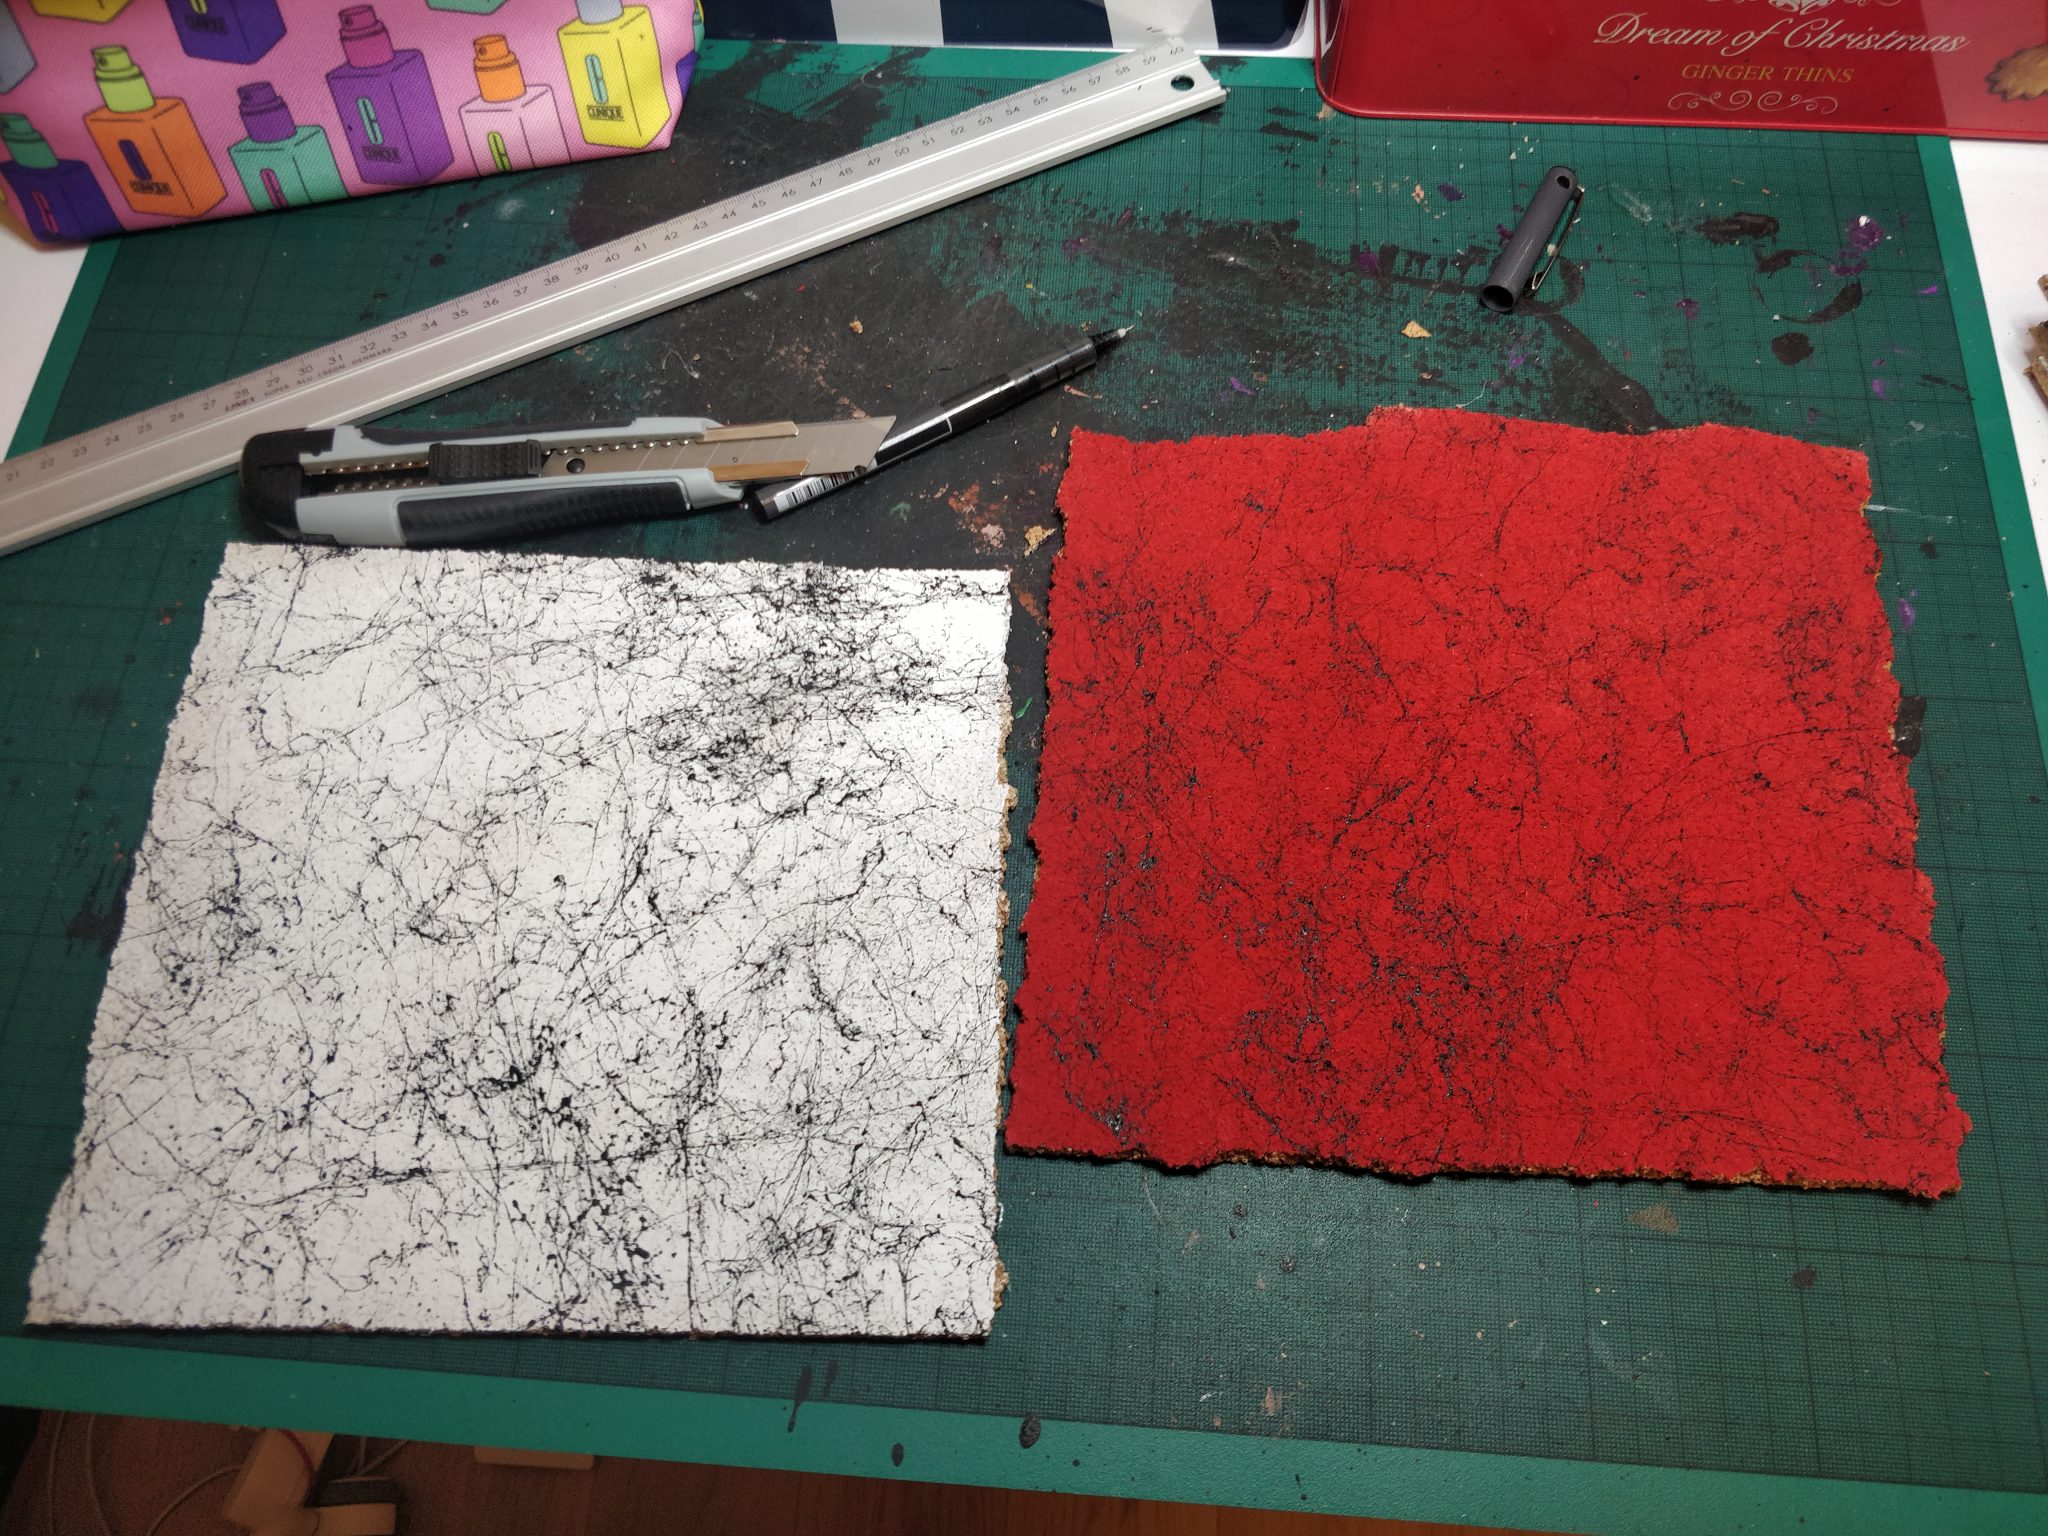
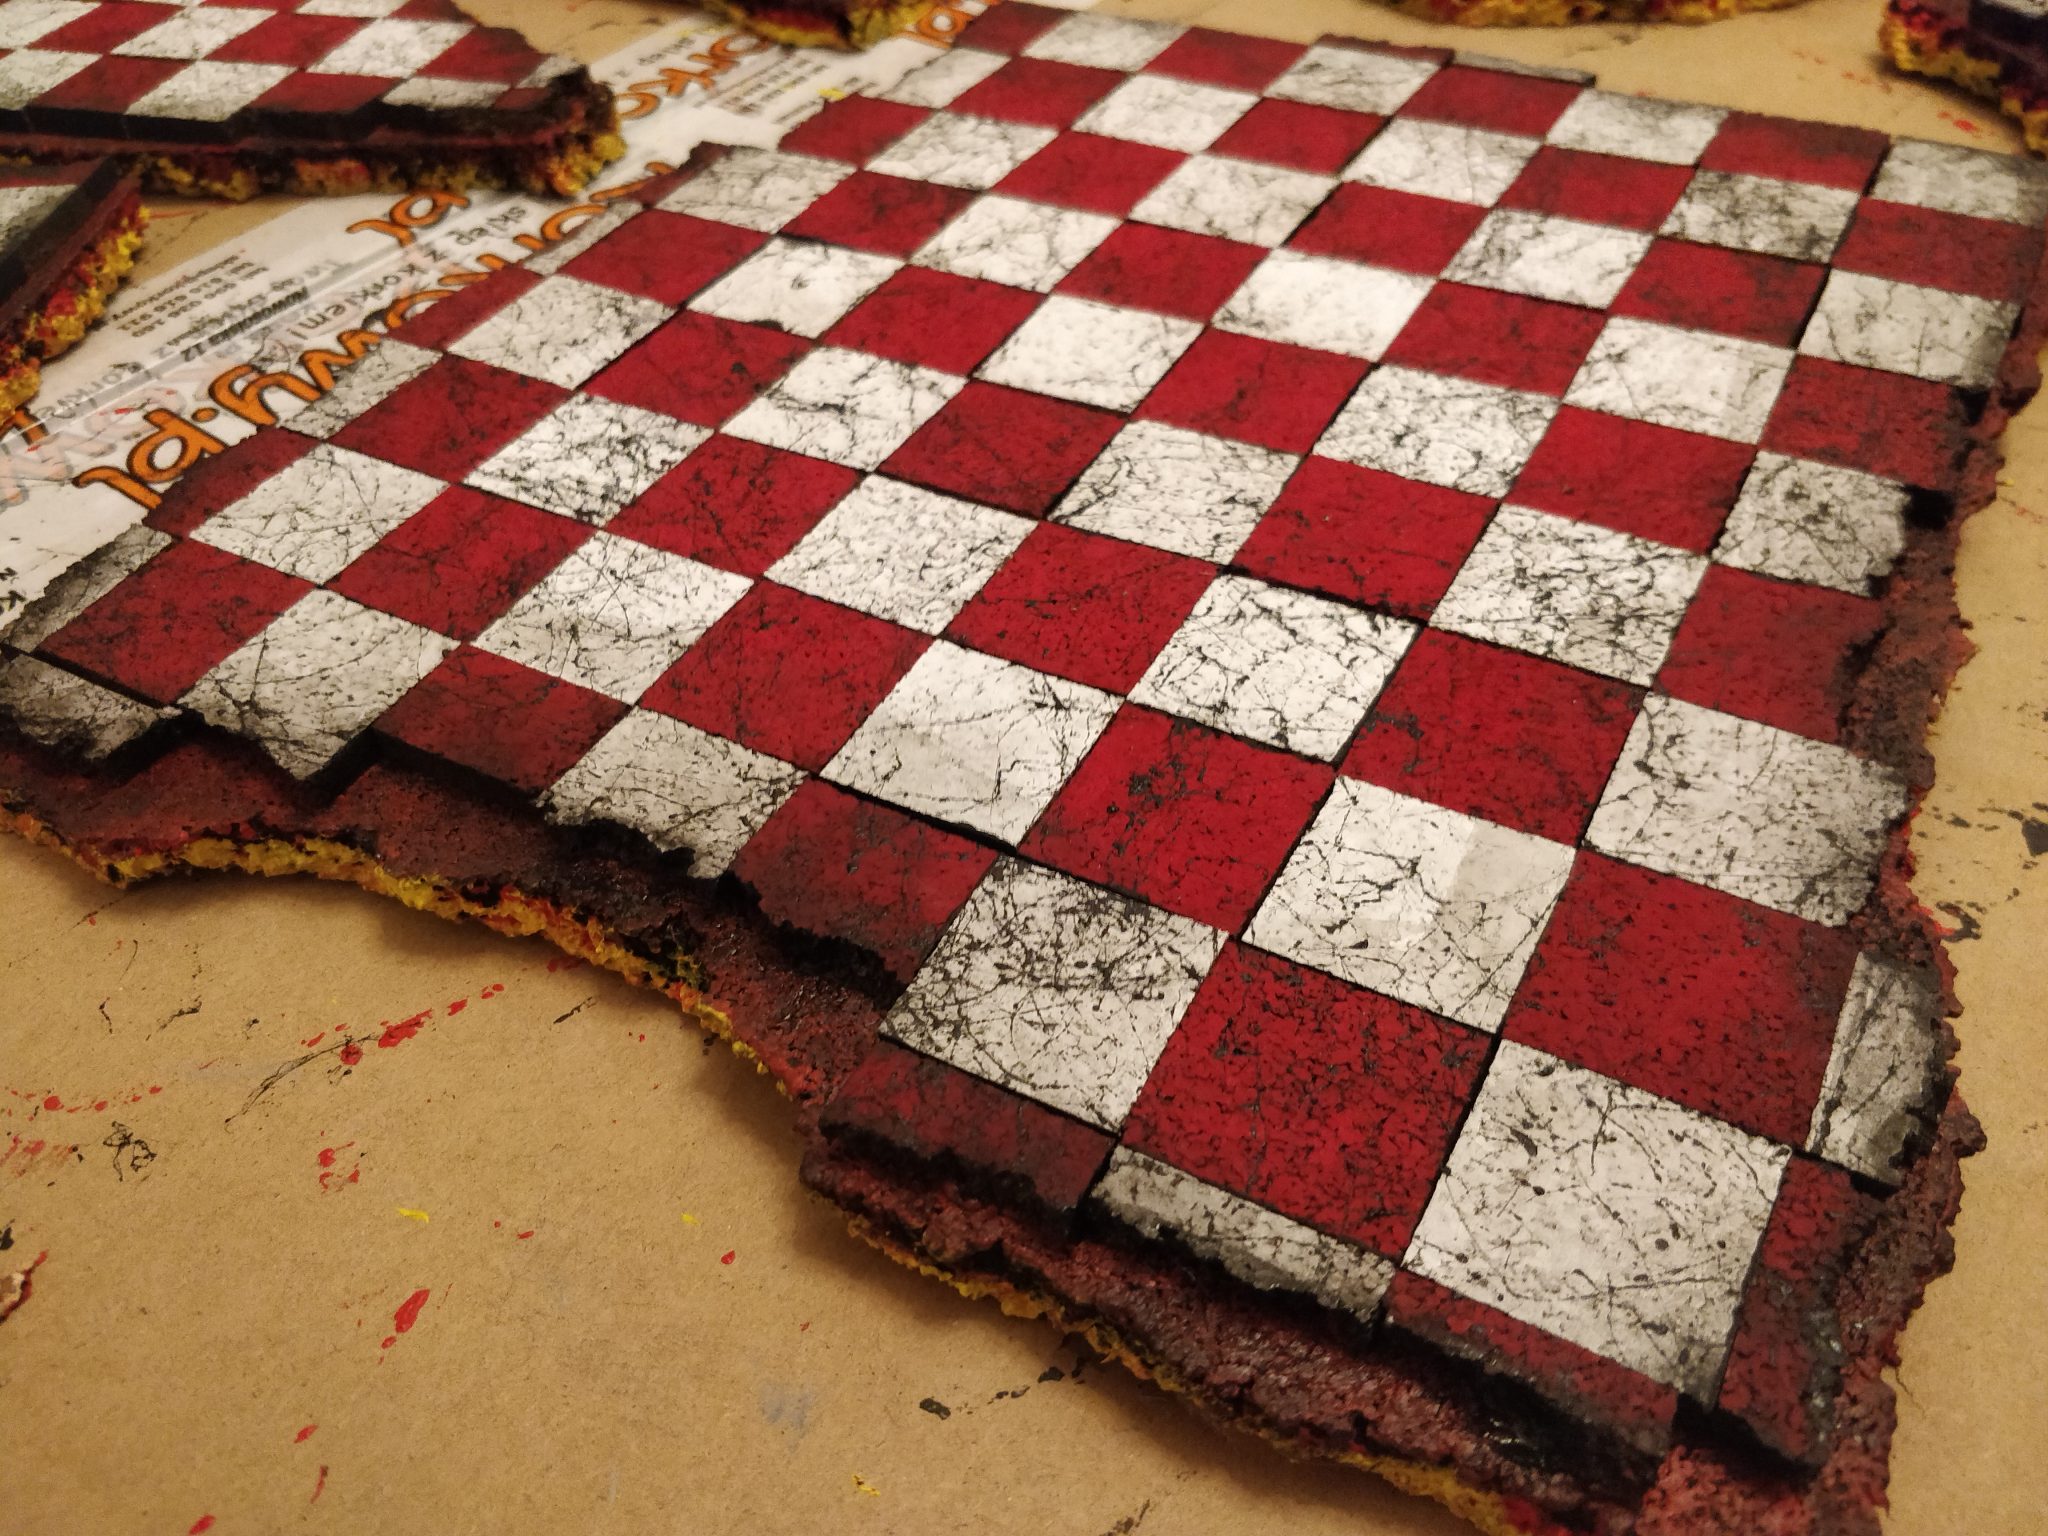
So I decided to make a second tile set, but using the marble spray I recently found in a shop, to create marble tiles.
This turned out to be a longer process, but I simply love the result and I will likely make replacement set for my Posh Ball set.
After the result I will share how I made the tiles, but first, here’s the result!
Finished result
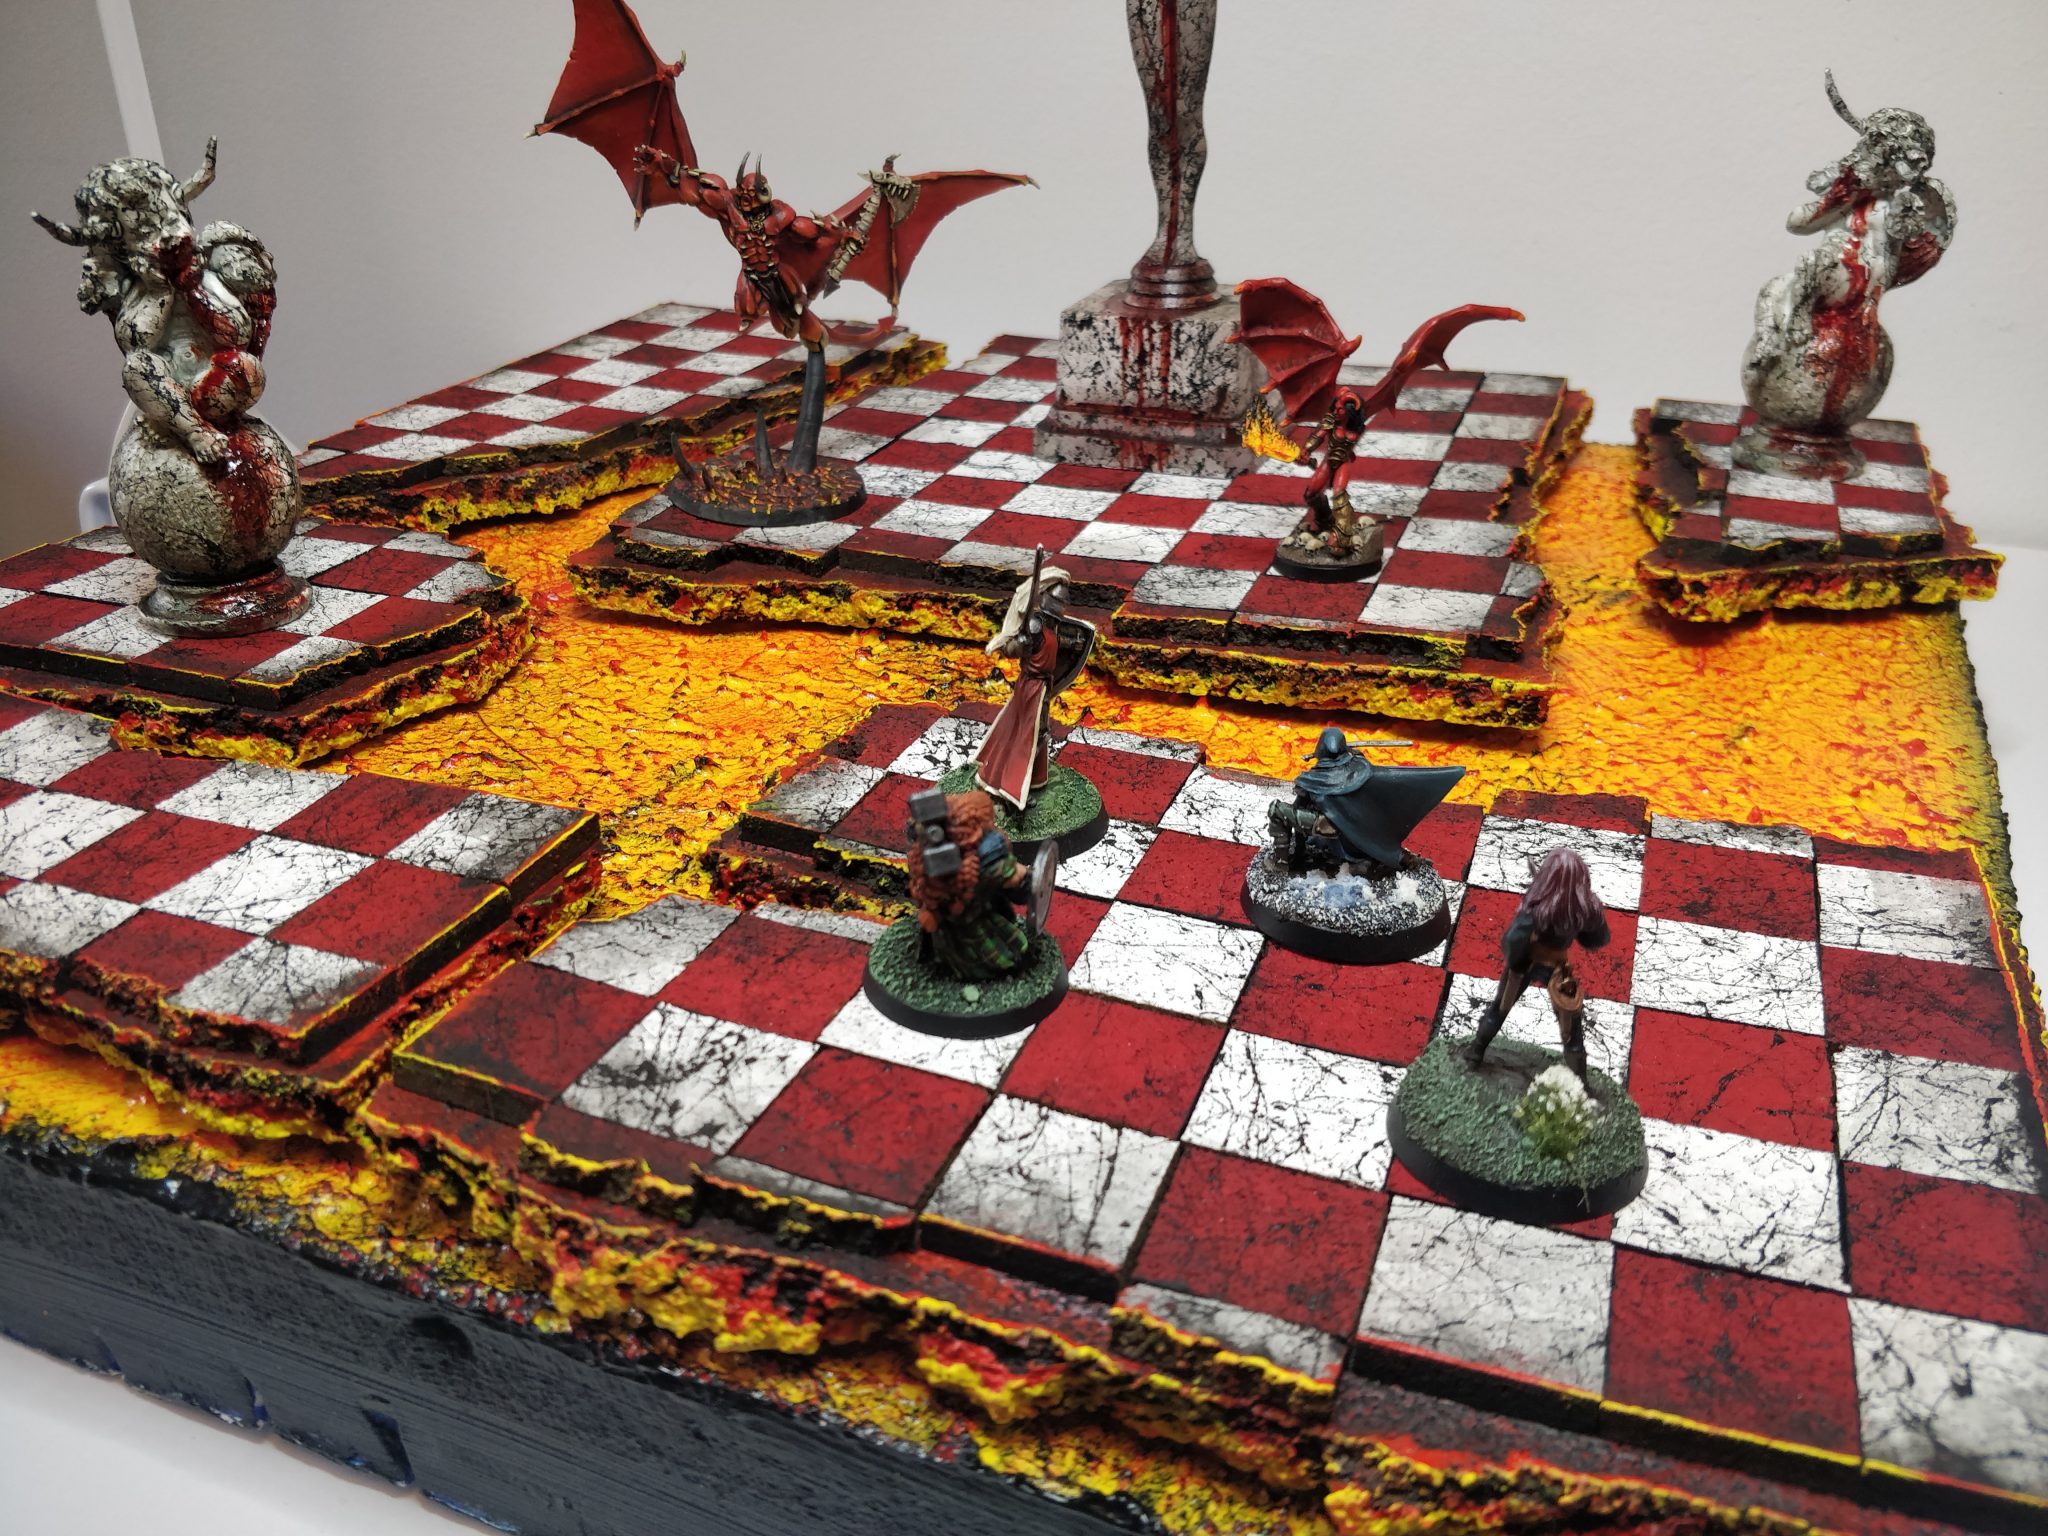
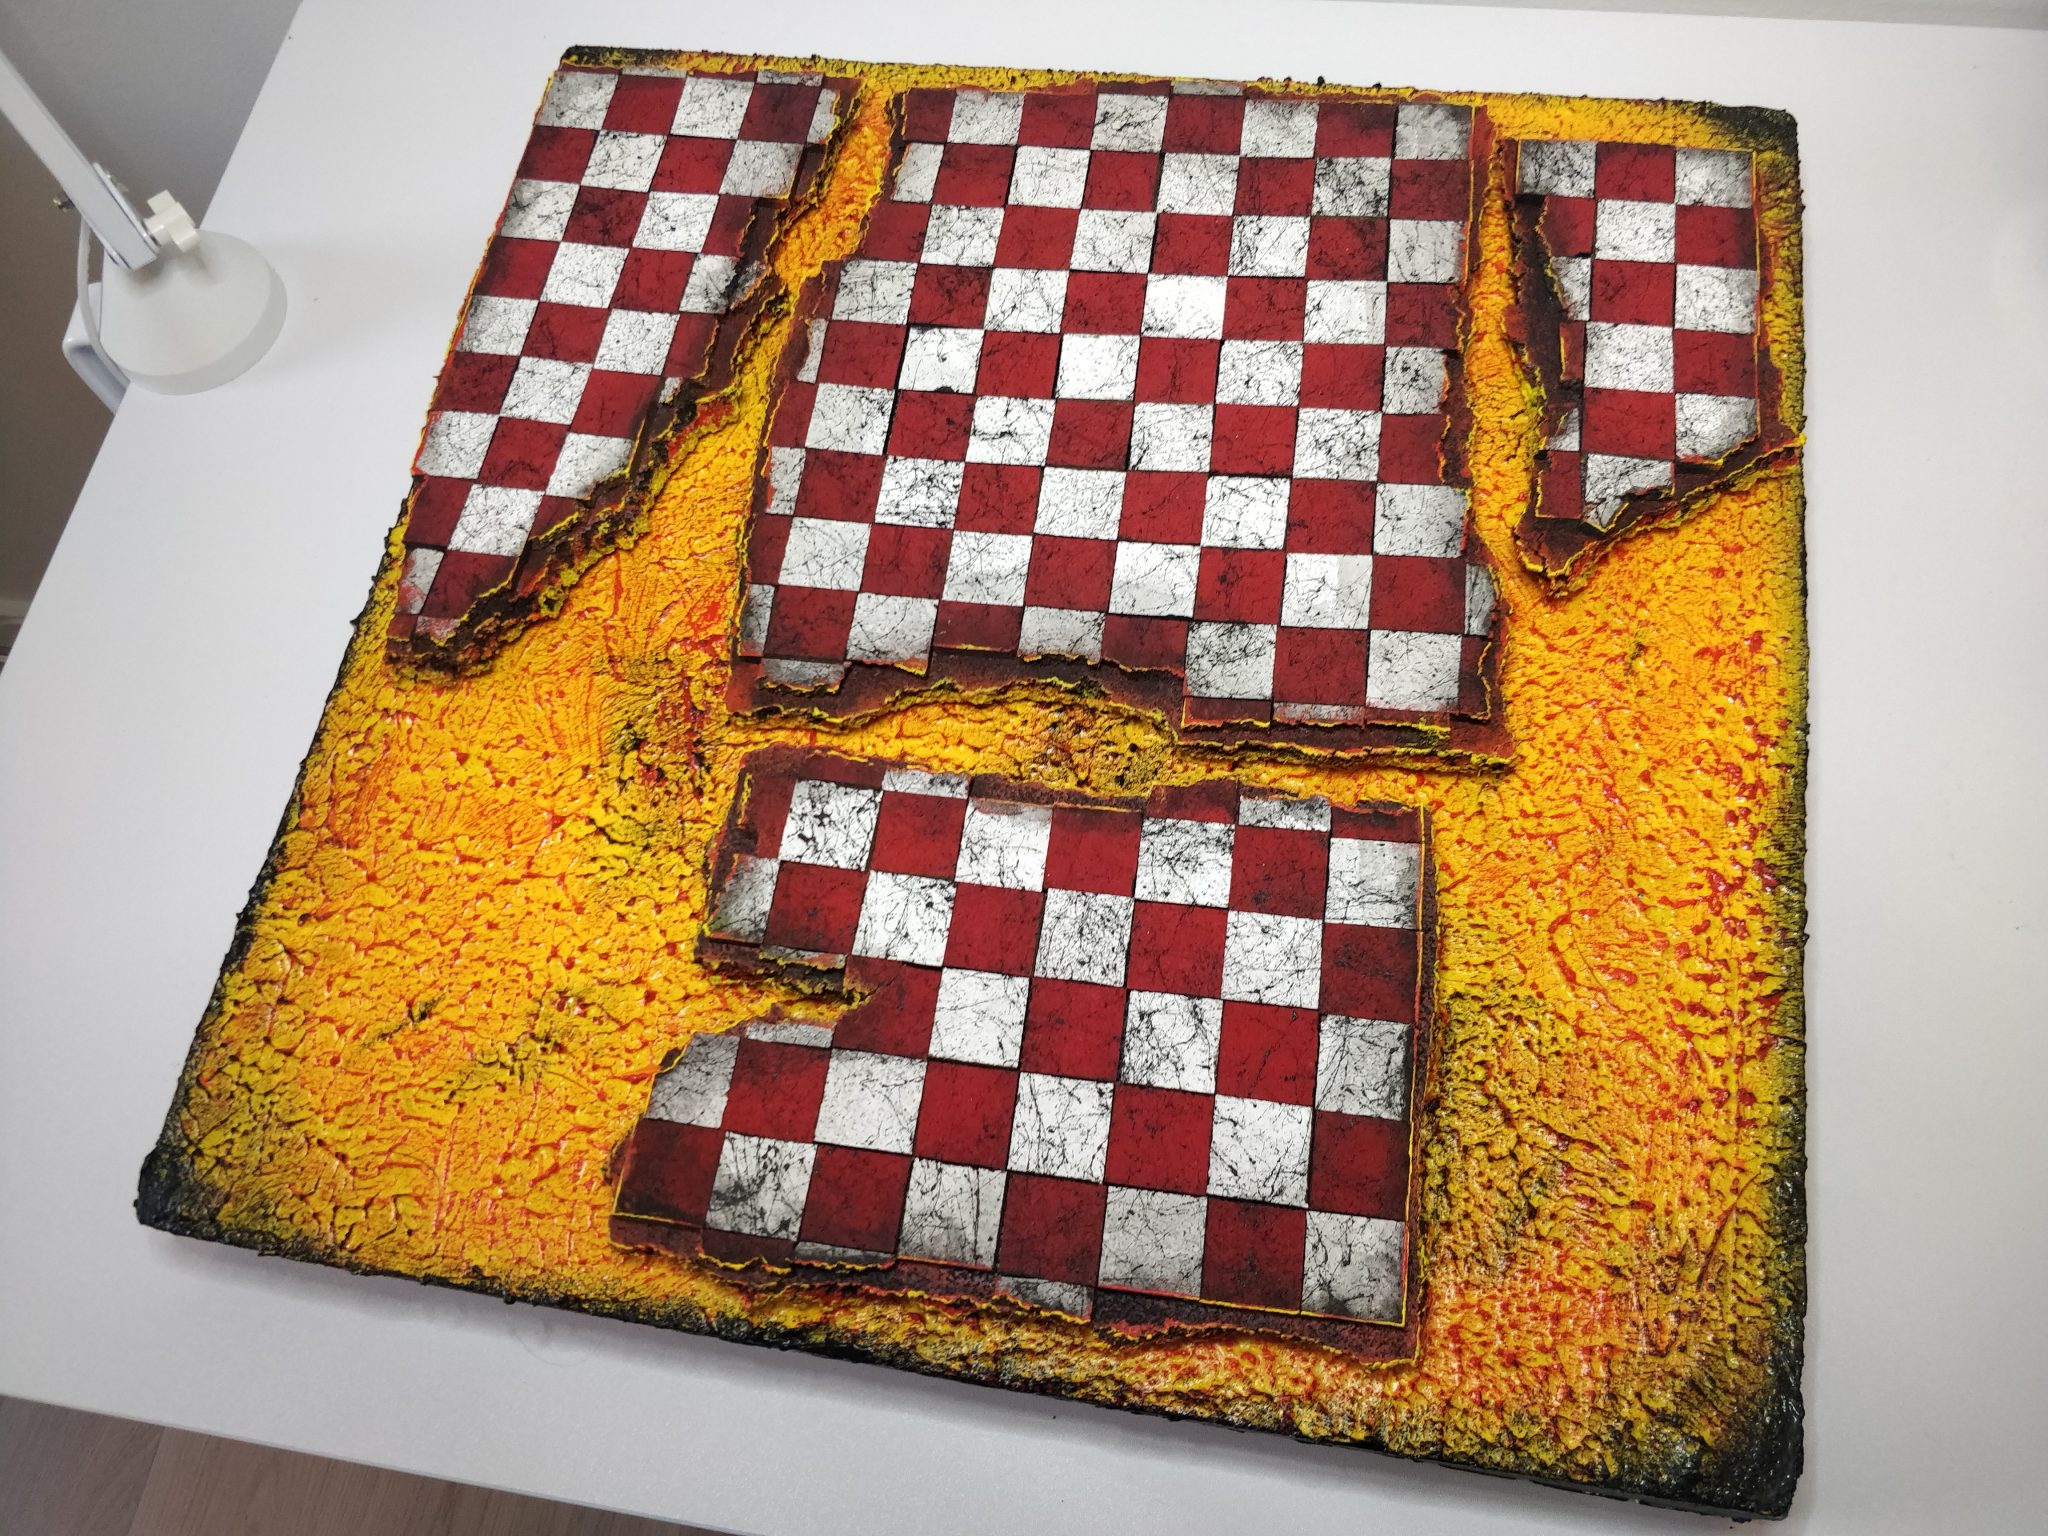
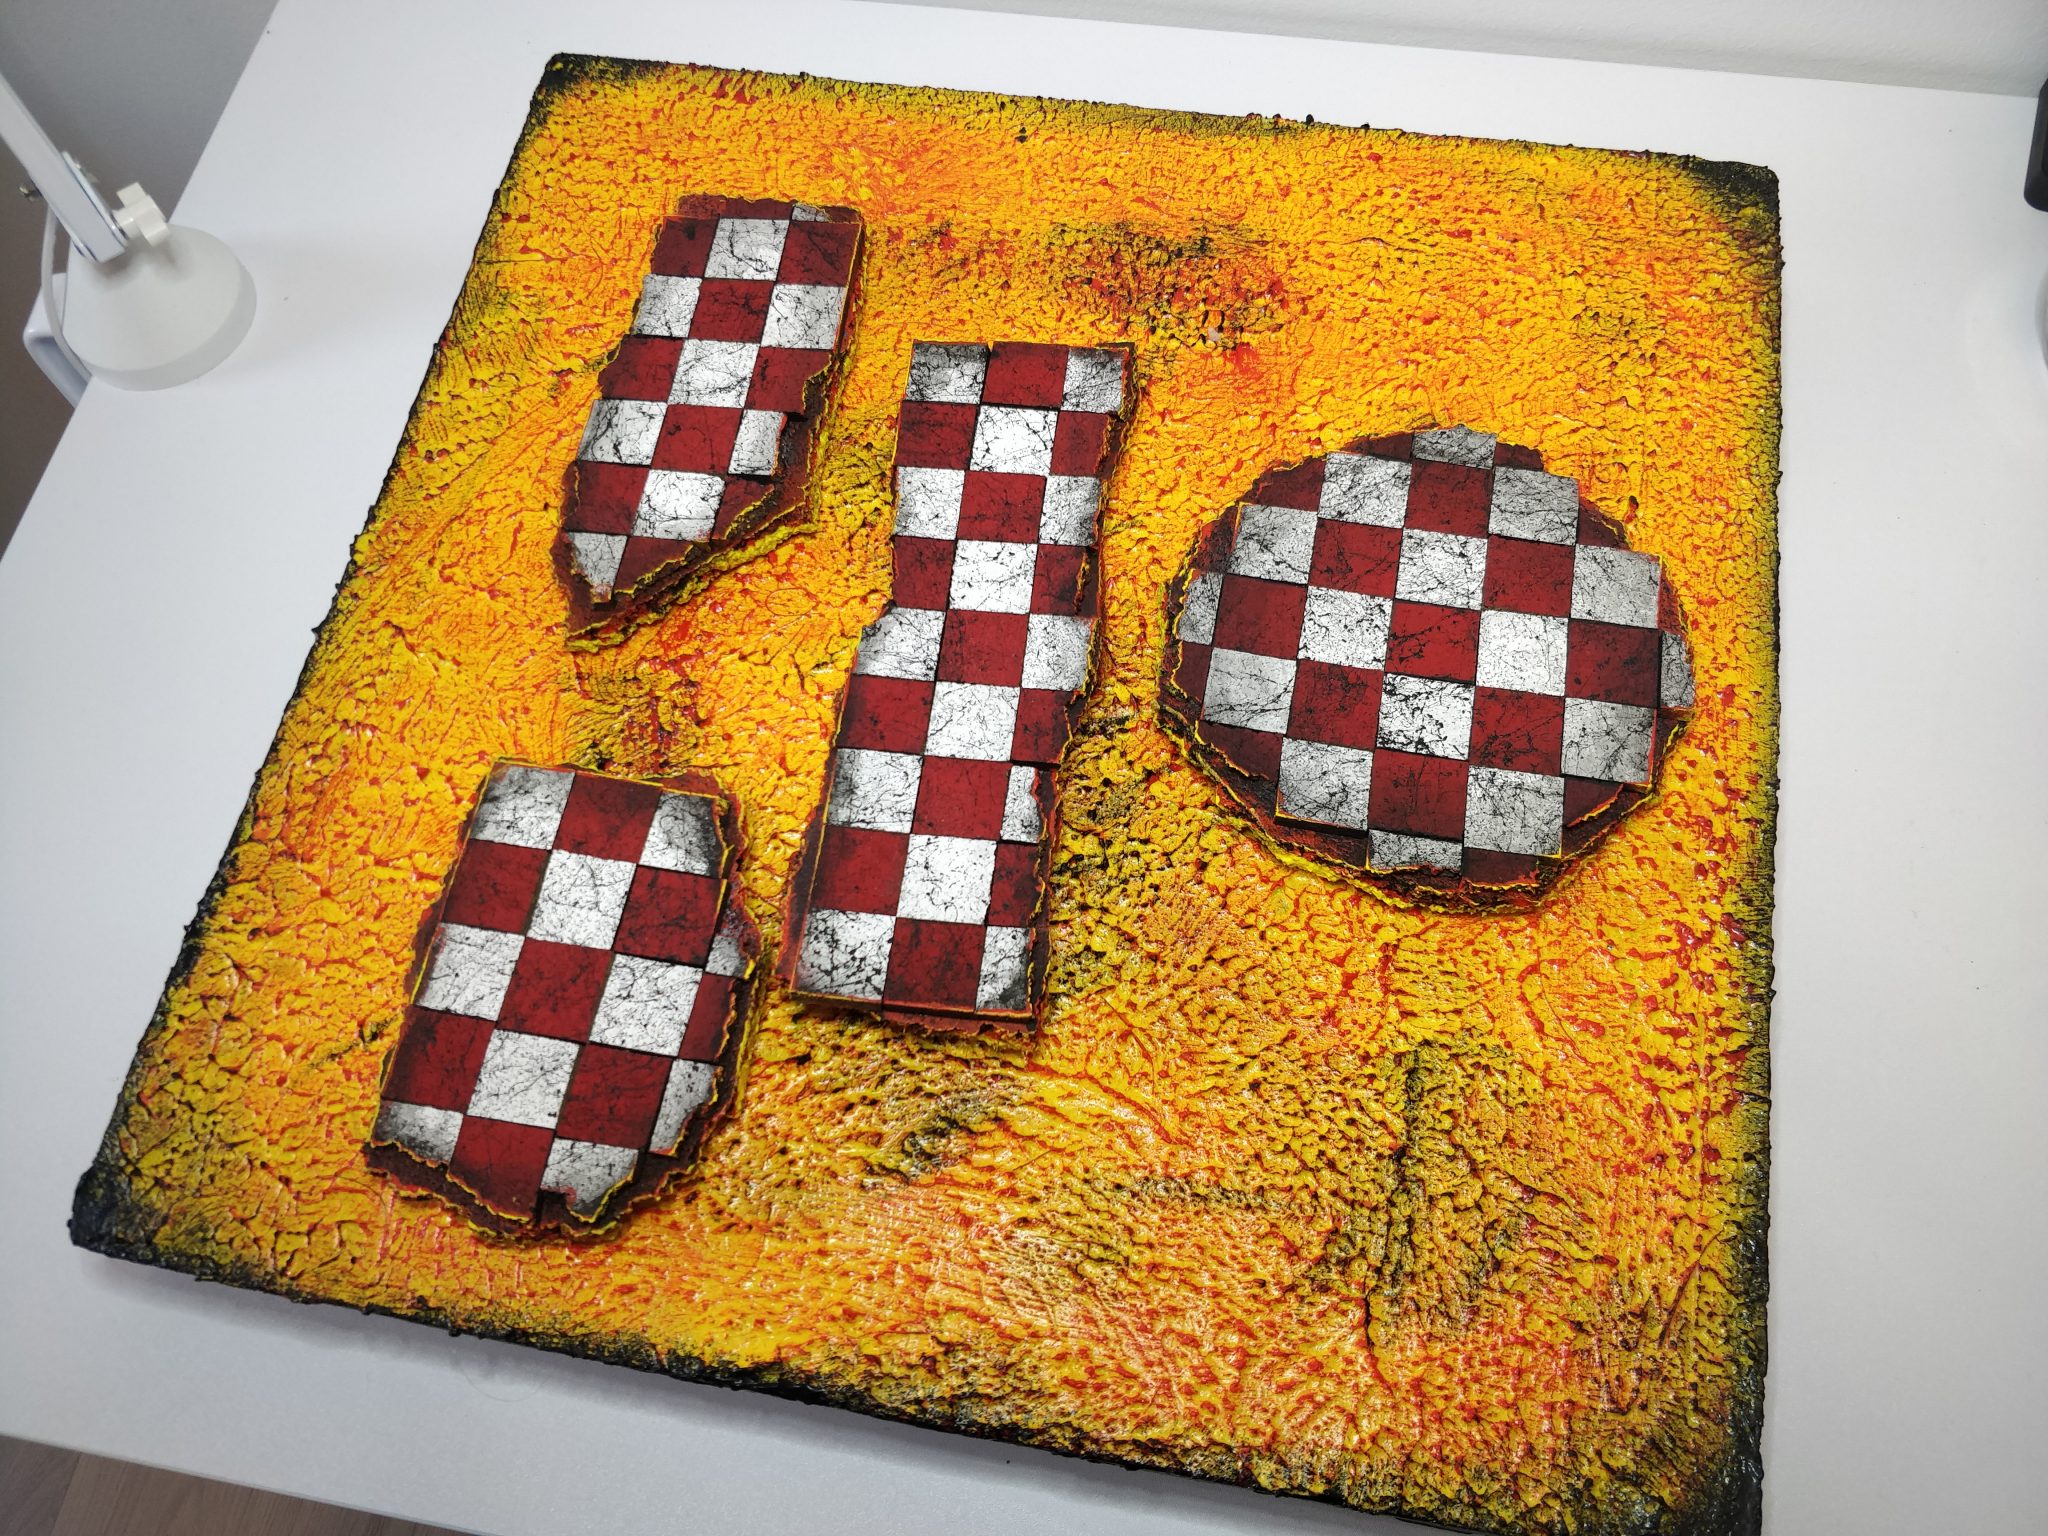
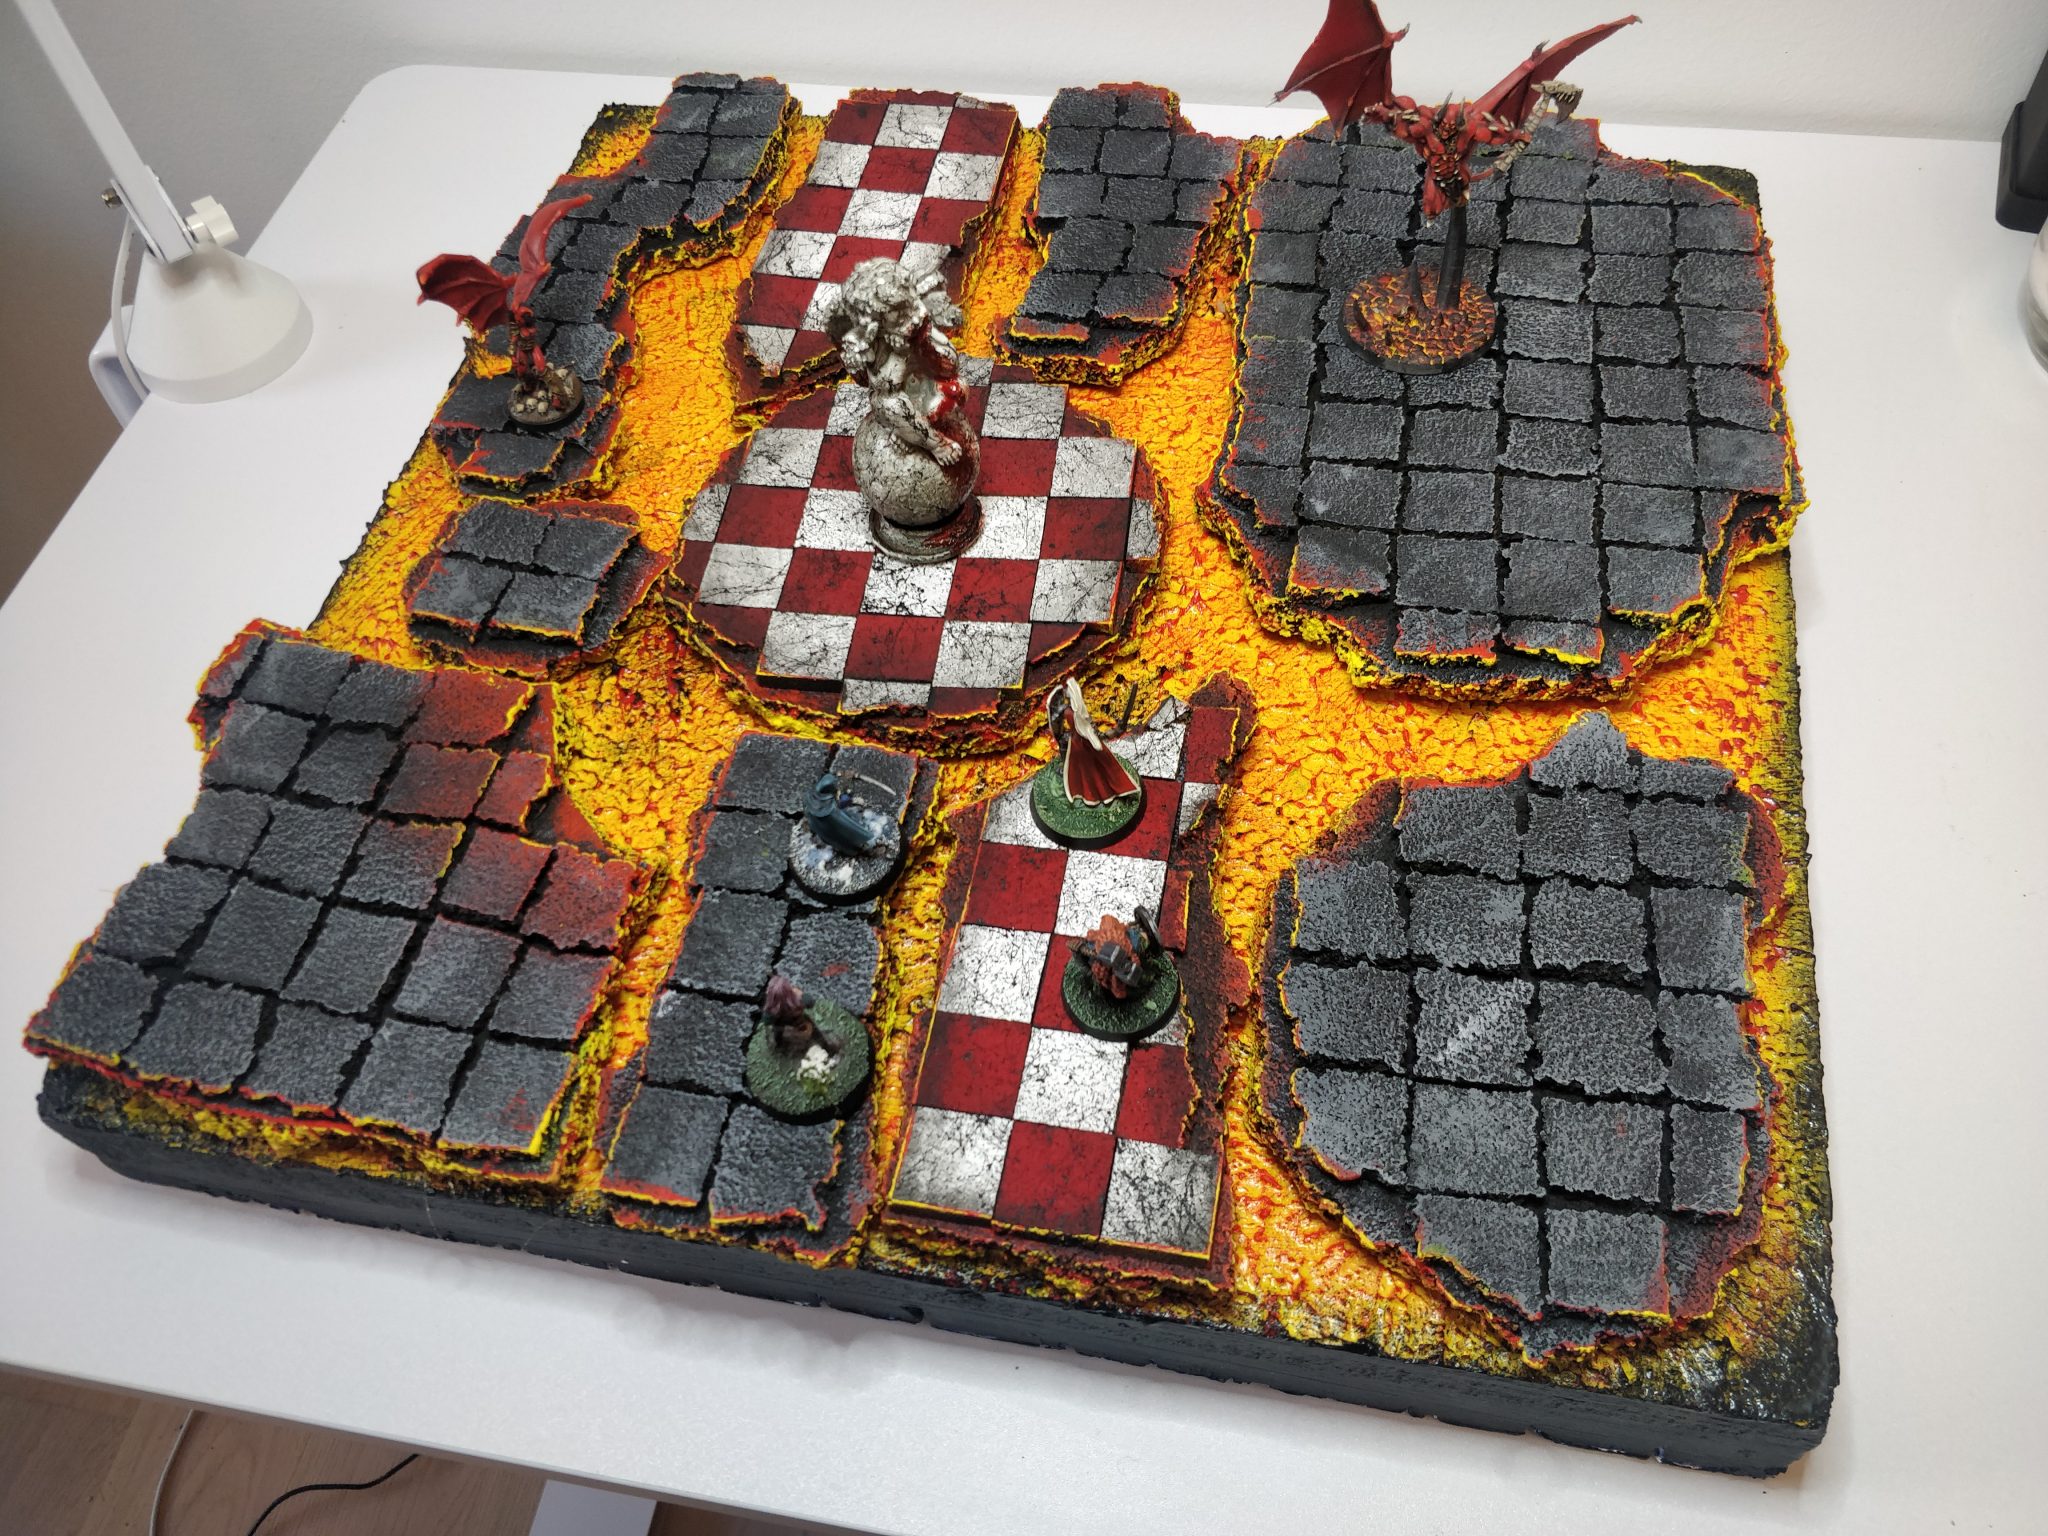
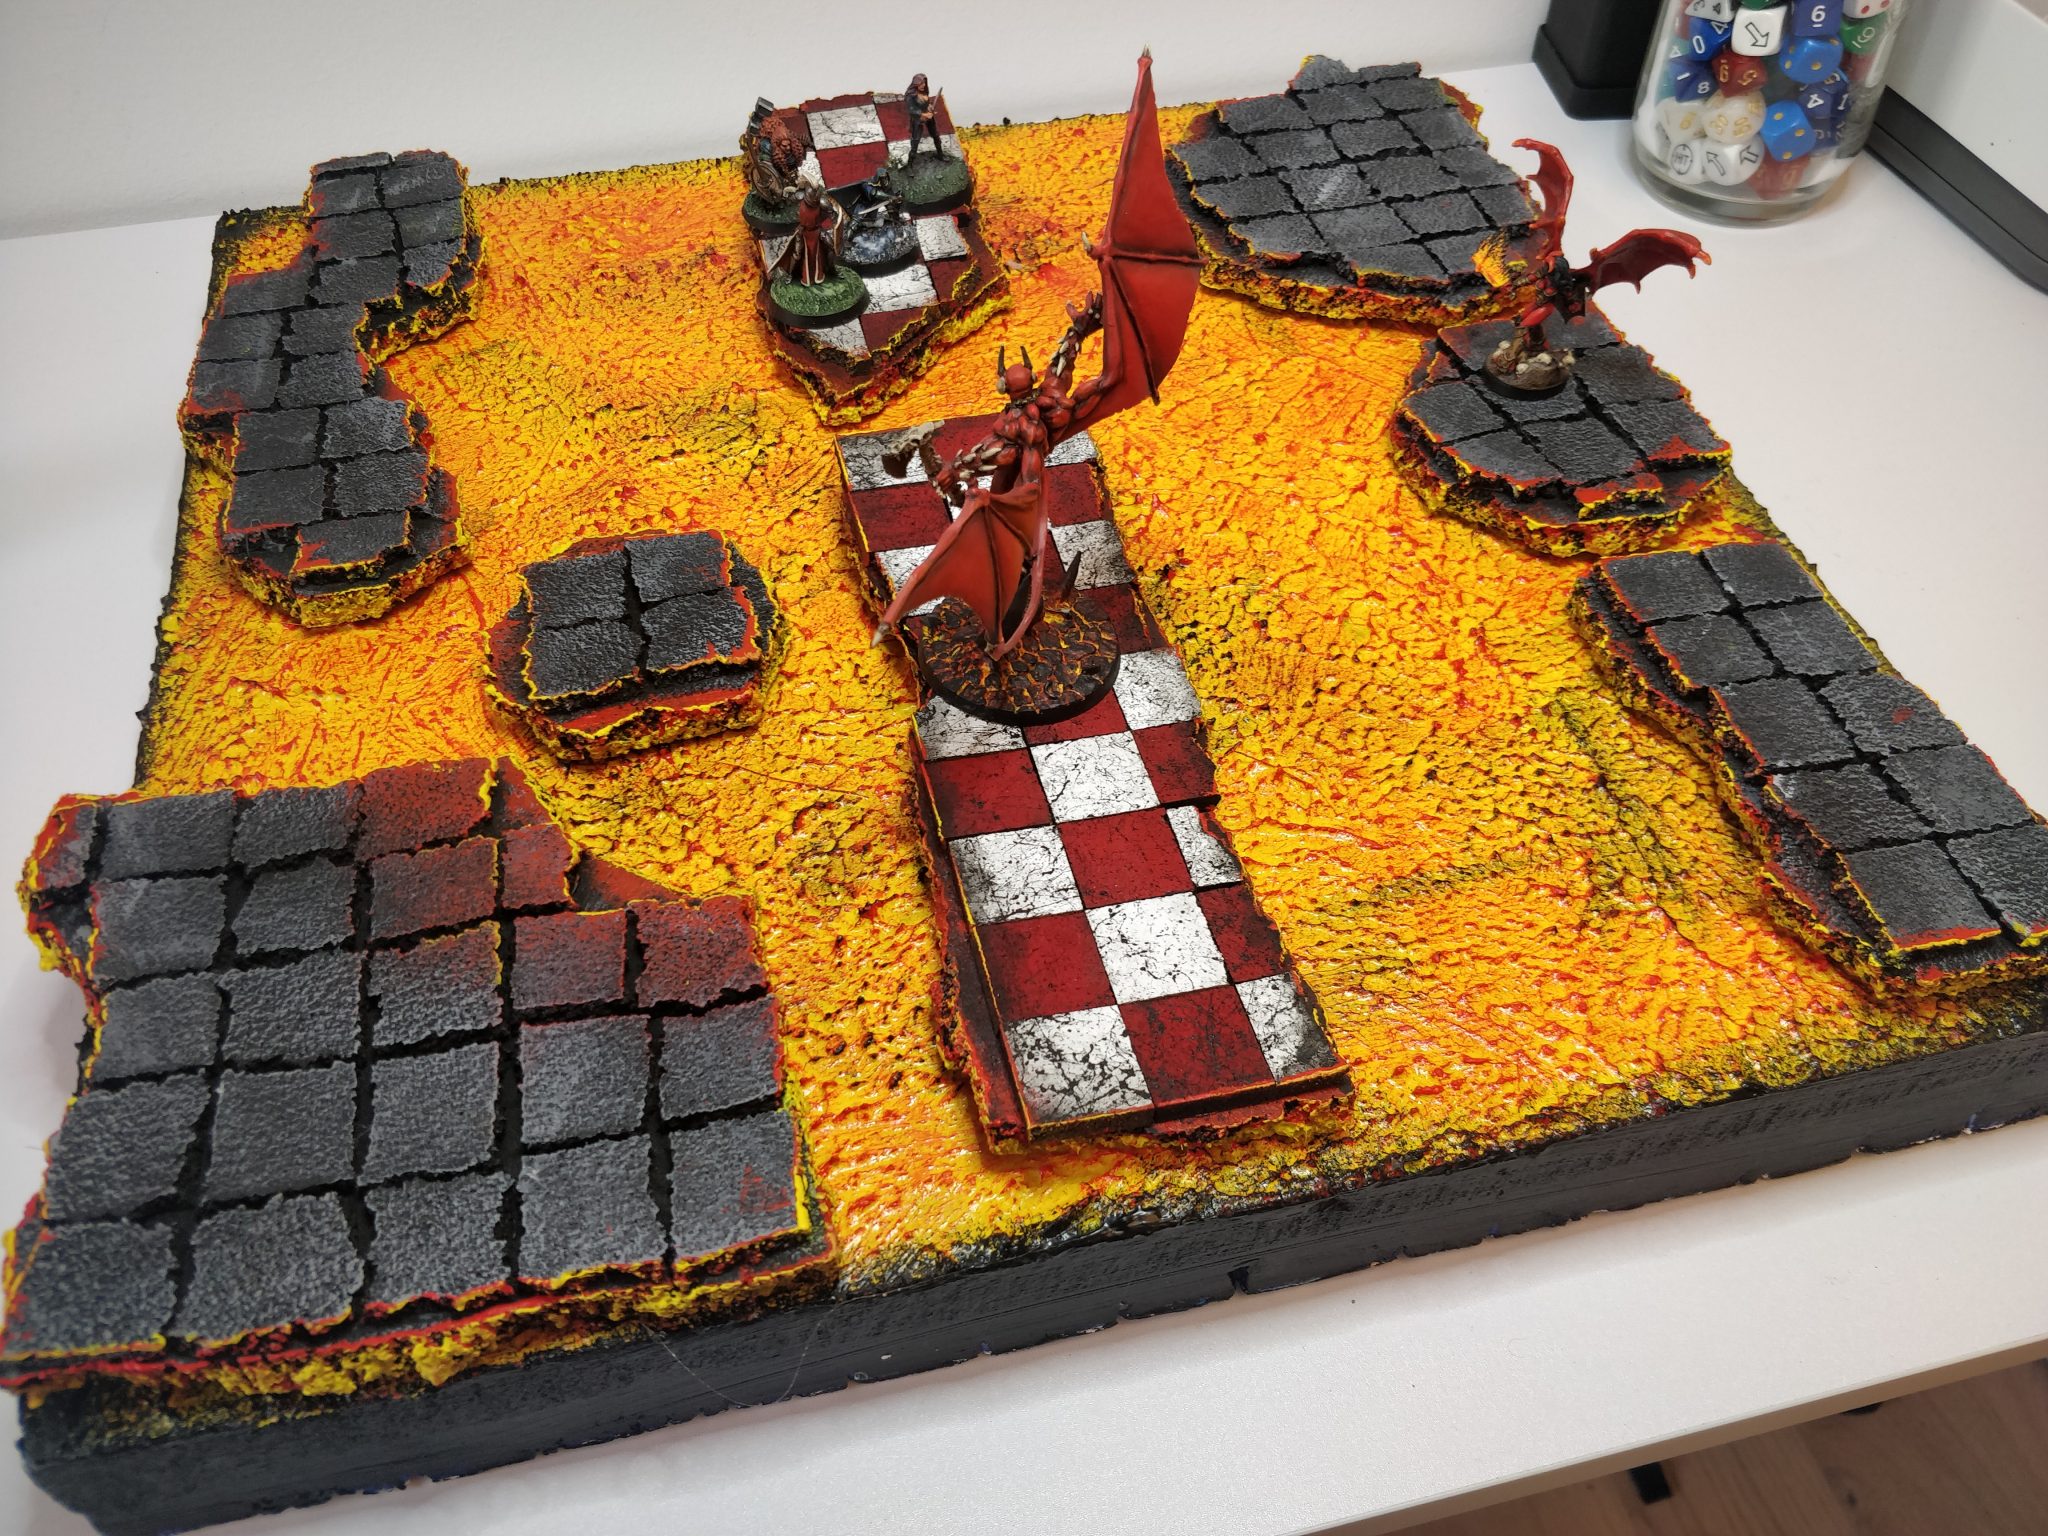
Tiles mixed with the previous tiles
How to make the set
I will not cover how to make the underlaying chunks as they follow the same formula as the previous set.
1. Spray
Spray thin (I use 5mm) cork boards with the two colours you want the tiles to be in. For this I used white and red and sprayed with a marble spray from Panduro.
If I were to do a white and black set I would have bought a white marble spray too.
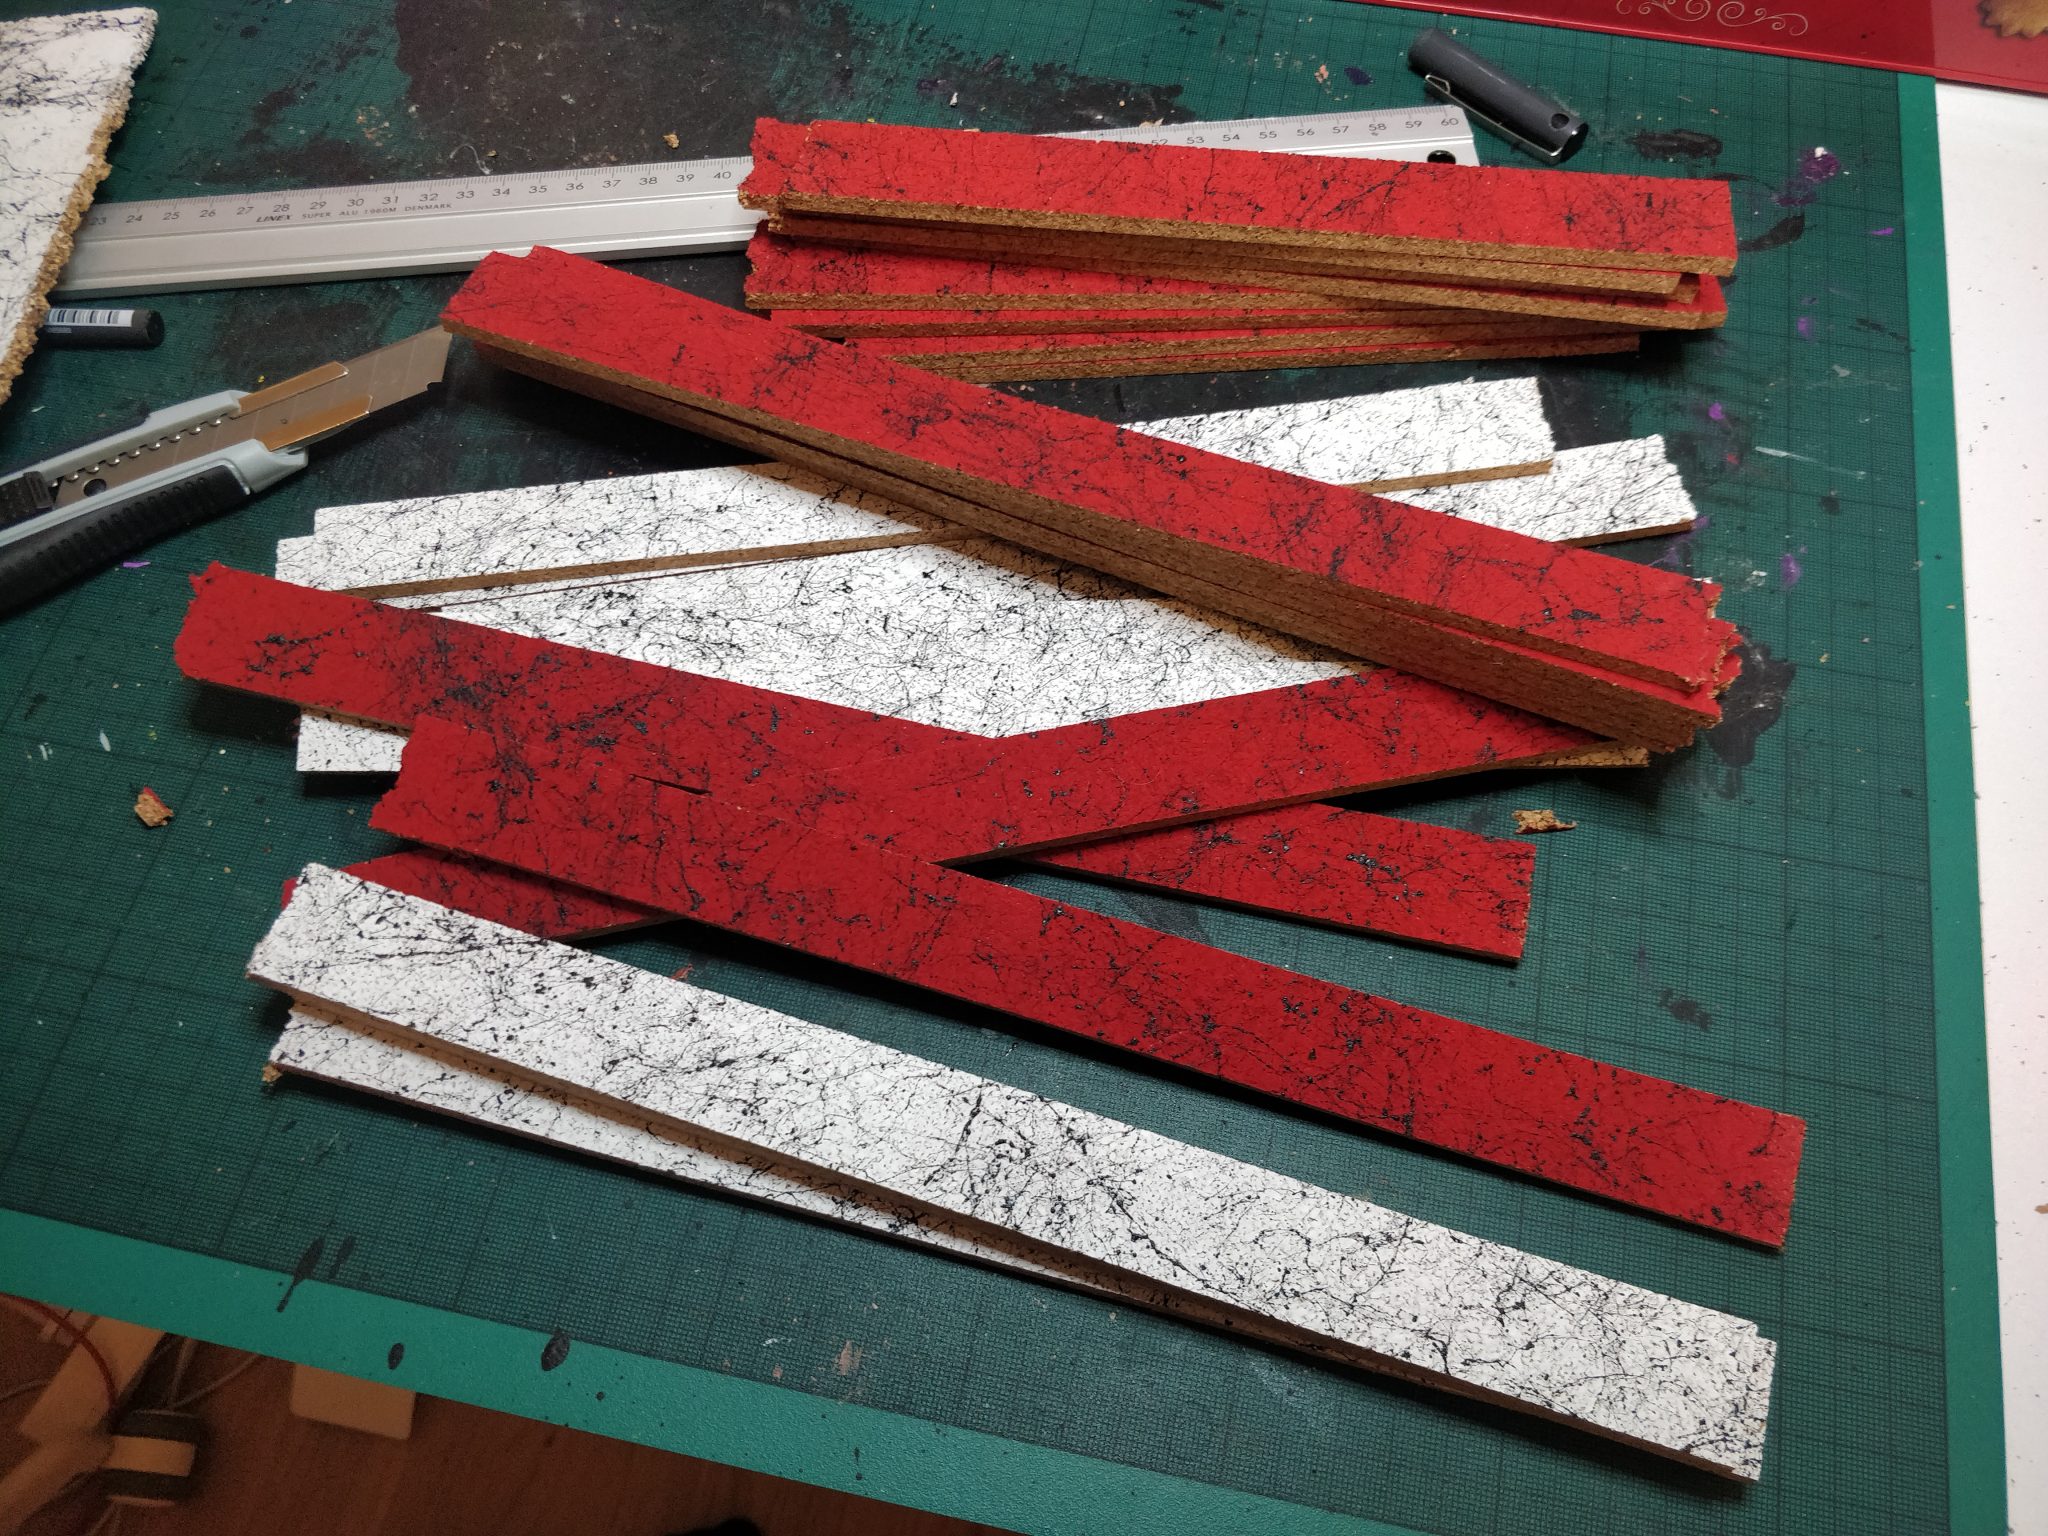
2. Draw grid
Take your time with this part as the more accurate you are, the better the tiles will fit.

3. Cut into strips
4. Paint edges black
The idea I had was I wanted all four sides of each tile to be painted black so to speed up the process, I painted the sides of the strips before cutting them into tiles.
In the end I didn’t paint each tile as I realised this wasn’t needed as I inked the whole thing and the cork is good at absorbing paint.
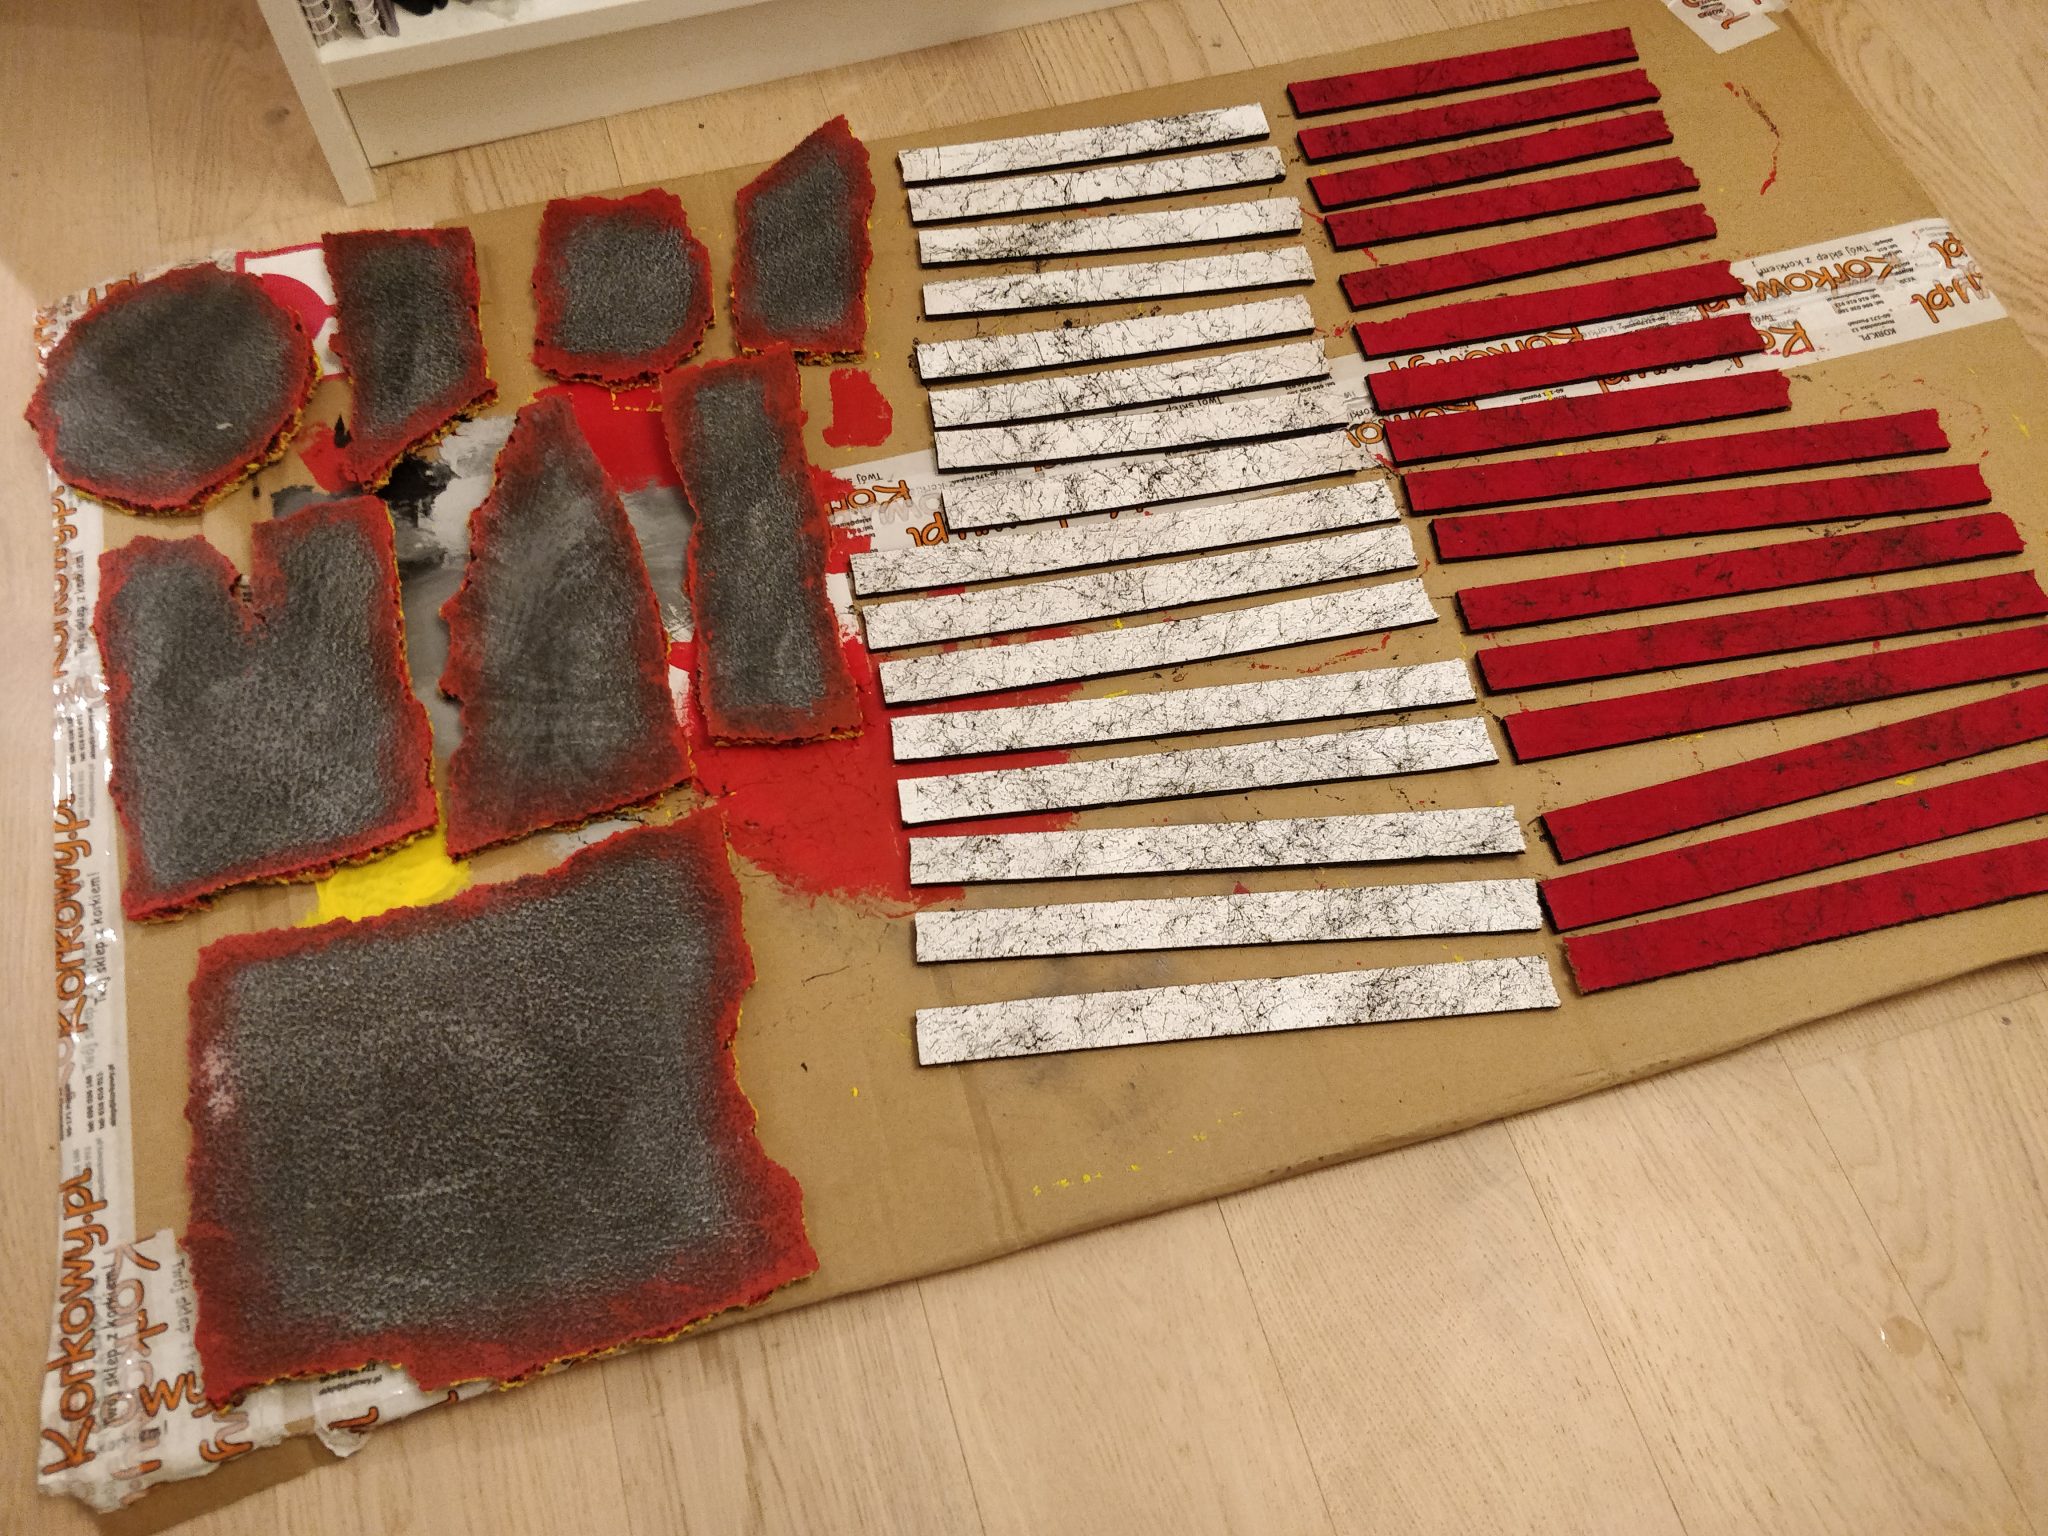
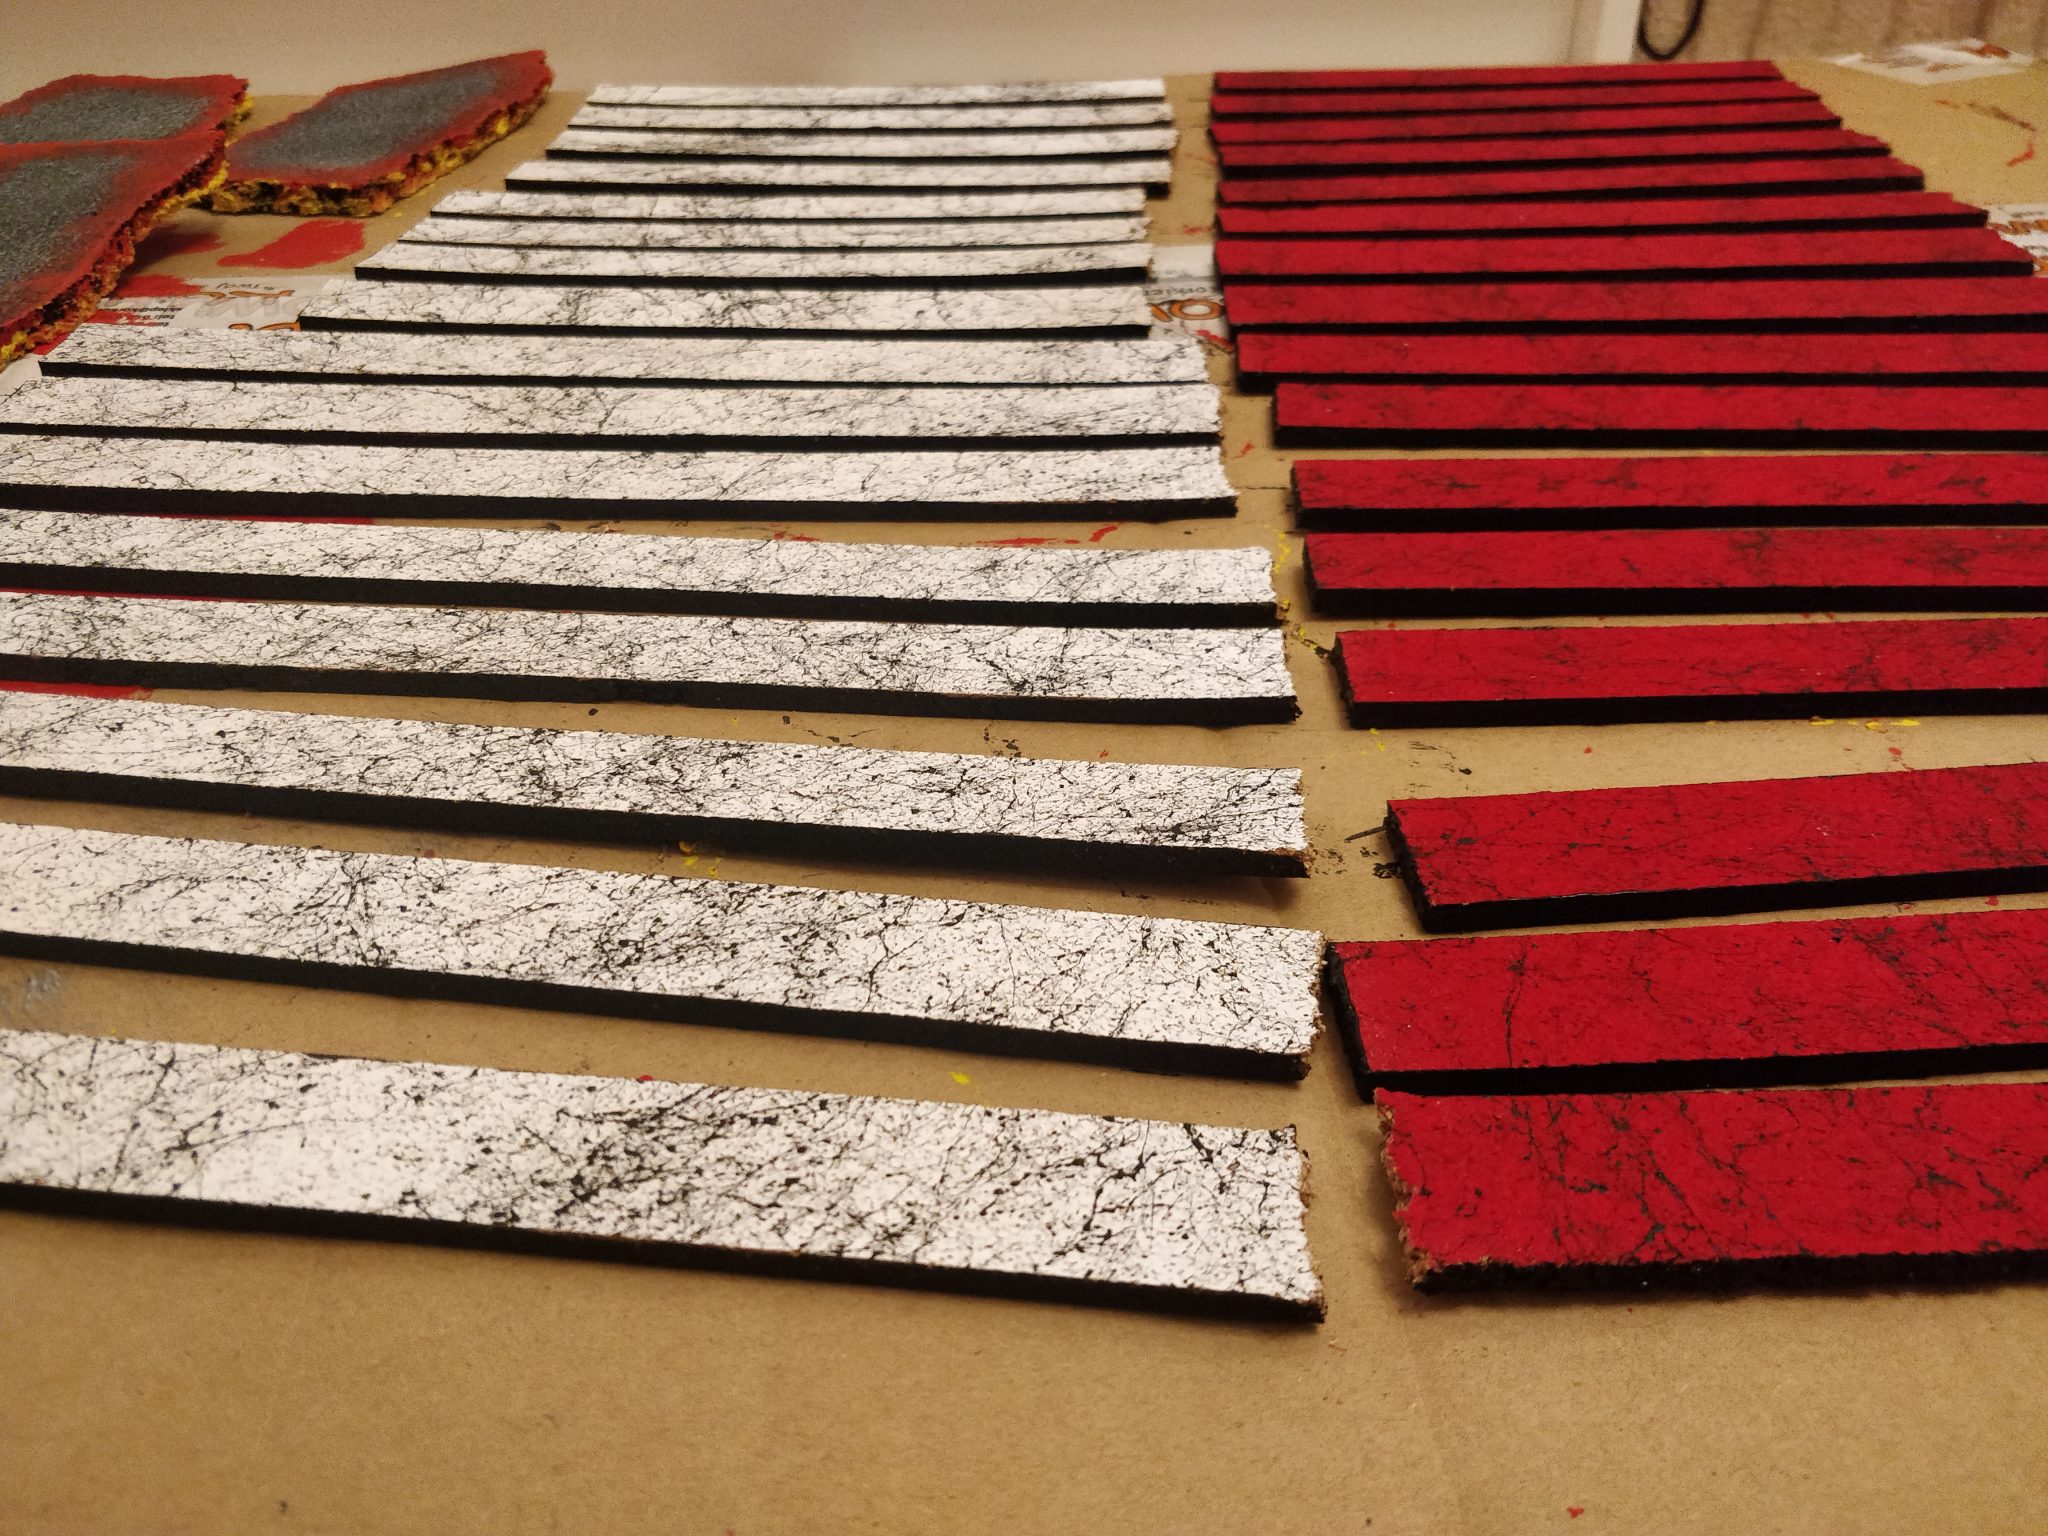
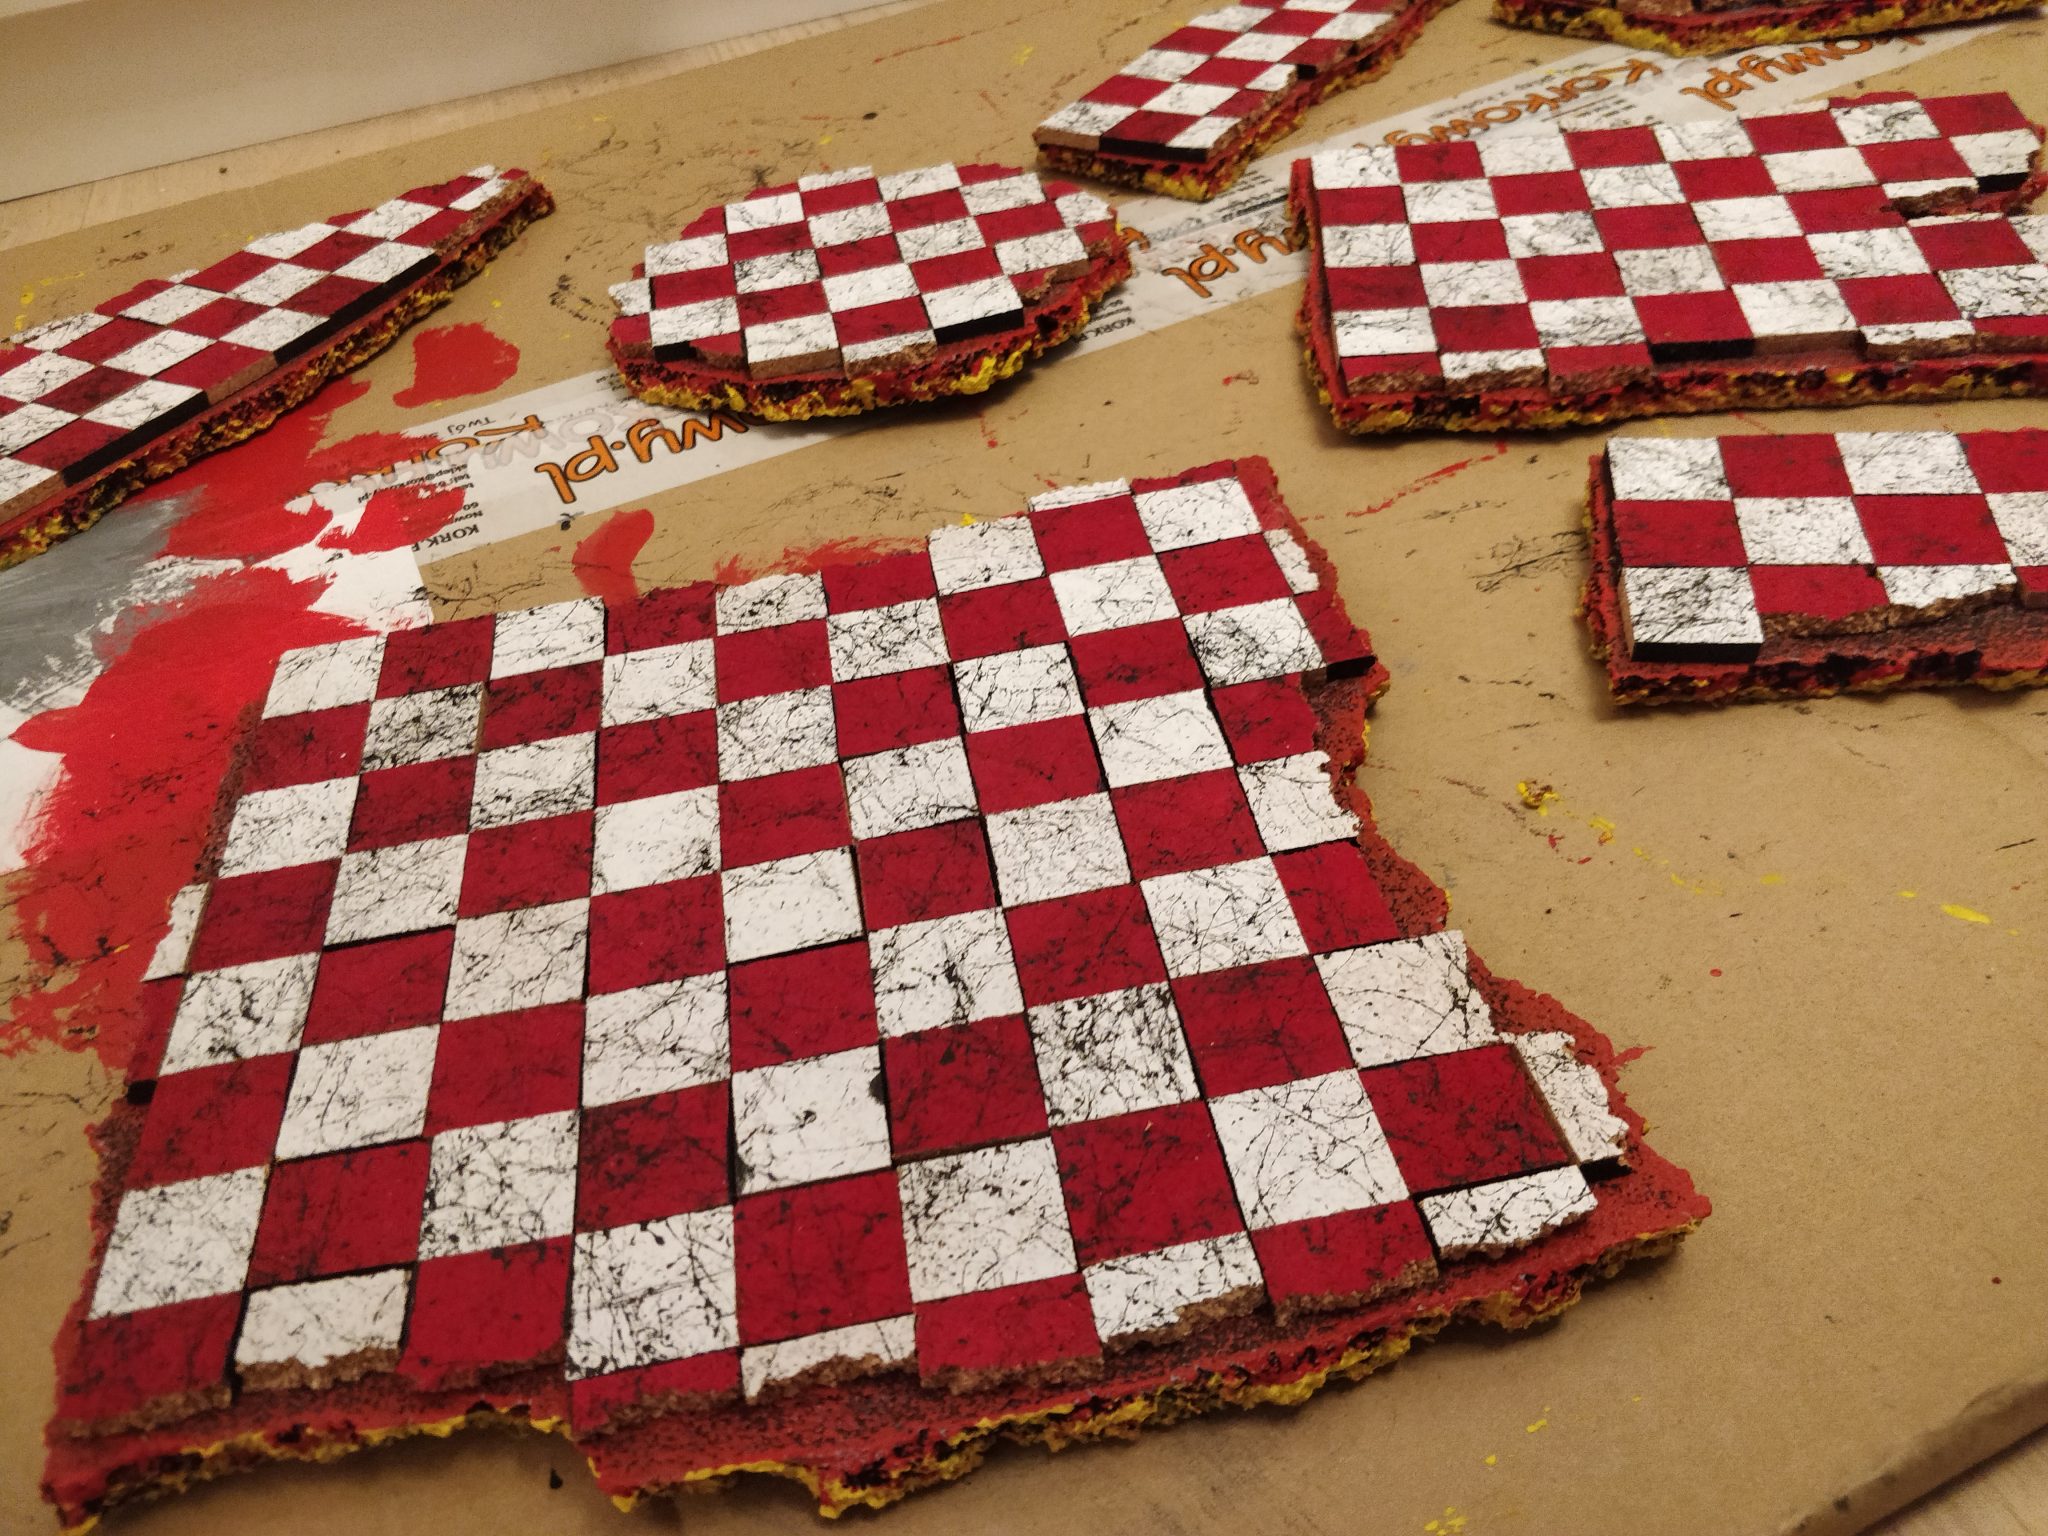
5. Cut tiles
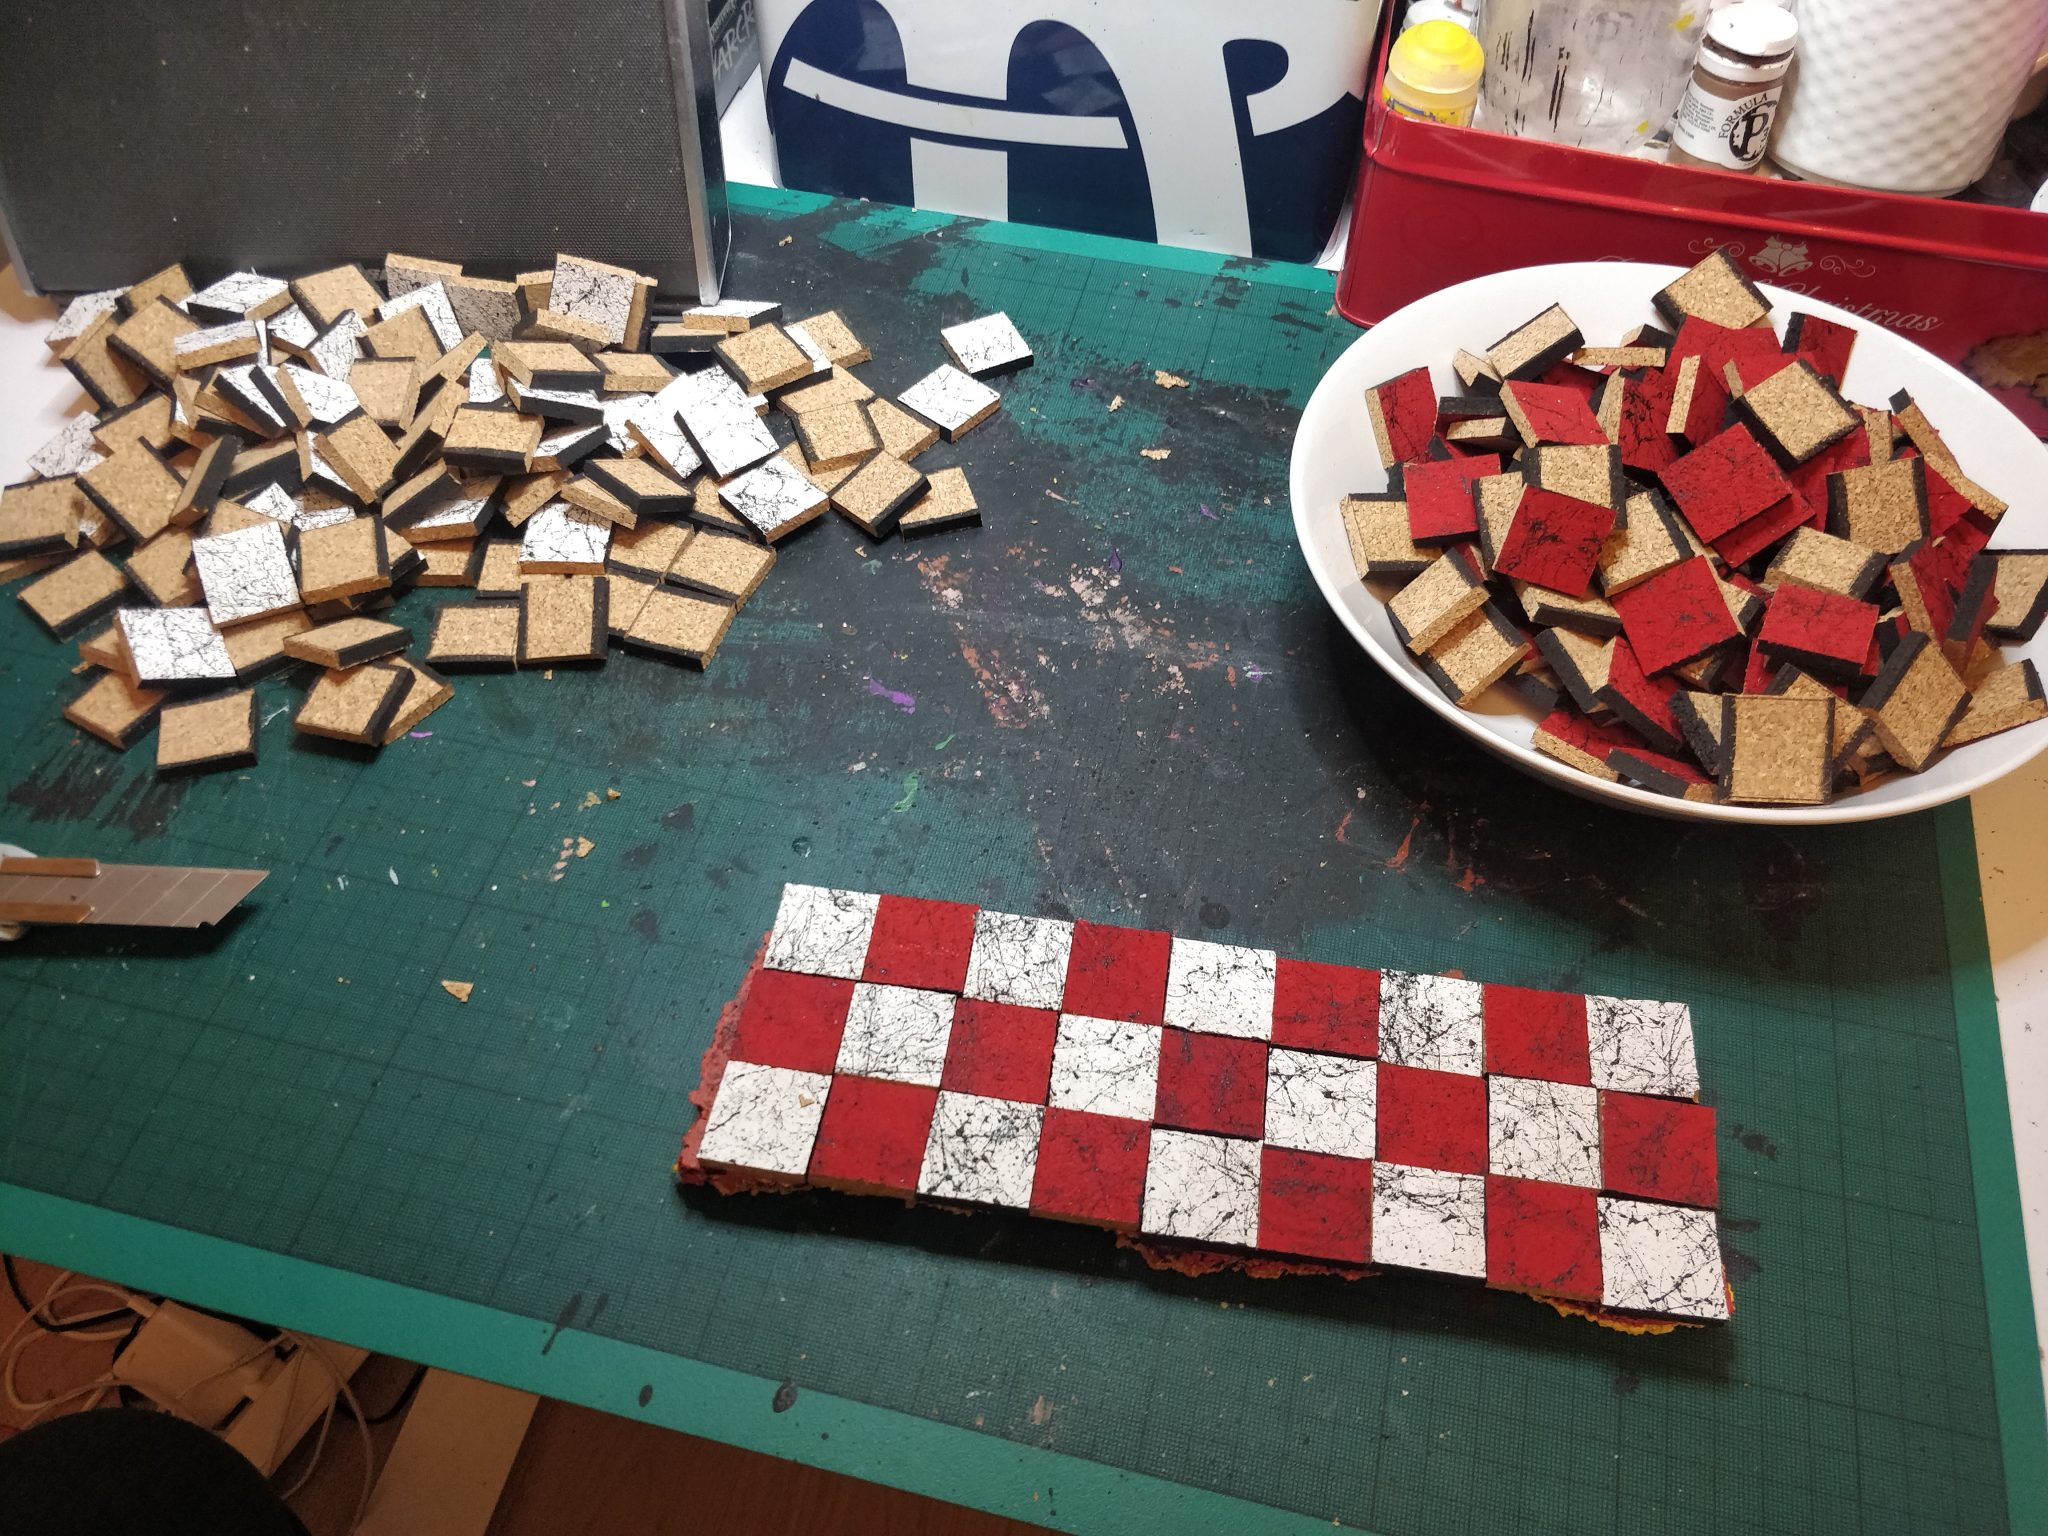
6. Glue tiles on the plates underneath
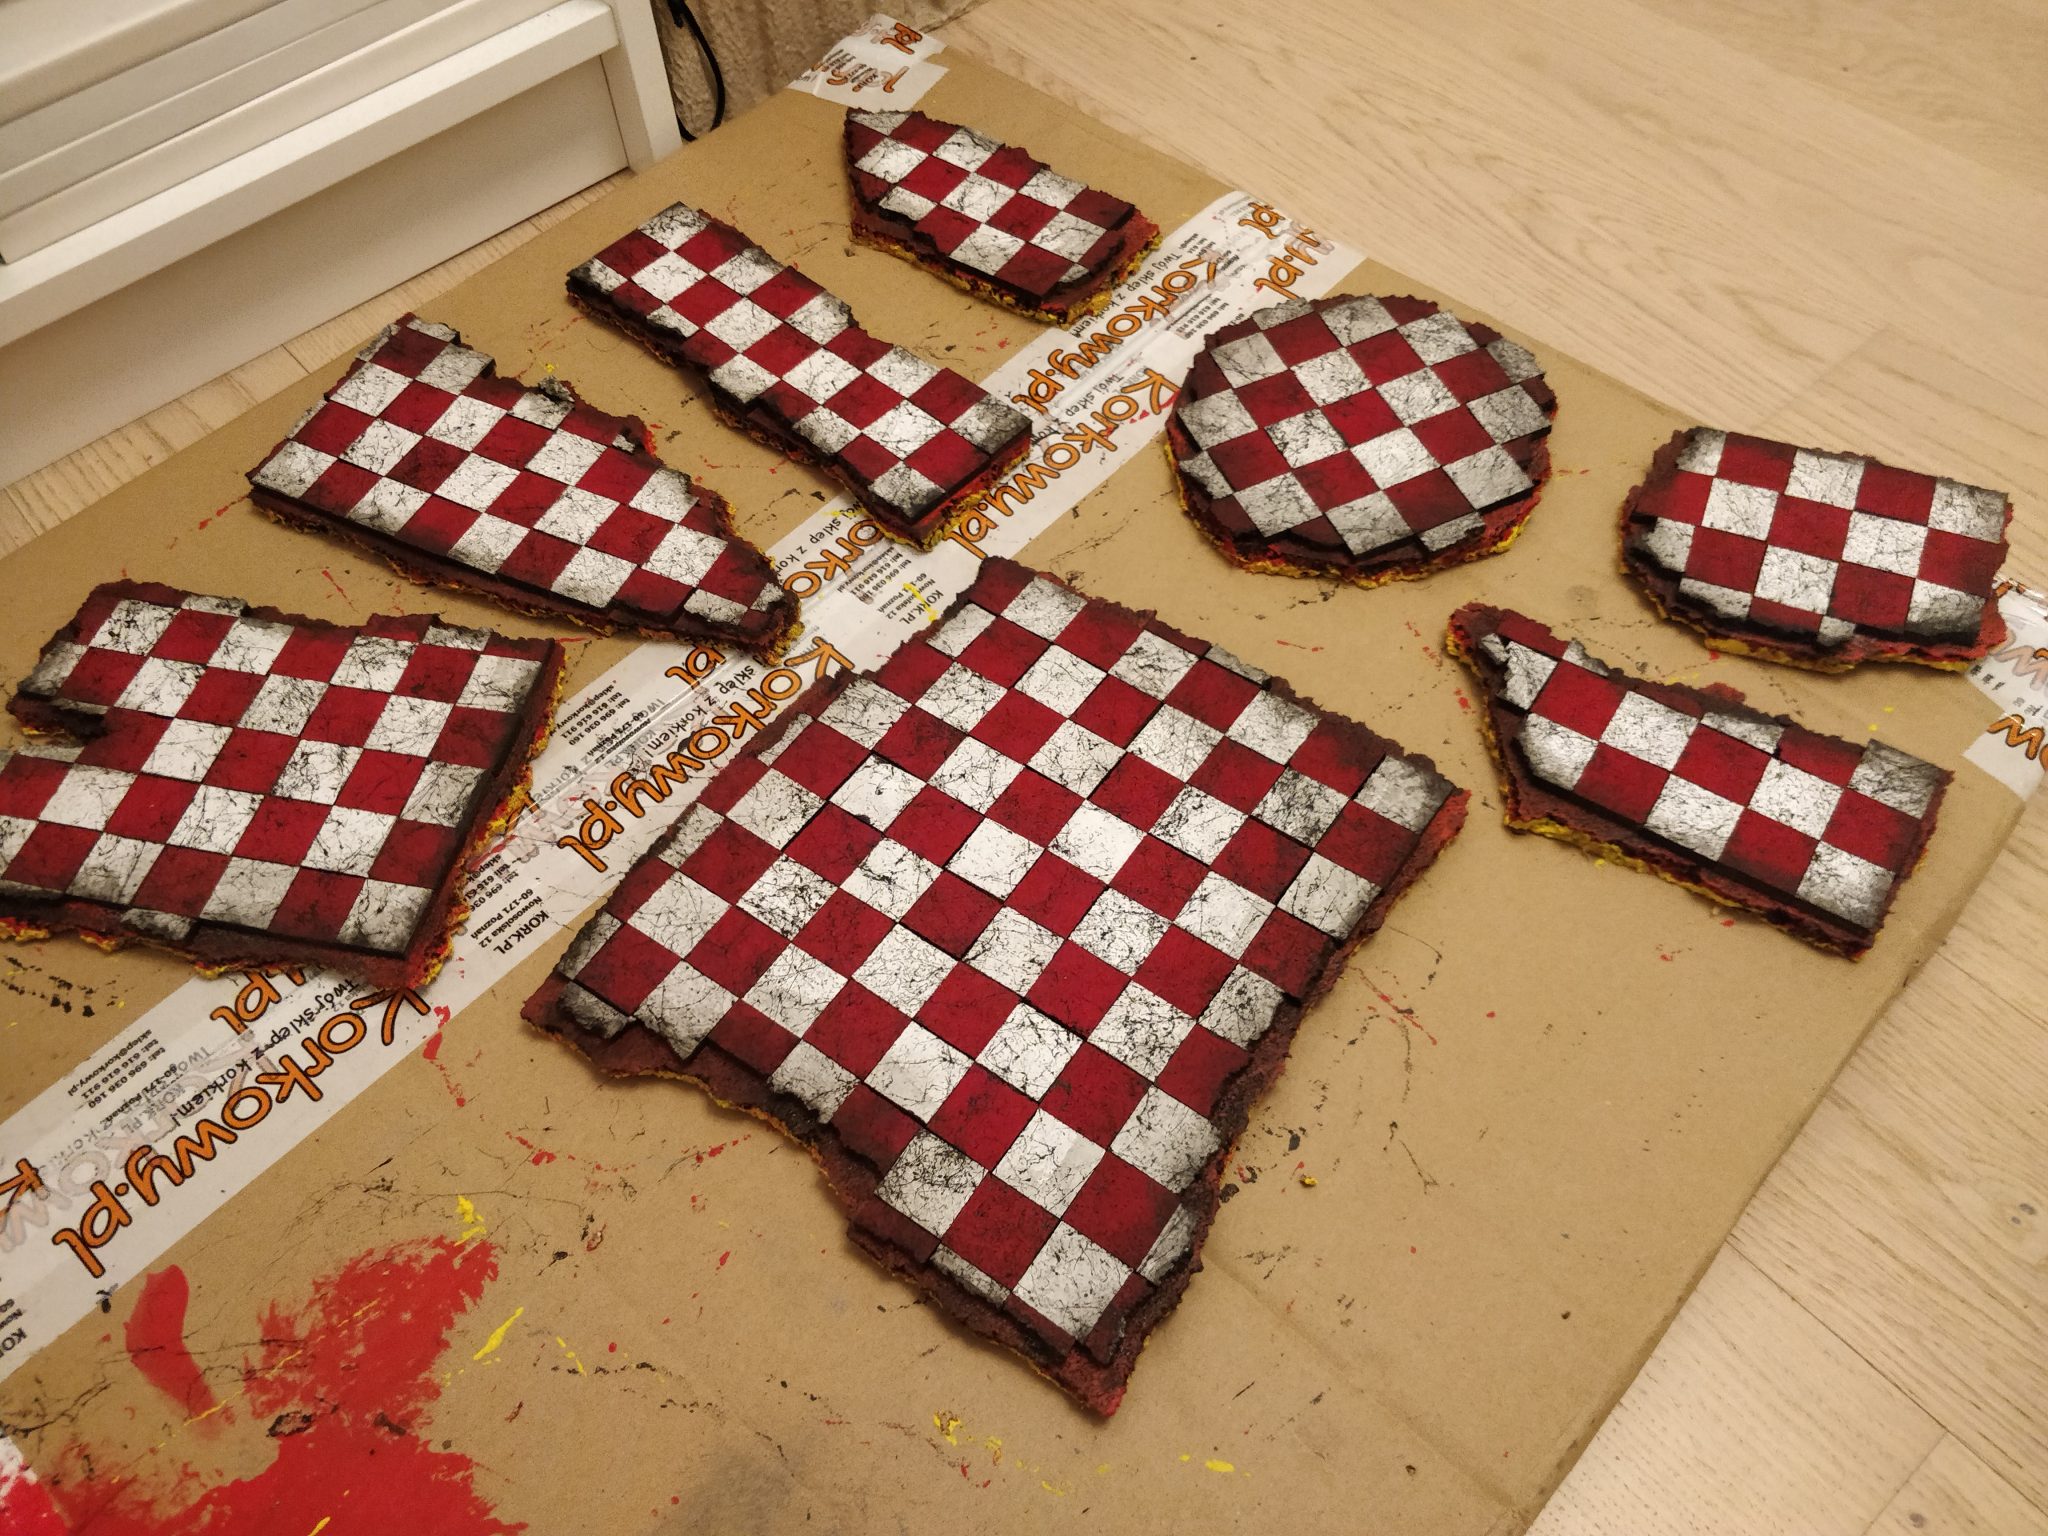
7. Ink tiles
I gave them a solid wash I had made from black, brown and green pain mixed with a bit of dish soap and water.
I dapped the centre to make it lighter and also gave the edges a denser coat of the wash mixed with black.
I feel I took a risk with this step but I really like the result.
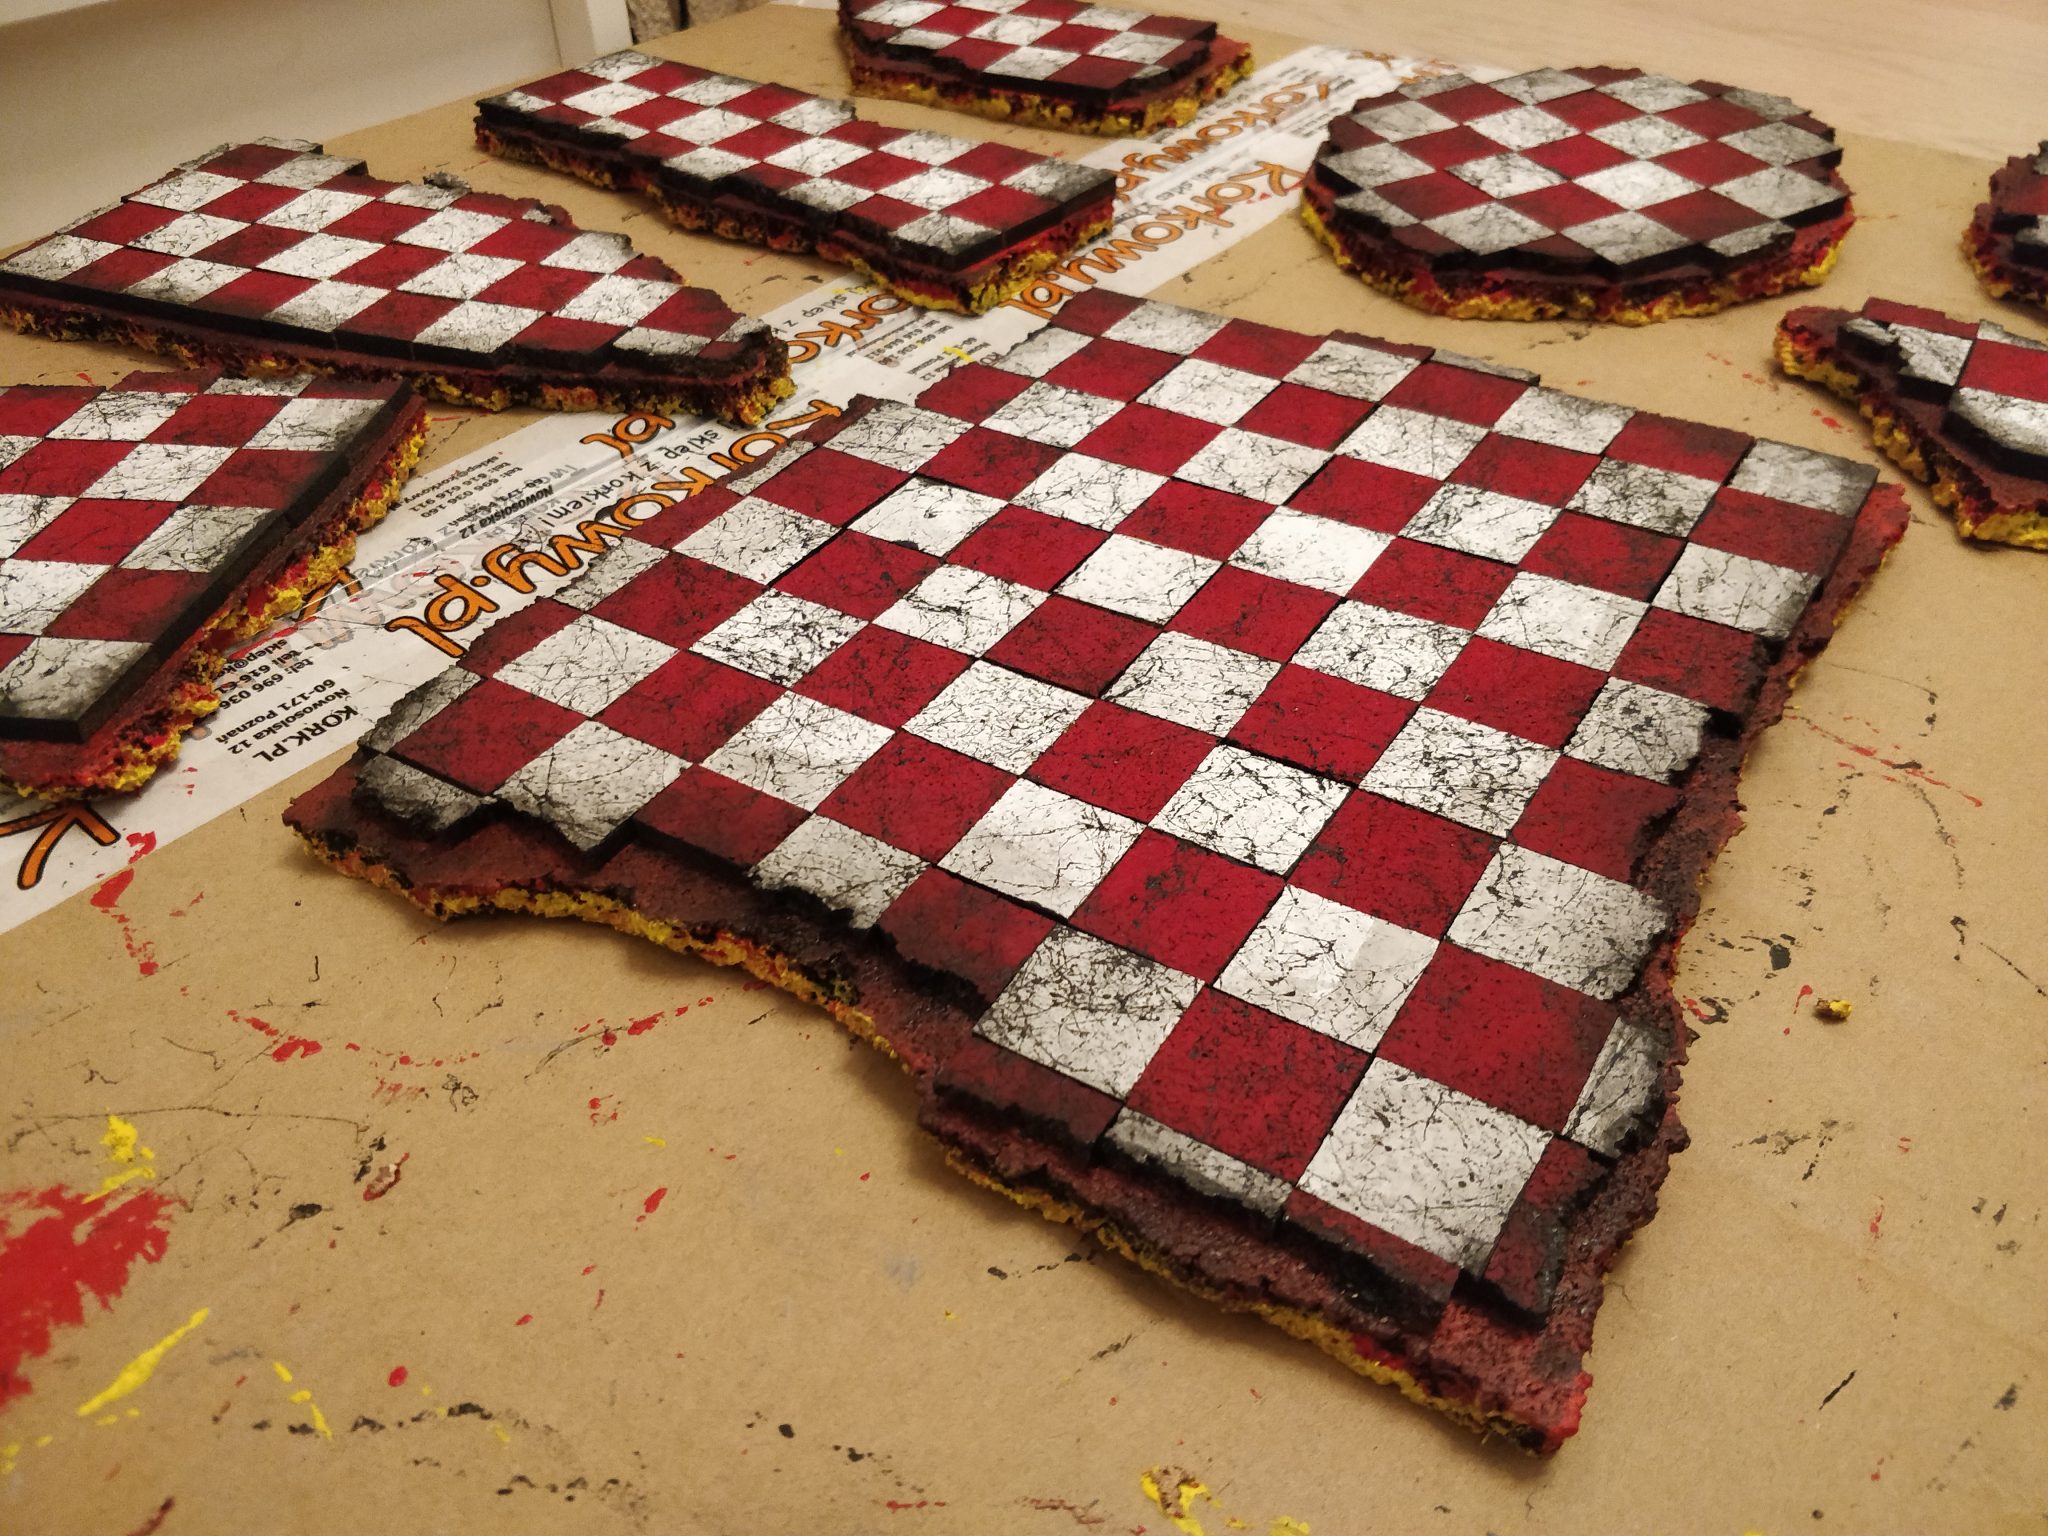
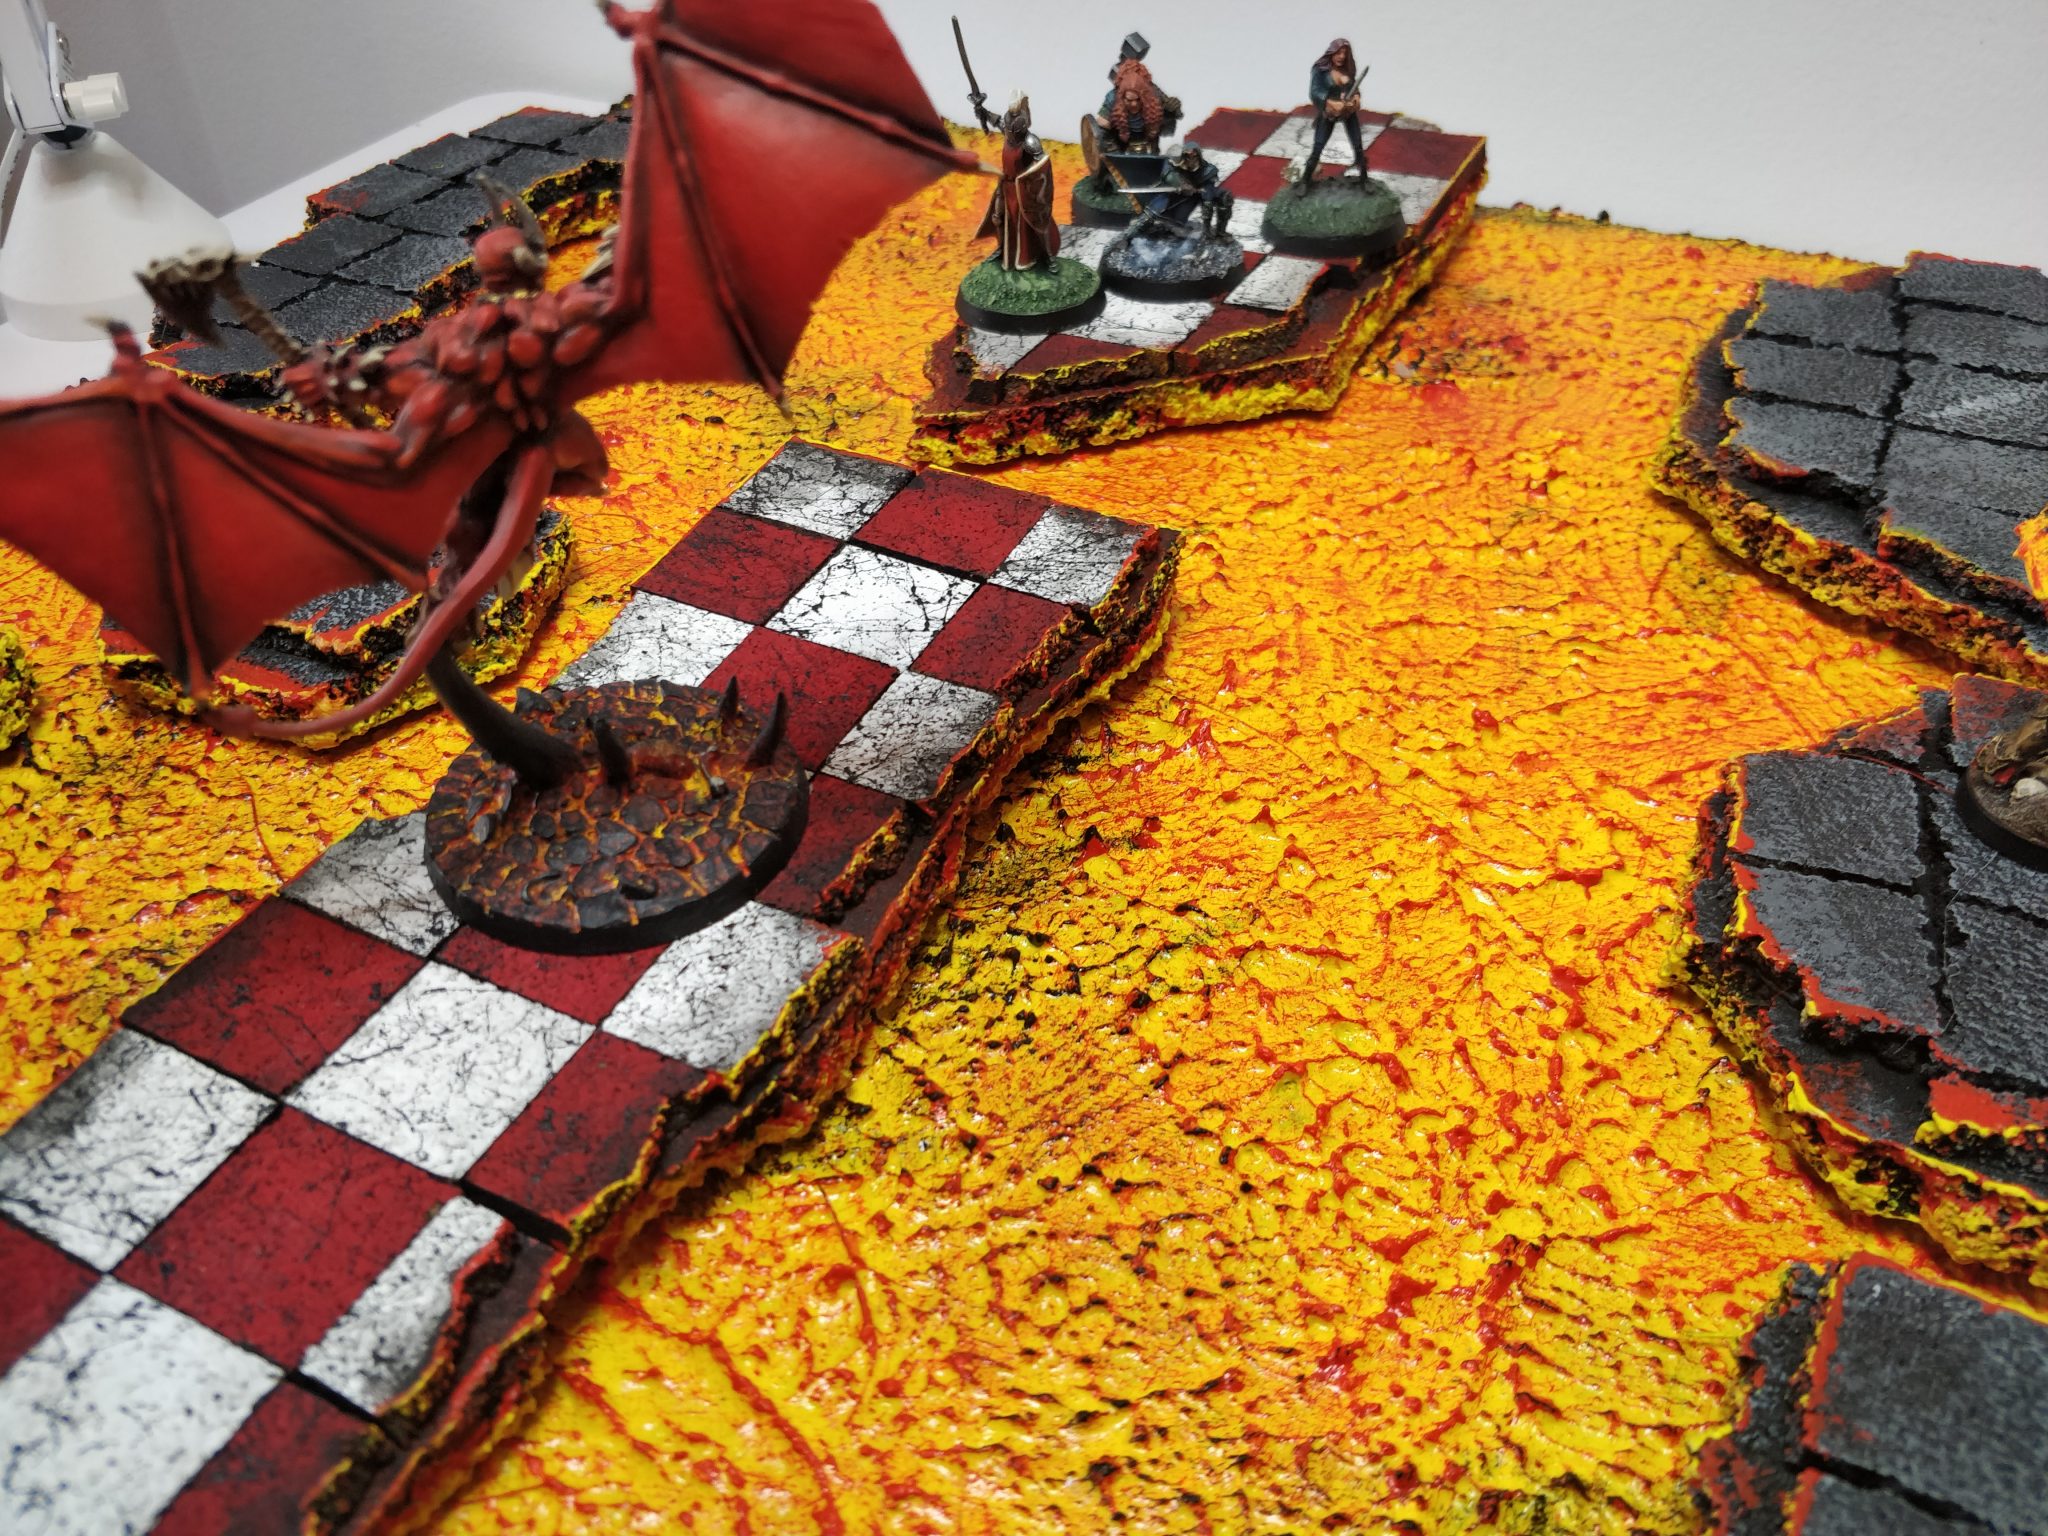
8. Paint OSL light effect
I painted a thin edge of red to create an OSL, Object Source Light effect from the underlaying lava pit.

I followed this with an even more sporadic yellow OSL. Since the wash had toned down the white tiles, the OSL effect really pops!